
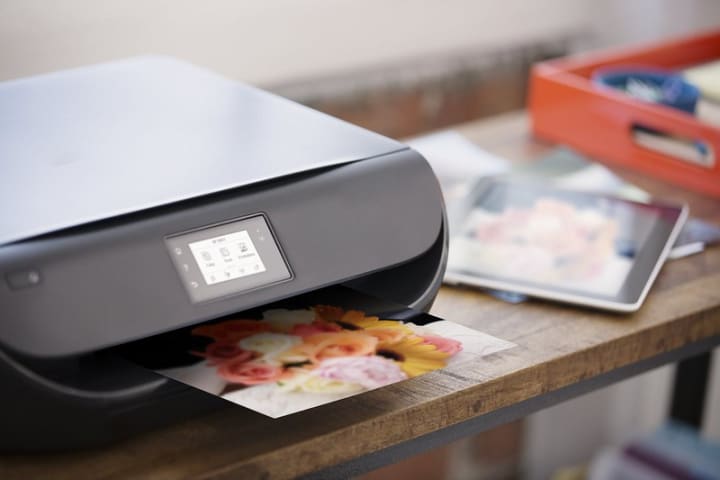
How to Setup HP Envy Photo 7855
Setup HP 1(888)479-6135 Envy Photo 7855
How to configure the HP Envy Photo 7855 printer?
- Make sure the HP printer box is sealed.
- Unseal the printer box and make sure the printer components are included.
- Remove any protective tapes and packing materials from the printer.
- Load a lot of paper in the input tray.
- Lift the access door at the top of the Envy printer. Take the ink cartridges provided in the printer box and unpack the printer.
- Insert the cartridges into the corresponding slots. Close the access door. Align the ink cartridge to complete the HP Envy 7855 printer hardware setup.
- Install the printer on your computer or smartphone using the recommended software or app.
Installing the HP Envy Photo 7855 Printer Driver
- Download the HP Envy Photo 7855 driver for Windows or Mac from this page.
- Open the driver file to begin the driver installation.
- Select the type of connection you want when prompted.
- Continue with the process by accepting the terms and conditions.
- Follow the instructions to complete the driver installation.
- The HP Envy 7855 printer automatically connects to your Windows computer or laptop if it is connected to the computer's network or in setup mode.
- For macOS, manually add the printer to the printer list after installing the recommended printer driver on your computer.
HP Envy Photo 7855 Wireless Setup
Step-by-step instructions on how to set up Wi-Fi on the HP Envy 7855 printer are explained in the next topic.
Easy Wi-Fi setup HP Envy Photo 7855
- Open the printer's control panel and touch Wireless > Settings > Wireless Settings.
- Choose the Wireless Setup Wizard option to connect your printer to Wi-Fi.
- Provide the name and password of the network to which you want to connect your printer.
- Download the HP Envy 7855 printer setup file for your computer or laptop operating system from this page if you do not have the driver file.
- Select Wireless on the Connection Options screen.
- Follow the computer viewing guidelines and complete the wireless setup of the HP Envy Photo 7855.
- You can also connect the printer to Wi-Fi via WPS if your router supports WPS.
- Choose the Wi-Fi Protected Setup option on the printer's Wireless Settings screen.
- Press the WPS button on the router to connect your printer to it.
HP Envy 7855 Wireless Direct Printing
- First, enable the Wi-Fi Direct feature on your printer. To do so, touch Wi-Fi Direct on the printer's dashboard.
- Choose Settings and turn on the Wi-Fi Direct feature.
- Enable the Wi-Fi function on your computer and connect it to the wireless network called Wi-Fi Direct, Direct-**- HP Envy Photo 7800.
- Be sure to correctly enter the printer's Wi-Fi Direct password in the corresponding field.
- Open a digital copy of your document and click Print.
- Change the print settings if necessary and press the Print button.
- The printer will now begin printing the selected document.
Easy HP Envy 7855 ePrint setup
- Turn on your HP Envy Photo 7855 printer and computer.
- Make sure the paper tray is loaded with the recommended type of paper.
- Also, make sure your printer has original ink cartridges installed.
- Open the printer's Control Panel.
- Choose the Settings menu and follow the instructions on the screen.
- Activate the Web Services option.
- Touch the Print or Print Information button if the option is already enabled.
- The printer's email address is now displayed on the control panel.
- Please note the email address. Open the email application you are using on a computer or smartphone. Type the email address of the HP Envy Photo 7855 printer in the To field.
- Attach the document you want to print and tap or click Send. The printer will start printing as soon as it receives the document.

HP Envy Photo 7855 Airprint Settings
- Turn on your HP Envy printer and connect it to the same network that your Apple device is connected to.
- Using Wi-Fi Direct: Touch the Wireless Direct icon on the printer dashboard if you want to enable Wi-Fi Direct to connect your printer to Apple or Mac using the Wi-Fi Direct connection method.
- Go to your Apple or Mac device. Enable Wi-Fi on it.
- Choose the Wi-Fi Direct name of the HP Envy printer from the list.
- Enter the Wi-Fi Direct password if you are prompted to connect your device to the printer's Wi-Fi Direct network.
- Using WPS or Wi-Fi Protected Setup: Connect your printer to the wireless network by referring to the instructions provided in the HP Envy Photo 7855 Wi-Fi Setup section.
- For Mac users, tap on the Apple icon located at the top of the screen.
- Click System Preferences --> Print & Scan. Check if your printer is on the list. If not, click Add.
- Choose the AirPrint option from the Use dropdown menu to complete the AirPrint setup for the HP Envy Photo 7855 printer.
Installing HP Envy Photo 7855 ink cartridges
The step-by-step guide to install the ink cartridge in the printer is provided in the next topic.
How to install the original ink cartridge in HP Envy 7855?
- First, check if the input tray has enough paper. If not, open the tray.
- Slide out the paper width guides.
- Load a stack of paper by adjusting the paper width guides.
- Lift the access door at the top. Make sure that no foreign particles or packaging remain inside the printer.
- Unpack the original HP ink cartridge recommended for your printer.
- Never touch the copper-colored contacts or ink nozzles on the cartridge.
- Hold the cartridge by touching its sides. Insert the cartridge into the respective slot.
- Close the access door of the HP Envy 7855 printer.
- Print an alignment page to align the cartridges.
How to change the ink in HP Envy 7855?
- Turn on the HP Envy Photo 7855 printer if it is turned off.
- Load a stack of suitable plain paper in the input tray.
- Lift the access door of the Envy printer.
- Now the cart moves to your position. Wait until the car stabilizes.
- Open the cover of the ink cartridge that you need to replace.
- Press down on the ink cartridge and remove it.
- Take a new ink cartridge and unpack it.
- Insert the cartridge into the appropriate slot.
- Close the access door. Align the ink cartridge to complete the cartridge replacement process.
How to reset the HP Envy Photo 7855 printer?
Factory Reset HP ENVY Photo 7855
- Turn on your HP Envy Photo 7855 printer if it is turned off.
- Open Control Panel. Here, tap on the Settings icon (it looks like the gear icon).
- This will open the printer setup screen.
- Locate and choose the Printer Maintenance option on the opened screen.
- Touch Restore > Restore Factory Defaults > Continue.
- The factory reset process will now begin on your printer.
- Once the HP Envy printer settings are reset to default, you can reconfigure it correctly according to your needs.
HP ENVY Photo 7855 printing restarts after a paper jam
- Communication problems between the printer and the computer occur when the firmware becomes outdated. To fix the problems, update the printer's firmware.
- Printer firmware can be updated from the manufacturer's site or from the HP Envy Photo 7855 Setup printer control panel.
- Follow the guidelines below to update the printer's firmware from the printer's control panel.
- Touch the HP ePrint icon. Touch Settings --> Product update or Check for product updates.
- Follow the instructions on the screen and update the firmware of your printer.
- After doing that, turn off the printer and go to your Windows computer. Open the Services app on it. Select and stop the print spooler service. Restart your computer and turn on the printer.
- Check if the HP printer problem is fixed. If not, please contact us.
Solve the HP ENVY Photo 7855 printing problem
- Make sure your HP Envy Photo 7855 printer is turned on and ready to print.
- Connect your printer to your computer if it is not already connected.
- Update the printer driver if the existing driver is incompatible or out of date.
- Check and adjust the print settings if necessary.
- Use the HP Diagnostic and Repair Tool if you have this problem with your Windows computer.
- Reboot the devices. Remove and re-add the printer.
Why won't my HP ENVY Photo 7855 scanner connect to Mac?
- Restart your HP Envy printer and your Mac device.
- Double-click the Macintosh HD option on your Mac device.
- Select Applications --> Hewlett-Packard --> HP Utility.
- Go to Scan Settings and select the Scan to Computer option.
- Make sure the Enable scan to computer check box is enabled.
- Run a scan function and check if the issue is resolved.
- If the problem persists, remove and re-add the scanner.
Why is the HP ENVY Photo 7855 printer in error state?
- Restart your HP Envy 7855 printer and computer.
- Reboot the printer if the reboot process does not resolve the issue.
- Uninstall the previously installed driver and reinstall the latest driver version on your computer.
- Check if the error appears on the screen. If yes, assign a manual IP address to your printer.
- Update the printer firmware if available.
Related:-
About the Creator
Growing Calm from the Ground Up: Healing Through Horticulture for PTSD Relief
Trauma can change how the brain and body respond to the world. For many people, peace feels distant and hard to reach. In recent years, healing through horticulture has gained attention as a gentle and natural way to support people living with PTSD. Gardening offers calm spaces, simple actions, and steady routines. These elements help reduce fear, stress, and emotional overload. This article explores how gardening supports PTSD recovery in practical, meaningful ways.
By Darke Hull7 days ago in Lifehack


Comments
There are no comments for this story
Be the first to respond and start the conversation.