
How To Master Instagram AR Filters 2024
"Master Spark AR Studio to Design Unique Augmented Reality Experiences that Captivate and Engage Your Audience"


Instagram’s AR filters are now a crucial creative and interactive tool on its platform. AR filters offer unlimited potentials for users as well as creators, which range from improving self-portraits to promoting organizations.
In 2024, it’s never been easier to make a custom Instagram AR filter- advanced tools and a rising community of creators mean this. We will talk about Spark AR Studio in this guide which has steps for creating filters with some advice that can help you make them unique.
Instagram AR filters are real-world images effects that get simulated through the Instagram camera. They could be simple hue changes or sophisticated animation 3D objects which overlap with a user’s surroundings. These filters get designed by Meta Company previously called Facebook through Spark AR Studio that is strong in addition to being user friendly website.
Getting Started with Spark AR Studio
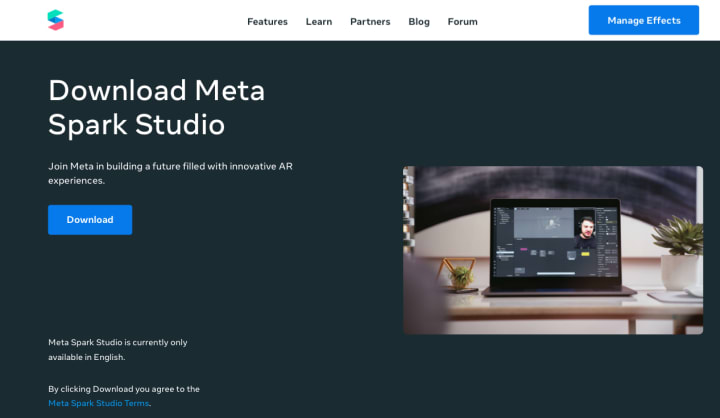
Step 1: Download and Install Spark AR Studio
- Visit the Spark AR Studio website: Spark AR Studio
- Download the application for your OS.
- Install the software by following the on-screen instructions.
Step 2: Familiarize Yourself With The Interface (UI)
- Get to know the interface Scene Panel: It shows the objects and layers in your project.
- The Assets Panel: This contains all the materials, textures, as well as audio files that are used in your filter.
- Viewport: An area that provides a live preview of your filter.
- Inspector Panel: The place where you modify attributes and settings of items you select.
- Patch Editor: A graphic scripting tool for making interactions and logic without the need to write codes.
- Things you have to think about include: - What do you intend to accomplish with your filter?
- Fun, branding or an art project: - Who would use your filter? Make sure that the design and complications are tailored to them
- If it’s your first time trying out AR, keep things basic at the beginning and advance to more complicated effects as you learn.
- Begin a new project.
- Navigate to Spark AR Studio.
- There, click on Create New and choose Blank Project.
Step 3: Define Your Concept
Step 4: Start a New Project
- The filter can track a user’s face by utilizing a face tracker.
- Hit the Add Object button in the Scene Panel.
- From the objects list pick a face tracker. Thus, you will have a face tracker in your scene.
Step 5: Add a Face Tracker
- Once you have chosen the Face Tracker, press Add Object once more.
- Pick Face Mesh. The Face Mesh becomes a descendant of the Face Tracker hence it goes along with the changes in facial expressions.
Step 6: Create a Face Mesh
A Face Mesh is a three dimensional figure that drapes over user's visage which permits application of effects.
- Choose the Scene Panel from the dropdown menu and then select the Face Mesh.
- Now under Inspector Panel, click + next to the materials field to create a new material.
- For easy identification, name the kind of substance (e.g., “Color Overlay”).
- Click on the newly created material in the Assets Panel.
- In Inspector Panel, change Shader Type to Flat for a even color.
- Hit the color box next to Diffuse to pick a colour or upload a texture.
Step 7: Apply a Material to the Face Mesh
Step 8: Customize the Material
- In order for you to see various face examples on the viewport, just hit the camera icon.
- It is possible to use the Simulator to check how your filter appears on any connected device. Therefore, connect your phone using USB cable then choose it from the simulator’s drop-down list.
Step 9: Test Your Filter
- At the lower side of Spark AR Studio, open the Patch Editor.
- To notice user taps, right-click on it and select ‘Screen Tap’ patch.
- Then create a Transition patch in order to be transitioning within assorted colors.
- Connect your Screen Tap with the Transition patch and subject its output into a material’s color property.
- Go to ‘File’ on the left side then select Export option that is available in top menu.
- You can export it according to Spark AR requirements for size and complexity.
- Now go to Spark AR Hub at: spark ar hub.
- Then, submit your filter with a name, icon and also demo video.
- Your filter must be reviewed by Instagram so it complies with community guidelines.
- In advance of the final release, share the test link with friends or peers to obtain suggestions.
- Stay in the Loop: Keep up with the Spark AR community for current information, instructions and motivation.
- Stick to Basics: Rather than elaborate filters which can be rather cumbersome to come up with and may not function well on old models.
- Put Emphasis on UX: This means being intuitive about it while giving something valuable or amusing at least to users like me who use it anyway!
- Differentiate Functionality: Look into things like particle systems, sound effects or even 3D objects just for a start still they will bring out better-looking films.
Step 10: Add Interactivity with Patch Editor
Get some help in making interactions on your filter by introducing subtle touch interactivity that alters the color of the overlay.
Step 11: Export and Upload
Step 12: Test and Review
Hints to Concoct Winning AR Filters
Step Into the Future of Augmented Reality with the Oculus Quest 2! 🌟
Transform your AR experience beyond Instagram filters and dive into immersive worlds with the Oculus Quest 2 Advanced All-In-One Virtual Reality Headset. Whether you're exploring new creative ideas or gaming, this headset offers unparalleled freedom and performance.
About the Creator
Akshat Raj
Passionate about new tech, scientific discoveries, art and motivation, I aim to make complex ideas easy to understand and interesting. Covering everything from technology and science to lifestyle and personal growth.
Keep reading
More stories from Akshat Raj and writers in Lifehack and other communities.
World Snake Day 2024: Celebrating Serpentine Wonders
On July 16, 2024, people who love snakes, scientists that study them and people that love nature in general are going to come together in various parts of the world so as to make merry during The World Snake Day celebration. This is the only day when the world can take time off its busy schedule to appreciate incredible creatures whose image has for long been tarnished with fables and misconstructions.
By Akshat Raj2 years ago in Earth
Are LED downlights better than halogen for kitchens
When planning a kitchen, bathroom, or full home renovation in Sydney, lighting is one of those details that quietly decides whether the space feels amazing—or just “okay.” Cabinets can be beautiful, stone benchtops can look like art, but if the lighting is wrong, the whole kitchen suddenly feels flat.
By John Zhang6 days ago in Lifehack
Mother’s Day Gift Ideas for Garden Lovers
Mother’s Day is just around the corner, and there’s no better way to celebrate one of the most important women in your life than by giving her the perfect present. Have you decided what to give her this year? If your mom loves gardening and finds peace among her plants, there are plenty of meaningful gift ideas that can perfectly match her passion.
By Andrew Lemieux3 days ago in Lifehack


Comments (1)
Thanks for this piece