

Molding is a decorative strip of materials installed with various profiles for covering transitions between surfaces or for decoration purposes. Installing wood molding is easy and affordable and is an excellent way of giving your floors a more polished look. With the requisite skills and experience on how to install wood molding, it is easier to attain a distinctive appearance of the floor as long as it is done professionally.
Wood molding can take many different forms that can also be installed for different purposes. With all the various types, their primary uses include adding a finishing touch and traditional style to any hallway or room. In this guide, we explore the various steps of installing wood molding, the tools and materials that you may need, and safety procedures and equipment to have while installing it.
Tools and Materials Needed for this Project
You may need some of the tools and materials below for wood molding installation:
- Wood glue or caulk and caulk gun
- Chalk line
- Tape measure
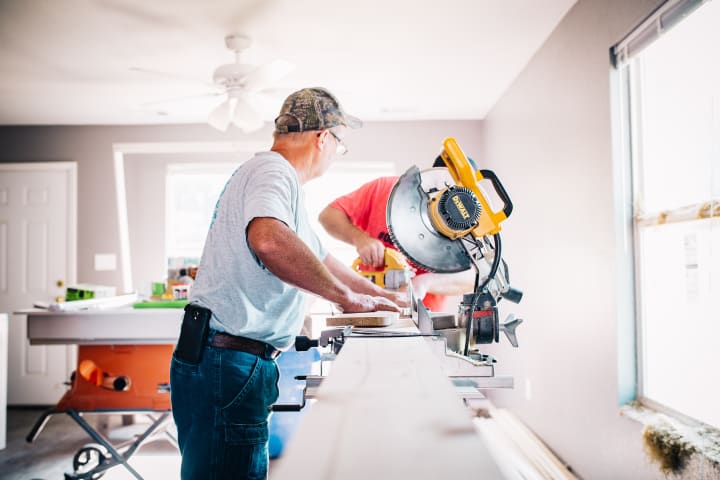
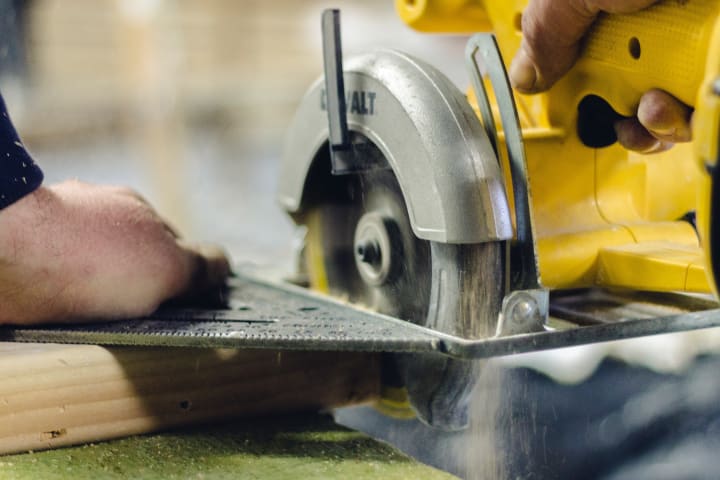
- Miter saw
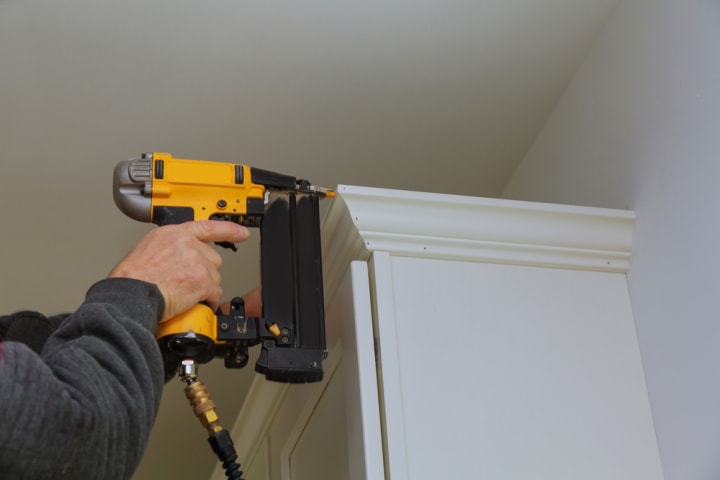
- 23 Gauge pin nailer
- File, sandpaper, or sander
- Paint and paintbrush.
- Drill
- Finishing nails
- Ladder
- Carpenter’s pencil
- Sections of wood molding or primed MDF
Steps to Installing Wood Molding
Step 1: Choosing Your Molding
Wood molding comes in a range of styles, from simple MDF designs to intricate wood designs. If you are a first-timer, you can use the less-expensive materials because wastage may be common when you are mastering a skill. Ideally, choose the molding design that is in line with the architecture and décor of the home.
While selecting the molding type, consider the height of the ceilings too. A higher ceiling can tolerate trims of about 4”-6” or more while a standard 8-foot-tall ceiling is best suited for a smaller width of between 3”-4”. Make sure it is smoothened.

Step 2: Cut the Materials
With the miter saw, cut the molding pieces a little long (you can trim them a little off per the need) since a short piece can be hard to fix. You may also need pre-drill holes on the pieces to drive the finishing nails through to avoid splitting the molding. If you are using a miter saw, at least a 60-tooth blade may suffice.
To establish a level line, use the tape measure and chalk line to measure and mark the lines for fixing the molding. As you draw the line, make sure it is even.
Step 3: Base and Chair Rail Corners
Have the MDF molding material placed on its back, flat against the miter saw’s bottom. To make inside corners, cut through the face of the molding at 45 degrees to ensure that the edge is visible from the front. As for the outside corners, you will also cut the molding at 45 degrees so that the edge of the cut will be concealed from the front.
Step 4: Cut the Inside and Outside Corners
Cut an inside corner (an inward-facing 45-degree angle of two walls). Also, cut an outside corner (at a 45-degree angle that will open in an outward direction). To miter the pieces, the molding should be placed in a way that its top (the part that will go against the ceiling) lies flat against the bottom of the miter box.
The bottom part of the molding (the side that will go against the wall) should lie flat against the miter box’s side or the miter saw’s fence. Ideally, you should cut the pieces as if they were mirrors placed against each other at 45-degree angles.
Alternatively, you may cope the pieces where you will need to butt one piece tightly against the wall and then nail it in place using the 23 gauge pin nailer. You will then have the second piece placed in your miter box or miter saw and cut it at 45-degrees to make the edge visible from the front. Using a coping saw, cut a slight back angle along the contour of the exposed molding profile, test-fit the coped cut, and trim where necessary.
Step 5: Nail the Molding in Place
Use finish nails to install and fix the molding along the marked lines on the walls and ceiling. You may apply a thin layer of glue to scarf joints if you had to make scarf cuts. If you have a helper, they will come in handy at this point.
Nail the rest of the molding around the work area, working clockwise or counterclockwise. You may continue applying some glue or caulk to all the scarf joints before nailing each piece. Continue until all the molding is installed, smoothen the remaining rough patches, and then paint the molding.
Safety Procedures and Equipment
Any project, be it a professional or DIY one, has safety precautions to have in mind. The same goes for wood molding installation. The following are safety precautions to observe in the process:
Ensure to wear safety gear: helmet, eyeglasses, dust and nose masks, earbuds, hand gloves, safety shoes, and overall.
Use a sturdy and firm ladder.
Beware of electric wires, gas, and water pipes.
Also, ensure to understand other safety standards as set by different regulatory bodies such as the Occupational Safety and Health Administration (OSHA), for example, on the use of nail guns.
Liaise with the local authorities and building offices to know whether there are any permits that you may need.
About the Creator
George Ward
I love house repairs, house improvements, interior design, landscaping, tool reviews, woodworking and anything related to DIY. I'm basically a freak!
Keep reading
More stories from writers in Lifehack and other communities.
Top Things to Do in North Potomac for Families
Known for its quiet neighborhoods and welcoming atmosphere, North Potomac appeals to families who value space, safety, and a strong sense of community. Whether you are new to the area or have lived here for years, there are plenty of activities that families can enjoy together.
By House Doctor7 days ago in Lifehack


Comments
There are no comments for this story
Be the first to respond and start the conversation.