
How To Improve Android Camera Quality | For All Androids
If you’re using a budget smartphone, you might have encountered the frustration of poor camera quality. Fortunately, there’s an easy way to significantly improve your photography experience without breaking the bank. Recently, I discovered a fantastic camera app that transformed my phone’s photography capabilities. In this guide, I’ll walk you through the steps to enhance your phone’s camera quality.


#### Step 1: Search for the App
To begin, open **Google Chrome** on your device. In the search bar, type in “iOS camera app.” This search will yield various options, but it’s essential to find a reliable app that’s well-reviewed for enhancing camera performance.
#### Step 2: Choose a Trusted Source
As you scroll through the results, look for a reputable website. One reliable option is **Softonic**, which provides a safe environment for downloading apps. Click on the link for **“Camera for iPhone 13”** or a similar title that suits your phone model.
#### Step 3: Download the APK File
Once you’re on the Softonic page, locate the **“Free APK Download”** button. Tap this to initiate the download. Ensure that your phone settings allow installations from unknown sources; you might need to adjust this in your security settings if you haven’t done it before.
#### Step 4: Install the Application
After the download is complete, it’s time to install the application. Navigate to your downloads folder and find the APK file. Tap on it to start the installation process. Follow the on-screen prompts to complete the setup. This camera app is designed specifically to enhance photo quality, making it worth your time.
#### Step 5: Open the Camera App
Once the installation is successful, launch the newly installed camera app. You should be greeted by an intuitive interface that makes it easy to navigate through various features designed to improve your photography.
#### Step 6: Adjust the Camera Settings
To get the most out of the app, it’s crucial to tweak some settings:
1. **Enable HDR:** Start by turning on the **HDR (High Dynamic Range)** option. HDR is beneficial for capturing more details in both the highlights and shadows of your photos, resulting in more balanced and vibrant images.
2. **Turn on Grid Lines:** Go to the settings menu and enable **grid lines.** This feature will help you compose your shots effectively, following the rule of thirds for more aesthetically pleasing images.
3. **Adjust Brightness:** Increase the brightness slightly to enhance the clarity of your photos. This adjustment can be especially helpful in low-light situations, ensuring your images remain bright and clear.
4. **Activate Action Mode:** If the app has an **action mode,** be sure to turn it on. This feature is excellent for capturing fast-moving subjects, helping you avoid blurriness in your photos.
#### Step 7: Experiment with Photography
With these settings adjusted, you’re all set to start capturing stunning photos! Take the time to experiment with different angles, lighting conditions, and subjects. Don’t hesitate to try out various modes available within the app; many offer filters and effects that can enhance your images even further.
#### Additional Tips for Better Photography
To maximize your phone's camera capabilities, consider these additional tips:
- **Clean Your Lens:** A simple yet often overlooked step is to ensure your camera lens is clean. Smudges or dirt can significantly affect photo quality.
- **Use Natural Light:** Whenever possible, take advantage of natural light. Shooting outdoors during the golden hour—just after sunrise or before sunset—can dramatically improve the warmth and vibrancy of your photos.
- **Stabilize Your Shots:** If you find that your photos are often blurry, consider using a tripod or stabilizing your phone against a solid surface when shooting.
- **Edit Your Photos:** After taking your shots, spend some time editing them using apps like Snapseed or Adobe Lightroom. Basic adjustments like cropping, brightness, and contrast can make a significant difference.
By following these steps and tips, you can transform your budget phone’s camera into a much more capable tool for photography. Enjoy capturing high-quality images, sharing them with friends, and showcasing your newfound skills! Happy shooting!
About the Creator
AMBANISHA
Am professor (Oxford University) My name is Ambanisha from United State am 65 and am also a professional Article writer since 2000
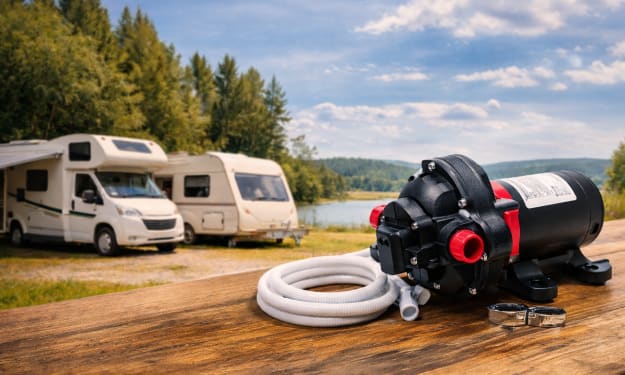
How to Choose the Right 12V Water Pump for a Campervan or Caravan (Flow Rate, PSI, Noise & Cycling)?
A good 12V pump should feel simple: you open the tap, water comes out, and the pump doesn’t annoy you in the background. You don’t need technical knowledge to choose well. You just need to understand four things:
By Bishal Khadka6 days ago in Lifehack
I Stopped Chasing Money—And This One Lifehack Quietly Made Me Richer
For years, I believed making money was about working harder, longer, and pushing myself to the limit. I thought if I just stayed busy enough—if I said yes to every opportunity and filled every hour of my day—money would naturally follow.
By Lukáš Hrdlička4 days ago in Lifehack


Comments
There are no comments for this story
Be the first to respond and start the conversation.