

Creating happiness
2021.06.09
The steps to happiness though the craft of wrapping gifts. Most of us have wrapped a gift and over the years we get better at this gesture of love that we give to our friends, to our family and our love. For many years I have thought about this act and how we take it for granted. We normally think of it more as a chore or a task on a list to check off. Perhaps a bothersome moment or inconvenience for some. I think over the years I have become very skilled from years of practice. This is for the ones who never think they have artistic talent but do. There are acts we do without ever thinking they could be considered an art form. Wrapping a gift for someone is in fact an art form that we all partake in. I love receiving gifts but not as much as giving them. The whole act brings me happiness.
I am an artist and my whole life I have met people who wish they could have art skills. I always find that people see art as a finished product like the statue of David or a the paintings on the ceiling of the Sistine chapel or a portrait like the Mona Lisa. There is great skill in some art that can be learned while some are just naturally gifted. Myself I have beaten myself on some of my own work looking to replicate artwork. One day I saw an art piece that opened up my eyes. It was a watercolor painting done by my grandmother in her late 90’s suffering from dementia. It was of a childhood memory of field with flowers. Never had I ever seen her make any type of art before in my life. I realized that art really is about a process and expression through your medium. It’s not about perfection. The process and expression evokes a feeling of joy. Then it’s given out into the world as a gift for the viewer to pull their feelings from it.
As an artist I pick out the type medium I wish to work with to express the emotions and feelings. We do the same with gift giving to celebrate a person’s birthday, or an anniversary, or a holiday or a for a simple get well gift. These are all expressions of our emotions towards someone. The first step we all make is to pick our medium for the celebratory gift. There are many types of colors and patterns to choose from. We all make artistic choices far before we start to wrap the gift. We think about the inner layer from tissue papers styles and to cards, we think about the different outer layers from wrapping paper, ribbon, bow and name tag.
The first step as an artist is to calculate and measure up the materials needed. Making sure I have enough materials I do a dry wrapping measurement by rolling over the gift enough times down the material to make sure the gift doesn’t run short on coverage. At the desired length I take a pair of scissors and run it down in a straight line. I half press the scissors to that sweet spot that allows me to bush them down the line making a tearing sound. Moving all the way to the end in one motion if I am lucky or until a snag stops the scissors where I have to cut all the way down till the snip sound of the scissors. I usually only make it down about one third the way before I have to repeat the motion one or two more times till I make the full cut to the end. I layout the paper upside down with the gift on top.
This is were art happens as I strategically plan to turn this wrapping paper into a partial origami movements of folds and creases as I dance the wrapping paper around the gift. I center the gift on the sheet and line up the edges before starting the dance. Making sure that the ends overlap or meet before applying the first piece of tape. I secure the first tape connecting the sheet of wrapping paper to the gift like an anchor to be able to tug and make tight the wrapping paper all the way around the gift. Sometimes that’s not needed because of size and shape allowing the sheet ends to overlap super snug. I calculate how many more pieces of tape are needed to attach the rest of the length and work my way following the seam. Following the edge inch by inch taping a new piece of tape every two to three inches as required to fasten the paper. All the while super excited about giving the gift away.
Now the gift has two open ends with the wrapping paper hanging over like a cantilevered sail. This is where the technical part comes in making the folds to cover and complete the sides. I know from years of practice that there are two ways to tackle the next steps. Influenced by the shape of the gift as well as the style of presentation I move to figuring out how to turn the extra wrapping paper into folds. Thinking about the desired tucking of the folds that are seen on the sides of a finished gift wrap. This all really depends on if the box is a perfect square or if its geometry is a long rectangle. How the gift will sit on a table top and if there is a dedicated top side or where I want the bow to be displayed. It may seem very minor or trivial but the detail side of my brain can see a big difference in presentation between the two simple choices. It also depends on the type of final decor I am adding over the wrapping paper. A placement of a plain bow, a wide or narrow ribbon or a ribbon that ends in a bow. Like any artist there are many calculations happening internally guiding them with years of experience and learned mistakes. My preference is that the overlap folds have the larger real estate coverage from the first fold tucked under. That means I start to fold the edges I want under the final fold side. I run my hand to smooth any wrinkles out and push away the paper down and around the corner of the gift. Grabbing a one inch piece of tape to use it as an anchor and fasten the edge to the gift. Keeping the paper taunt around the corners edge while placing half the tape on the end of the wrapping paper and smoothing it over to fasten it to the gift. I repeat this on the other side of the face of the gift. At this point the two anchor points leaving a shape in the wrapping paper that looks like a figure eight.
Now following the vertical edges of the gift I work one side at a time. I run my fingers down the side to the end and from the middle out. As one hand moves along the corner the other hand runs up the folded face. Forcing the two edges to meet and now creating a permant 45 degree edge. I repeat the same motions to the the opposite end of the same side. I work the edge around the corner and the sheet to fold back on itself. Forcing a 45 degree angle while I push the end at the bottom I crease the edge to make the angle back on itself, I repeat this motion on the other side. I repeat the motions where I have four angles. Two on each flap and then I tape them to the gift. I repeat this dance on the other side.
My gift is all wrapped up and It need a ribbon or a bow. I personally always make a bow out of a long ribbon. It gives the gift a more dramatic look. I cut the ribbon for the minimum length by wrapping the ribbon around the gift 2 times and I add 12 additional inches to its length. Pulling the ribbon up into the air and make sure the ends match up with equal distance cradling the wrapped gift at the center. Taking one end and underlap the other and pull tight like a shoelace. Then taking one end and make a loop 1/2 the distance of the remaining length. Wrapped the other loop around the 1st loop and pull back through creating a new loop while leaving 1/2 the length behind. I work the loop slowly cinching it snug but not tight. I work the loops by pulling on the end and shortening the loops. Now the gift is ready to be presented.
It’s an act of human expression straight from the heart to give a gift. It’s just like any art piece created by an artist. Whether the gift is nice, tight and neat or if it’s loose and messy it is all about the act. It’s about the process and in those actions we are all artist working on a craft to give joy to someone and in doing so we bring joy to ourselves.
About the Creator
Theartistjosko
In pursuit of my passion of expression through art, writing, poetry, architecture, photography, fashion and the beautiful things to see in this world.
Keep reading
More stories from Theartistjosko and writers in Lifehack and other communities.
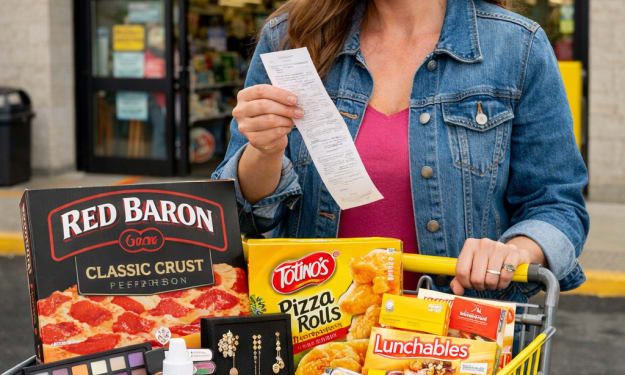
How to Find Penny Items at Dollar General
Imagine walking into Dollar General and walking out with a cart filled with items that cost you a total of less than a dollar. The lucky few who snag penny items certainly have experienced the adrenaline and happiness it creates. If you want to feel like a Queen (or king) for a day, read below to learn how you can become a DG penny-aire.
By Criminal Matters5 days ago in Lifehack
Top 10 Side Effects of Chia Seeds You Should Know
Chia seeds have gained huge popularity in recent years as a superfood. From smoothies and puddings to salads and oatmeal, these tiny seeds are often praised for their high fiber, omega-3 fatty acids, and protein content. Many people include them in their daily diet to support weight loss, digestion, and overall health.
By Veronica Bennettabout 21 hours ago in Lifehack


Comments
There are no comments for this story
Be the first to respond and start the conversation.