
Theme Selection for Blogger Blog and Its Customization
The second step in creating a blogger website or blog


As in the previous article, we create a blog on blogger. In this article, we will build our blog.
- Table of content.
- Create a post
Select a theme (selecting theme, downloading, uploading, and customization)
Let's begin.
Step 1. Create a post
Creating a post is important to see what a theme looks like. So before moving toward theme selection and customization, I will suggest you upload your first blog post. No need to worry if you don't have already written an article. you can copy and paste any of your Medium stories that are relevant to your blog topic.
For an instant, I have uploaded my previous article on my newly created blog.
Follow these steps one by one.
1.1 Posting
Go to your site > click on the "new post button > paste your article on the body section> cut the heading from the article and paste it into the heading section> copy-paste an image at the top of the post or you can select from your computer by "select a photo option" in the toolbar.
1.2 Post setting
Make sure you have done an important set of your post before posting.
Click on image ad alt text and photo credit> reset inside post heading as per requirement > select all text and justify by clicking on the option in the toolbar.
Then go to the sidebar and click label> add the label as per your article topic ( such as my article is regarding blogging so I added a label "blogging" >select a location in the down section> set date. That's done
As we don't have another post link yet, so we will leave the permalinks option empty. We will add new links to this section when we will upload more content.
You are done, now, click on publish a post.
To see your post and what it's like: go to "view a blog below on the left side of your pc"> and click on it. Your blog will appear in front of you. Now it appears as by default select them.

2. How to select a theme?
You have three options for the selected themes.
- 2.1. Theme Selection
- 2.1.1. By default available themes
- 2.1.2. Downloading from other sites
- 2.1.3/ Creating your own theme ( we will not work on this option).
2.1.1. By default available theme
can explore the theme option available on your site dashboard. You can simply go to theme> click on it> scroll through theme templates> click on your favorite theme> preview it and apply.
To see again what your blog looks like. Go to view the blog.
Widget setting by default them.
For the widget, set go to the layout option. Widget means the features that you want to keep on your blog and the feature that you don't want to keep. In other languages, you say it's like a plug-in on WordPress. Such as social widgets. YouTube widget. I don't want to keep YouTube's widget so I will remove it from the layout option.

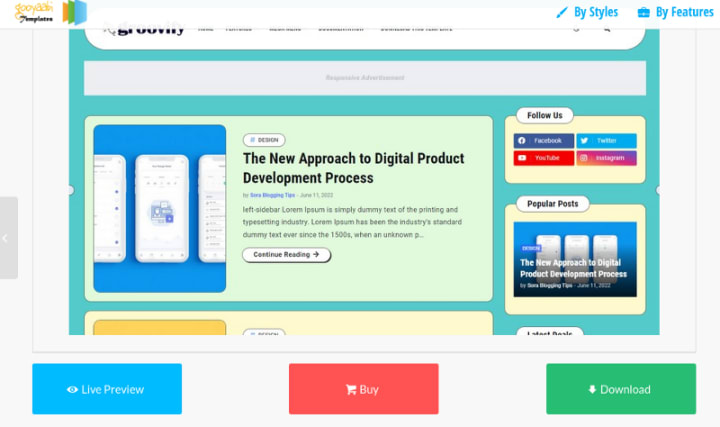
2.2 Downloading theme from other sources
The default available themes on blogger do not have many features and they are not perfect for Adsense approval. If you want to create your blog with monetization you can choose an available theme in blogger. But defined you are here in this blogging course because you want to earn by blogging. So, we will select professional themes from another source.
For this purpose what do you need to do?
Go to gooyaabi theme > select responsive theme> choose your favorite theme (I will suggest you choose a responsive theme, it will help in monetization) > download it to your pc.
Now the next step is how to upload this to your blogger site.
The first method for Chromebook: The process is simple. Go to downloaded file> open XML file> open it> select all text >come to blogger side> go to theme option> click on the small button on the side of customization> select edit HTML > and paste your selected theme code here.
The second method for laptop: open the downloaded file> place the XML file in a separate folder>come to the blogger site>click on the small side button>click restore> click upload > and upload the XML file> and save.
Widget setting: The widget setting process is the same as described in the previous section.

Closing
Here we are done with theme customization. Make sure that you customised the theme as per your requirement. Remove unnecessary widgets and add your own. Here we only have one labeling, as we will keep adding new topics we will keep adding labeling. Such as can post new on money-making, which I will label as money-making. You can add as many labels as you want. Don't add too many labels. Just keep the blog relevant. Five labels are enough. Make sure you ON the tags option in the widgets set. Labels and tags are topics that we talk about.
In the next article, I will let you know about five important pages (privacy policy, disclaimers, contact, about, and terms and condition). These pages are important for google absence approval. These pages contain very long content. It's not possible to write by yourself. So I will let you how can create these pages without hiring any person or writing by yourself. We will not write these pages, we will create them.
About the Creator
makelivingonline
A passionate writer, freelancer, blogger, explorer, and learner. If you want to learn to survive in the online world, join me hear.
❦Freelancing ❦Blogging ❦Earning Money Online ❦Writing
@makelivingonline
Keep reading
More stories from makelivingonline and writers in Journal and other communities.
Introduction to Blogger/Blogspot. How to Create a Free Blogger/BlogSpot Blog or Website
Blogging is one of the best ways to make money online. You might be familiar with Blogger Blogspot. You might hear people extensively talking about creating a free Blog or Website on Blogger Blogspot. You might dream to own a blog or website but you don't know how to create it. You might not pay the high charges of a professional blog or website developer. You might not be familiar to create a Blog or Website with Blogger Blogspot. You might not…Or you might be…! Whatever the case is. This article is gonna taught you how to create a Blog or Website on Blogger Blogspot - step by step guide.
By makelivingonline3 years ago in Journal
Author’s Advice
If you would’ve asked me 20 years ago did I know I’d become a writer and an author, I would’ve said “nope, ain’t happening”. As fate would have it I did become an author and I can honestly say I’m loving it so far. It really does feel good to be a writer. I’ve learned a lot on this journey and I feel like with even me being as new to this world as I am, there’s some wisdom I need to share with every other aspiring author.
By Joe Patterson4 days ago in Journal
How Modern Fintech Platforms Are Built: Architecture Behind Digital Finance
Abstract The rapid growth of financial technology has reshaped how digital financial services are designed and delivered. Modern fintech platforms must support secure transactions, real-time processing, regulatory compliance, and global scalability. This article explores fintech platform architecture and the technological foundations that support digital finance infrastructure. It analyzes microservices architecture in fintech applications, API driven banking systems, cloud-based fintech platforms, and scalable fintech systems that power modern financial services. By examining the fintech technology stack and financial software engineering practices behind these systems, this article provides an in-depth perspective on how modern fintech platforms are built to deliver reliable, secure, and efficient digital financial experiences.
By Lucas Wade3 days ago in Journal


Comments
There are no comments for this story
Be the first to respond and start the conversation.