
Microsoft Teams Tenant to Tenant Migration: Proven Best Practices
Step-by-step best practices for seamless Teams tenant-to-tenant migration

Microsoft Teams acts as the digital heart of the majority of organizations, enabling users to communicate and collaborate with each other efficiently. It houses essential data of an organization, from important conversations to essential files. Usually, when an organization undergoes an acquisition or divestiture, the need to migrate entire Team’s data to the new environment arises.
Moving your entire data from one Microsoft 365 tenant to another is a high-stakes task with chances of errors. A poorly planned and executed migration can lead to significant data loss and costly downtime.
In this guide, we’ll go deep into the reasons for tenant-to-tenant migration, the best practices to migrate teams from one tenant to another, the challenges, and a straightforward way to execute a smooth and successful data transfer.
Reasons for Microsoft Teams tenant-to-tenant migration
There can be a variety of reasons why organizations plan to migrate Microsoft Teams from one tenant to another. Some of the reasons include:
Rebranding of the company: Rebranding of the entire company also involves changing its domain name at times. The entire data gets transferred to a new tenant having the updated brand identity.
Company Mergers and Acquisitions: Businesses and professionals often migrate data from one Teams tenant to another during company mergers. This is to consolidate data in one place for better productivity.
Merging multiple tenants: Organizations often consolidate multiple tenants into one to simplify data management. It’s also a cost-effective option to reduce licensing costs for multiple tenants.
Company divestitures: When a company or a business separates from its parent company, moving all the data to the new environment becomes crucial. All the data must be migrated to the new environment cleanly from the old infrastructure of the company.
Shifting from legacy tenants: An organization might be shifting from an old tenant with outdated configurations or a messy structure that is beyond repair.
Best Practices for a Successful Teams Migration
Microsoft Teams tenant-to-tenant migration is a complex process, often performed when a company undergoes mergers, acquisitions, divestitures, or rebranding. Planning a tenant-to-tenant migration properly is essential for a smooth migration with minimal downtime. Usually, Teams migration tenant to tenant is divided into three detailed phases, involving multiple steps.
Phase 1: Pre-migration planning
This is the most critical phase of the entire migration process. You need to execute all the given steps for a successful migration carefully.
Step 1: Inventory and assessment
Identify essential content: Identify the data that’s to be migrated and analyze the volume of the data.
Categorize the data: Categorize the data properly to avoid confusion and clutter in the destination environment.
Map all the assets: Properly map all the assets, such as users, teams, lists, libraries, any dependencies, etc.
Step 2: Choose an appropriate migration strategy
Big bang approach: The entire data is migrated in one go without stopping. This is a high-risk process that requires thorough planning and may lead to data loss. It’s best suitable for smaller organizations.
Phased migration approach: Data is migrated in multiple phases, usually pilot, departmental, and full. This is the most suitable approach for Teams tenant-to-tenant migration. It leaves the option for testing and learning while migrating data.
Step 3: Prepare target tenant
Prepare primary domain: Create a primary domain for your company and add it to the target tenant. This is crucial for setting up user accounts.
Create user accounts in target tenant: Set up user accounts in target tenant either manually or via the Azure AD Connect. Check that the user principal name entered is same as the source tenant.
Assign required licenses: Assign all the necessary licenses to the required users carefully to avoid any configuration errors.
Step 4: Communicate with users
Set clear timeline: Communicate all migration details with the users and set a clear timeline for process completion.
Be transparent: Be absolutely clear about what will get migrated and what will be left behind. This gives users the chance to back up data personally and avoid data loss.
Offer training: Provide training to users if necessary to help them settle comfortably in the new tenant environment.
Phase 2: Initiate migration
After setting up everything carefully, start the migration in small batches to avoid data loss. Read below to know in detail:
Run pilot migration: Firstly, transfer a small batch of data to check for any potential problems and errors before the final migration.
Run full migration: After a successful pilot migration, start migrating your data in small, manageable phases. This phased approach helps migrate data smoothly with minimal downtime.
Check storage space: Make sure that you have ample space available in the target tenant and your network connection is stable.
Be transparent with users: Maintain proper communication with users and keep them informed during the process. Deal with any errors promptly that may arise during the process.
Phase 3: Post Migration Validation
After a successful migration, validate few things to make sure everything is working as it should. Check for the following things:
Validate all data: Check that all the Teams data, including all the Teams, channels, chats, files, etc., have been migrated properly. Verify that meetings can be scheduled without an issue and that the uploaded files are opening properly.
Offer support to users: Help users at every step and answer all the questions that may arise. Provide assistance at any point of time and resolve all the issues promptly to help users settle in the new target tenant.
Decommission source tenant: Avoid deleting the source tenant immediately after the migration. It works as a safety net in case things have not been migrated properly.
Safest way to migrate Teams from one tenant to another
Planning to manually migrate Microsoft Teams from one tenant to another is a sure-shot recipe for disaster. This is precisely why using a dedicated Microsoft Teams migration tool is the best option to avoid data loss. This tool is specifically developed to address the varied demands of industry and large-scale Microsoft Teams tenant-to-tenant migration.
Conclusion
Microsoft Teams tenant-to-tenant migration is a complex process that’s performed when shifting to a new Teams environment. A successful migration can be performed only when it's meticulously planned. Attempting this migration with manual methods puts crucial data at risk of corruption and data loss.
By using a dedicated Microsoft Teams migration tool like Kernel Microsoft Teams Migration software, organizations can automate the entire Teams migration and execute a seamless transfer with minimal downtime.
About the Creator
Claire Bowen
Tech-savvy and detail-driven, Claire shares insights on Microsoft 365, email migrations, and smart tools. Loves streamlining workflows as much as she loves coffee and a well-organized workspace.
Keep reading
More stories from Claire Bowen and writers in Journal and other communities.
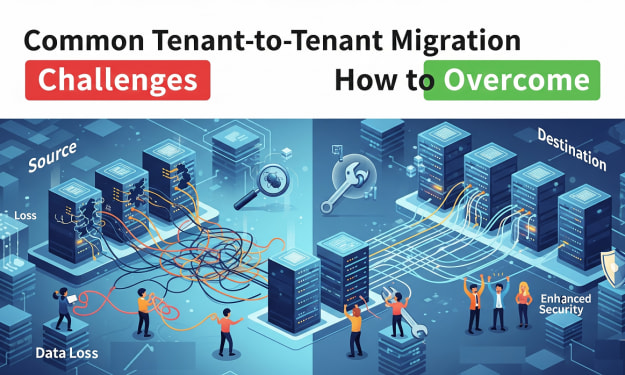
Common Tenant-to-Tenant Migration Challenges and How to Overcome
The tenant-to-tenant migration process transfers the data of an entire Office 365 mailbox to another account. This process is crucial when restructuring the company, for mergers, or for compliance needs. But this is not an easy process to perform by any means. Many businesses struggle with tenant-to-tenant migration challenges and often lose their crucial data.
By Claire Bowen5 months ago in Journal
How AI Agent Development Companies Design Autonomous Workflows
Autonomous workflows aren’t about replacing humans they’re about removing friction from decision-heavy processes. AI agent development companies focus on designing systems that can observe, decide, act, and improve with minimal human intervention.
By Lilly Scott7 days ago in Journal
📢 Raise Your Voice Thread: 01/08/2026
Our “Raise Your Voice Threads” are hosted most alternating Thursdays at 12PM ET to offer creators more avenues to uncover exceptional stories on Vocal. As we are continuously searching for fresh creators and inspiring stories, this thread provides an opportunity to exchange and discuss the stories that have moved and motivated us on Vocal.
By Raise Your Voice by Vocal7 days ago in Resources


Comments
There are no comments for this story
Be the first to respond and start the conversation.