
How to Ensure Your Prepress Files Are of Good Quality?
Create high-quality prepress files for your print projects with expert tips. Prepress services providers use the right software and techniques for the best results.


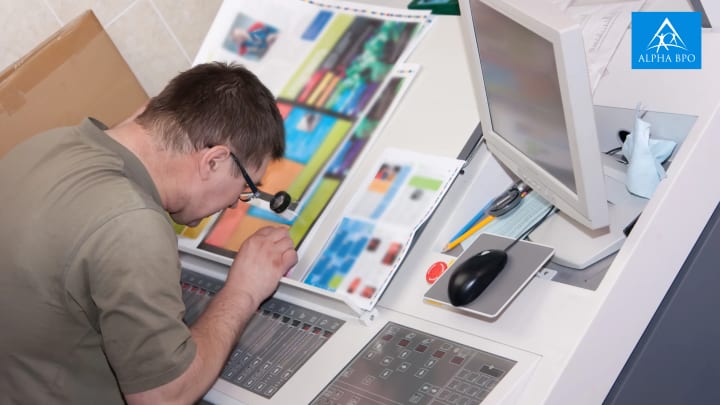
What could be more alarming for a printer or project manager than receiving an email with prepress files containing pixelated images in a Word or PowerPoint document? While there may be more serious challenges, this frustrating scenario is all too common and can overwhelm professionals. Although experimenting with graphic design is popular today, you must remember that creating quality prepress files requires following established printing guidelines—improvisation simply won't cut it.
The prepress file preparation tips outlined by expert prepress services providers will provide a solid starting point. Produce clean, professional files high quality prepress printing, ensuring they are ready for submission to printers or agencies for assessment.
1. Stick to Professional Graphic Design Software for Your Prepress Files
When creating documents for print, you need to use professional desktop publishing (DTP) software like Adobe's Creative Suite (including InDesign, Illustrator, and Photoshop) or Quark XPress. These tools are designed explicitly for high-quality visual processing and provide the necessary features to meet professional standards in layout and typography.
Using essential office software like Microsoft Word or PowerPoint to design items like business cards is not acceptable. These technical programs allow you to export high-resolution PDF files that are "ready to print," ensuring the best quality. PDFs are the preferred file format in the printing industry because they contain all essential information for printing, such as fonts and images. This format saves time and money and also helps printers spot and fix errors more efficiently.
Always include a PDF version of your layout for easy review and quality control. Remember, using the right software is key to gaining the best results in your prepress printing projects!
2. Bleed in Prepress File Format for a Perfect Finish
When preparing prepress files for printing, one of the most crucial aspects to consider is the bleed. Bleed refers to the extra space added around your document that extends beyond the final cut size.
For example, if you're designing a business card that will ultimately measure 55 x 85 mm, you should create your file slightly larger to include a bleed of about 5 mm. This extra margin is important because it prevents any unappealing white edges from appearing if the paper shifts during the cutting process.
For larger prints, such as wall murals, you might need to increase the bleed to up to 2 inches, depending on the printer's specifications. Always communicate with your prepress service provider to determine the appropriate bleed size for your project.
Remember to maintain a minimum inner margin of 3 mm from the cutting edge to ensure that no important text gets cropped. Using these bleed guidelines will help attain a professional look for your printed materials.
3. Selecting the Right Resolution and Color Mode for Quality Prints
To create eye-catching printed materials, it's essential to use the correct resolution and color mode. For optimal results, always save your artwork in CMYK color mode, which stands for Cyan, Magenta, Yellow, and Black. This color model is specifically designed for printing and ensures that your colors appear vibrant and true to life. If you're using any spot colors, make sure to indicate them using the PANTONE Matching System.
As far as resolution is concerned, aim for a minimum of 300 dpi (dots per inch) for your images. This high resolution ensures that your prints will be sharp and detailed. For larger formats, a resolution of around 150 dpi may be sufficient, as these prints are viewed from a distance.
Always consult with your prepress graphic designer to confirm the best settings for your specific project. Paying attention to these details can avoid color discrepancies and ensure that your printed materials look exactly as you imagined.
4. Flattening and Vectorizing for Error-Free Prepress Files
To minimize the risk of mistakes in your prepress files, it's crucial to flatten layers and vectorize text before exporting your final PDF. Flattening layers combine all the elements of your design into a single layer, which helps control issues like missing fonts or misaligned graphics during printing.
Similarly, vectorizing text converts it into a format that ensures it will appear correctly, regardless of the software used to open the file. However, it's important to note that these actions are permanent, so keep backup copies of your original files before proceeding.
In programs like Adobe InDesign and Illustrator, you can easily vectorize text by selecting the text frames and choosing the vectorize option from the menu. In Photoshop, you can flatten layers through the Layers window.
By taking these measures, you can create polished and professional documents that are ready for the high quality prepress printing process, reducing the likelihood of any last-minute surprises.
5. Adding Print Marks is a Key to Successful Printing
For a smooth printing experience, your PDF must include essential print marks such as crop marks, color marks, and assembly marks. These guides are crucial for ensuring that your printed materials are cut and assembled accurately.
In Adobe InDesign and Illustrator, these marks are typically added automatically when you export your PDF, making the prepress process for print clear. However, if you're working in Photoshop, you'll need to manually add these marks with precision. Here's how:
Place guidelines 5 mm from the edge of your document to indicate where the cuts will be made.
Draw black lines along these guidelines to serve as cutting marks. It's essential to ensure that these lines do not cross each other, as this could lead to visible marks on your final printed product.
Once your print marks are in place, you can export your document as a high-resolution PDF, ensuring that all necessary settings are correctly configured.
By retaining these print marks, you help facilitate quality prepress file preparation and achieve the best possible results for your printed materials.
Get Expert Help to Boost Print Projects with Quality Prepress Files!
To achieve the best results in print projects, you must recognize the importance of expert assistance in crafting quality prepress files. While the guidelines and best practices provided can help you establish a strong foundation, the complexities of graphic design and printing often require specialized knowledge and experience.
By collaborating with professionals providing prepress printing services, you can avoid problems and ensure that your files are ready for production. It improves the overall quality of your printed materials as well as simplifies the printing process, saving you time and effort.
Getting expert help to prepare prepress files empowers you to bring your creative visions to life with confidence, resulting in impressive, high-quality prints that stand out in a competitive market.
About the Creator
Alpha BPO
Alpha BPO offers IT solutions, business solutions, and outsourcing solutions to small, medium and large scale enterprises and organizations in the USA.
Visit our website: https://www.alphabpo.com/
The Trouble with /My/ Time
Today is supposed to be my fresh start to a new week, but I am still reeling with the realization that my private property means absolutely nothing to my children's father, that my parenting time and my personal plans are irrelevant enough to him to risk our child going without the prescription drink he needs - just because said adult's schedule is the sole valuable one?, and that there is likely nothing I can do to stop this behavior from simply continuing.
By The Schizophrenic Mom5 days ago in Journal


Comments
There are no comments for this story
Be the first to respond and start the conversation.