
How To Clean The Inside Of A Laptop?
Learn how to safely clean the inside of your laptop, remove dust, and improve performance with this step-by-step guide for beginners and tech users alike.

Regular internal cleaning is necessary for both extending the life of your laptop and preserving its best performance.
Dust, debris and even pet hair buildups over time can lead to hardware failure, overheating and reduced performance.
In this extensive guide, we'll walk you through every stage of cleaning the inside of a laptop, ensuring you do it successfully and safely.
When Would You Clean the Inside of a Laptop?
One should clean the inside of a laptop for several reasons.
Preventing Overheating: Dust buildup can choke laptop vents and cooling fans, causing internal component damage and overheating.
Better Performance: A more effectively ventilated and cooled laptop typically runs more smoothly.
Extended Lifespan: Regular internal cleaning helps to avoid hardware damage and hence prolong the life of your laptop.
Reduced Noise: If there is dust in the cooling fans, they could have to work harder and make more sound.
Basic Supplies and Equipment
To fully clean a laptop's interior, you'll need the following materials and equipment:
For dust and debris clearance from interior components, use compressed air.
To open the laptop casing, one needs a variety of tiny screwdrivers.
Soft or paintbrush: For finely dusting interior surfaces.
An anti-static wrist strap protects internal parts from static energy harm.
Good for wiping out any surfaces that are visible within the laptop is microfiber cloth.
An All-Inclusive Handbook on Inside Laptop Cleaning
Plan a data backup.
Before you start, backup any important data on your laptop. If, in the odd event that something goes wrong during the cleaning process, this step ensures you don't lose crucial information.
Unplugg and turn off the laptop.
Top priority is security. After turning it off, unplug your laptop from all electrical outlets. Should the laptop have a detachable battery, remove it. Internal component damage and electrical shock are less likely when this is done.
Disassemble the laptop.
Carefully remove the case to get at the laptop's internal parts. It takes following the manufacturer's instructions, which vary according to the model and brand, to assemble a laptop.
To properly reassemble the laptop, it's critical to keep track of the screws and other tiny components.
Ground Yourself with an Anti-Static Wrist Strap
After donning an anti-static wrist band, ground it against something metal. Taking this step will protect delicate internal components from static energy damage.
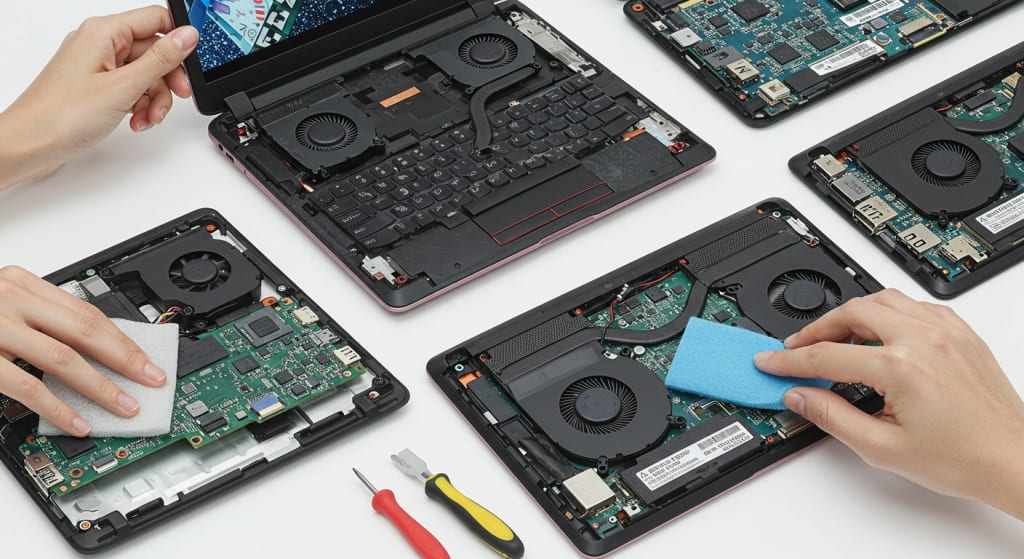
Using Compressed Air to Blow Out Dust
Holding the compressed air canister at an angle and releasing brief airbursts will help to dust off the internal components.
Pay attention to vents, heat sinks, and cooling fans places where dust likes to gather. Move the laptop about to reach every angle, but watch out not to blow too forcefully to save fragile parts.
Clean
Use a paintbrush or other delicate brush to gently clean components that compressed air could have missed. Press lightly and carefully to avoid injury.
Especially helpful for this stage is cleaning the regions around the RAM, motherboard, and other delicate components.
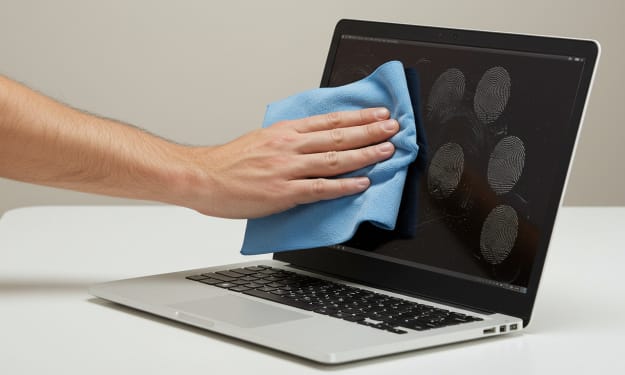
Wipe over with a microfiber cloth.
Easily reachable surfaces can have dust and debris cleaned with a microfiber cloth. This stage enhances airflow and cooling by making sure all visible dust is gone.
Reassemble the laptop.
Thoroughly reassemble the laptop after cleaning its interior. Check to be sure every component and screw is securely fastened. Once more confirm that there are no extra parts or tools on the laptop.
Test the laptop at step nine.
Reassemble the laptop, then power it on to see how it works. Make sure everything works as it ought to and that the laptop turns on. Check the reassembly again to be sure everything is in the right location and report any issues.
Suggestions for Maintaining the Interior of Your Laptop
These tips can help you maintain the inside of your laptop neat and in good operating order:
Clean the inside of your laptop more than once a year if you use it in dusty environments.
Put a laptop stand to use. Dust buildup in the vents can be reduced and airflow improved using a laptop stand.
Eat away from your laptop: Food crumbs might entice insects and build up dust.
Use a laptop case or sleeve to keep dust off your laptop when it's not in use.
Upkeep a neat surroundings: Air purifiers or regular cleaning might help to reduce the amount of dust in your workspace.
Following these tips will help you maintain a clean laptop inside for lifetime and best performance. Kindly feel free to offer any more tips or observations on internal laptop cleaning in the space provided for comments below. To your cleaning success!
About the Creator
Laptopflora
Welcome to Laptopflora, where laptops meet expertise and your tech decisions are made easier. Our journey began with a single mission: to create a trusted platform that provides clear, actionable, and insightful information about laptop.
Keep reading
More stories from Laptopflora and writers in Education and other communities.
Why the Sun’s Surface Boils: Understanding Solar Granulation and Turbulent Energy
The Structure of the Sun To understand why the Sun’s surface appears to boil, it is important to first understand the structure of the Sun. The Sun is composed of several layers, each with different physical processes.
By shahkar jalal8 days ago in Education


Comments
There are no comments for this story
Be the first to respond and start the conversation.