
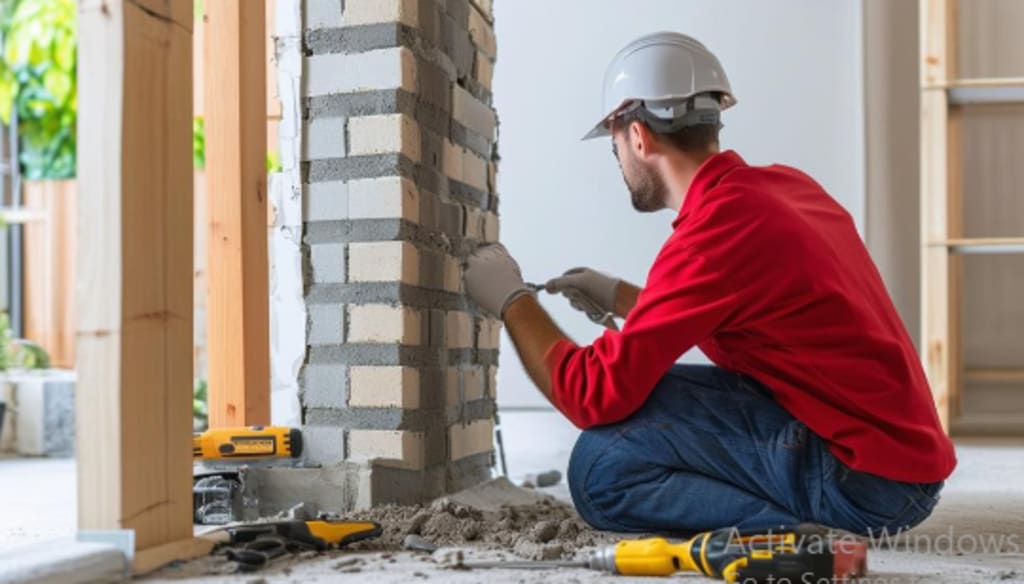
Can You Put Stone Veneer Over Brick?
Yes, you can put Stone veneer in Stoney Creek over brick, and it’s a popular method for updating or enhancing the appearance of existing brick surfaces. Stone veneer can be applied to both interior and exterior brick walls, providing a fresh, modern look while retaining the structural benefits of the original brick. This process is not only effective but also relatively straightforward, as long as proper preparation and techniques are used.
Benefits of Installing Stone Veneer Over Brick
1. Enhanced Aesthetic Appeal
One of the primary reasons to install stone veneer over brick is to improve the visual appeal of a wall or structure. Stone veneer offers a variety of styles, colors, and textures, allowing you to customize the look to match your design preferences. Whether you want to achieve a rustic, contemporary, or traditional look, stone veneer provides a versatile option.
2. Added Value
Installing stone veneer over brick can significantly increase the value of your property. It not only enhances the curb appeal for exterior applications but also creates a striking interior feature, making your home more attractive to potential buyers.
3. Improved Insulation
In some cases, adding stone veneer over brick can improve the insulation properties of a wall. The additional layer can help to reduce heat transfer, keeping your home warmer in the winter and cooler in the summer.
How to Install Stone Veneer Over Brick
Installing stone veneer over brick involves several key steps to ensure a durable and attractive finish. Here’s a step-by-step guide to the process:
Materials Needed
Stone veneer
Type S mortar mix or a suitable stone veneer adhesive
Metal lath (if needed)
Scratch coat mortar (if needed)
Trowel
Masonry nails or screws
Wire brush
Grout (if applying joints)
Grout bag or pointing tool
Soft brush for cleaning
Safety gear (gloves, goggles)
Step 1: Prepare the Brick Surface
Proper preparation of the brick surface is essential for a successful installation. The brick must be clean, dry, and structurally sound.
Clean the Brick: Use a wire brush to remove any dirt, dust, loose mortar, or debris from the brick surface. For stubborn grime, you may need to use a pressure washer. Allow the brick to dry completely before proceeding.
Repair Any Damage: If the brick or mortar joints are damaged, repair them before applying the stone veneer. This ensures a solid, stable base for the veneer.
Step 2: Apply a Bonding Agent
To ensure the stone veneer adheres properly to the brick, apply a bonding agent designed for masonry surfaces. This product helps create a strong bond between the brick and the mortar or adhesive used to attach the stone veneer.
Step 3: Install Metal Lath (if needed)
In some cases, particularly if the brick surface is uneven or if the mortar joints are deeply recessed, you may need to install a metal lath over the brick. The lath provides a rough surface that helps the mortar grip better.
Secure the Lath: Attach the metal lath to the brick using masonry nails or screws. Ensure it is tightly secured and covers the entire area where the stone veneer will be applied.
Step 4: Apply a Scratch Coat (if using a lath)
If you’ve installed a metal lath, the next step is to apply a scratch coat of mortar. This layer helps create a uniform surface for the stone veneer to adhere to.
Mix and Apply Mortar: Mix the scratch coat mortar according to the manufacturer’s instructions and apply it over the metal lath using a trowel. Spread the mortar evenly, then use the edge of the trowel to create horizontal grooves in the mortar, which will help the stone veneer adhere more effectively. Allow the scratch coat to cure before proceeding.
Step 5: Plan Your Layout
Before applying the stone veneer, lay out the stones on the ground to plan your arrangement. This helps you visualize the final look and avoid any awkward cuts or joints.
Mix the Stones: If you’re using different types or sizes of stone, mix them up to create a natural, varied appearance on the wall.
Step 6: Apply Mortar and Install the Stone Veneer
Now you’re ready to start installing the stone veneer.
Apply Mortar: Using a trowel, apply a generous layer of mortar to the back of each stone. Press the stone firmly onto the brick surface, starting at the bottom of the wall and working your way up. Ensure each stone is level and properly aligned before moving on to the next one.
Use an Adhesive (if preferred): In some cases, especially for interior applications, you may choose to use a strong stone veneer adhesive instead of mortar.
Step 7: Grout the Joints (if applicable)
If you’ve left gaps between the stones for a grouted joint, fill the spaces with grout using a grout bag or pointing tool. Smooth the joints with a pointing tool or your finger for a clean finish.
Step 8: Allow the Mortar to Cure
After installing the stone veneer, allow the mortar to cure fully. This typically takes 24 to 48 hours, depending on the conditions. Avoid applying any additional weight or stress to the wall during this time.
Step 9: Clean and Seal (optional)
Once the mortar has cured, use a soft brush to clean off any dust or debris from the stone veneer. For exterior applications or in high-moisture areas, consider applying a stone sealer to protect the veneer from water damage and staining.
Considerations When Installing Stone Veneer Over Brick
Surface Condition
The brick surface must be in good condition to support the stone veneer. If the brick or mortar joints are crumbling or loose, they should be repaired before beginning the installation.
Moisture Management
For exterior applications, proper moisture management is essential. Ensure that the wall has adequate drainage and that any moisture issues are addressed before applying the stone veneer.
Weight Considerations
Brick is a strong and stable substrate, making it ideal for supporting the weight of stone veneer. However, the veneer and mortar add additional weight, so it’s important to ensure that the underlying structure can handle this load.
Conclusion
Installing stone veneer over brick is a practical and aesthetically pleasing way to update the look of your home or building. With proper preparation and careful installation, stone veneer can transform a dated brick surface into a beautiful, modern feature. Whether you’re enhancing an interior space or boosting curb appeal with an exterior application, stone veneer offers a versatile and durable solution that can add value and visual appeal to your property.
For more information on our services, visit our Google Maps location
Stoney Creek, ON L8E 4E3
Phone: +1 (916)955-0627
https://gtamasonry.ca/
Google Business Profile:
https://www.google.com/maps?cid=17351466089651407115
About the Creator
Valentine's Dates Over the Years
Colin grinned as Brooklyn slipped into the living room. “Is it all set?” he asked. The twenty-one year old grinned. She was in her last year of college and Colin knew that Lincoln was proud of her. Although she had been away at college, she’d eagerly helped Colin plan his surprise for Lincoln. “I’m so glad you’re finally doing this,” she said.
By Reb Kreyling28 days ago in Chapters


Comments
There are no comments for this story
Be the first to respond and start the conversation.