
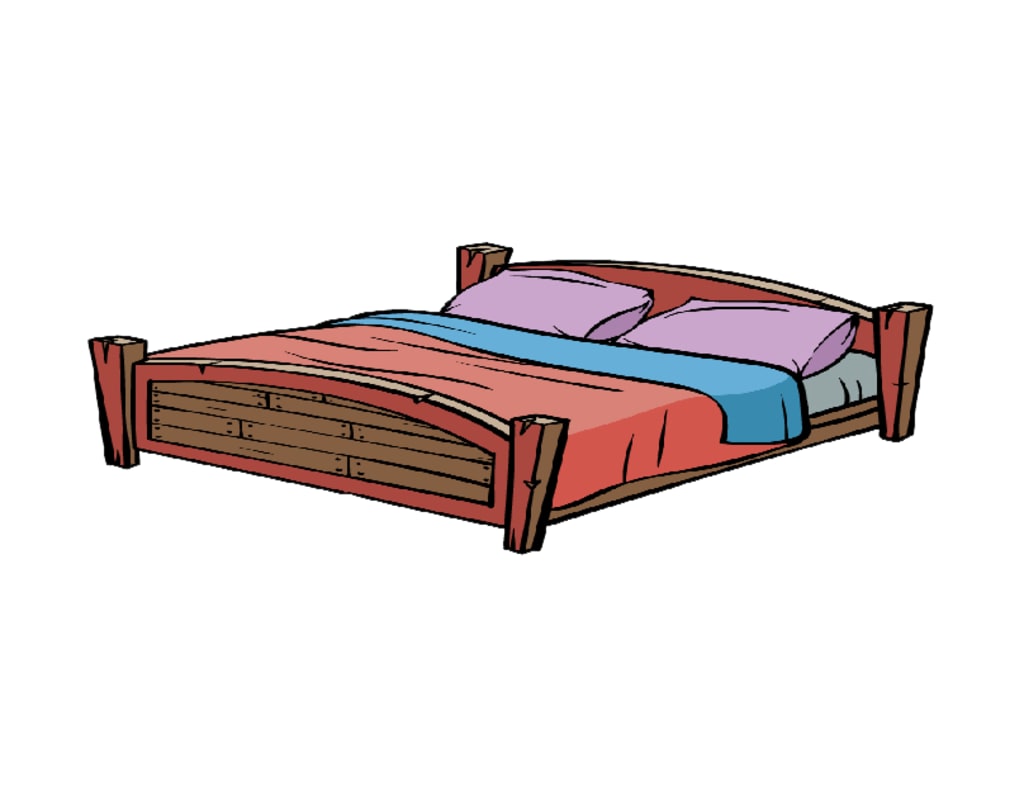
Bed Drawing
There are not many household items that are a more invite sight following a difficult day than a comfortable bed. Beds can come in a wide range of shapes and sizes, and there is a plan to suit each need and taste! Regardless of what they might resemble, beds are an incredible spot to rest and unwind, and figuring out how to draw a bed can be an extraordinary method for envisioning your ideal variant of one.
Note: Learn latest drawing tutorials like Cute ideas drawing blog.
With all the assortment on offer, it can get overpowering to settle on the style you would like for your own bed plan, and this can make it precarious to figure out how to draw a bed. Fortunately, that is precisely exact thing this instructional exercise before you is here to assist with! Our bit by bit guide on the most proficient method to attract a bed only 6 stages will show you exactly the way that tomfoolery and simple it can really be.
Stage 1 - how to draw a bed
To start this aide on the most proficient method to draw a bed, we will begin with the foot of the bed. This will have two squared support points at one or the flip side, and you could utilize a ruler to ensure that their edges are completely straight. You can likewise add a few indents to them to make them look as though they are made of wood.
Then, we will add the part of wood between these support points. You can involve a straight line for the foundation of this center segment, and afterward utilize a few bended lines for the top edges. You can likewise add a few little indents to them for that wooden impact. Then, at that point, you will be prepared for stage 2 of the aide!
Stage 2 - Presently, draw some surface impacts for the foot of the bed
For the following piece of your bed drawing, we will add significantly more wood surface to the foot of the bed. To begin this, we will draw a shape inside the level center part of the foot. This shape will have a few straight-edged sides and a base, and the top will be blended. This will give it a comparable shape to this segment of the bed all in all.
When this blueprint is drawn, we will then be making the impact of wooden sheets nailed together. Essentially define a few straight level boundaries genuinely near each other, and afterward add a few little vertical lines too. Polish off by drawing a few spots for the nails keeping the sheets intact before you continue to stage 3 of the aide.
Stage 3 - Begin drawing the center part of the bed
The foot of the bed is drawn, so presently we can begin attracting the center segment this step of our aide on the most proficient method to draw a bed. Utilize a few bended lines for the sides of the sweeping that is covering the bed, and these lines will likewise shape the layout of the center segment overall. These lines ought to be drawn freehand with a touch of waviness to them, as it is intended to look as though it is made of texture.
Then, at that point, define an additional bended boundaries toward the finish to show the sweeping collapsing back on itself. Polish off this step by adding a few wavy lines inside the sweeping diagram for more wrinkle surfaces, and afterward we can continue.
Stage 4 - Next, draw a few cushions and the foundation of the bed
Presently you're prepared to add a cushions and a base to your bed attracting this following stage. In the first place, define a straight boundary along the foundation of where the covers end, and that will act as the wooden base.
Then, draw one more meager wooden support point at the opposite side of the bed. This one will look basically the same as the ones you drew at the foot of the bed. At long last, polish off by adding a few cushioned pads close to the top of the bed. Then, at that point, you will be prepared for the last subtleties and components in the following stage of the aide.
Stage 5 - Add the last subtleties to your bed drawing
You're practically prepared to add a varieties to your drawing, however first we will polish off the last subtleties and components. To begin with, draw one more wooden support point on the left-hand side of the top of the bed. Then, at that point, interface the points of support on one or the other side for certain bended lines, and afterward add some a greater amount of those wooden components.
Whenever you have added these last subtleties, you will be prepared for the last step! Before you continue on, you could add your very own few subtleties to the picture. One thought is draw the room region encompassing this bed, or perhaps add a few toys or extravagant cushions sitting on it. These are only a couple of thoughts, yet what else might you at any point consider to polish it off?
Visit the more thing of Early Childhood Education.
Stage 6 - Polish off your bed drawing with variety
For this last piece of your bed drawing, you can polish it off with some tone! In our reference picture, we showed you how we would variety this picture in. We utilized a few reds, blues and purples for the covers, pads and bedding and a few browns for the wooden viewpoints.
These are only a portion of the tones you could go for, notwithstanding! In your own drawing you ought to go ahead and utilize any tones or workmanship mediums that you think would best suit the picture?
About the Creator
Keep reading
More stories from writers in Art and other communities.
What Happened to Keith Porter?
I am writing this letter with a heavy heart and an unwavering commitment to justice. On New Year’s Eve, our community lost a beloved father, son, and friend—Keith Porter Jr., a 43-year-old Black man whose life was tragically cut short at his Northridge apartment complex. Keith was not just a name in the news; he was a loving father, a “girl dad,” and a man who brought joy and kindness to everyone who knew him. His mother, Franceola Armstrong, described him best:
By Organic Products 7 days ago in Art


Comments
There are no comments for this story
Be the first to respond and start the conversation.