
What Happens During the Insurance Adjusting Process?
Don't forget these steps during insurance adjusting process


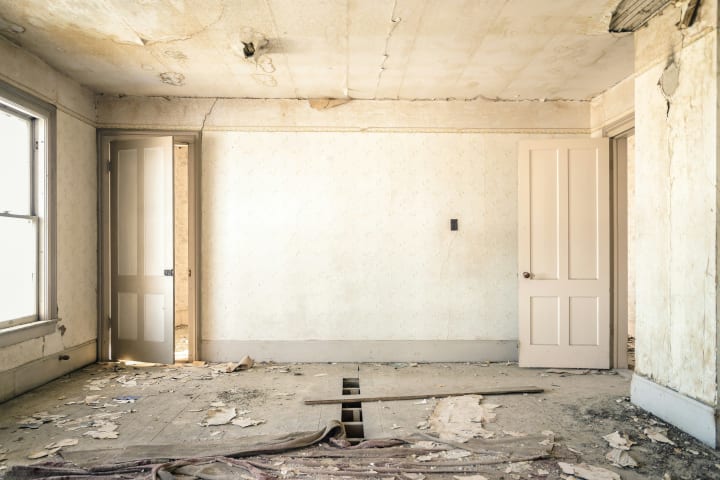
Introduction: The Frustration of a Homeowner Dealing with Insurance Claims
As a homeowner, experiencing damage to your property is not easy. Natural disasters can occur at any time, and when there’s fire, water, wind damage, or other situations, these unexpected scenarios can be devastating. You also have to consider the regular issues that can crop up such as pipes bursting. The effort and financial burden can frankly be overwhelming. And we all know what’s next - it’s time to deal with the insurance company.
It’s fair to say that insurance companies tend to take more than they give. Oftentimes, insurance providers will minimize and delay their payouts. The back-and-forth battle can be a grueling process all while trying to restore your home.
Without a strong advocacy team, going up against an insurance provider can leave you with the bare minimum, which, in many cases, won’t be enough to restore your home back to its normal state. Finding the right property claim adjuster is vital. A skilled adjuster knows how to handle the process of filing an insurance claim, can provide effective guidance on documentation matters, and can negotiate to ensure you receive what you deserve. So how does the insurance adjusting process work?
What to Look For When Starting the Insurance Adjusting Process
When filing an insurance claim, it is vital to work with an independent adjuster. Many times, adjusters can be affiliated with insurance companies, and that’s never a good idea. Find a third-party adjuster with your best interest in mind. It’s important to be proactive with this initial process, as you are essentially choosing your team that will represent you for this case. You need a strong advocate for you as a homeowner. Do your research and ask for referrals from people you trust. Dedicate some time to take this first process very seriously - as this will be fundamental to processing your insurance claim.
Step 1: Stop the Issue ASAP - Immediate Mitigation
Even if you haven’t found your adjuster yet, it’s crucial to mitigate your property damage issue as soon as possible. Granted, if this is a natural disaster or something you cannot control, this may not be possible. But if you have water damage due to a pipe leaking, turn off the water immediately. Most insurance claims can cover immediate mitigation services. Save all of your receipts, take pictures, and document everything. Proper documentation of your damage is absolutely essential to receiving the best compensation possible.
Step 2: Inspect the Property
Once all damages have stopped, and it is safe to be in and around the home for inspection, it’s time to work with the insurance adjuster to assess the property and all damages. This includes:
- A full walk-through of the damaged areas, and beyond - be sure that all territory is covered, even if you may not see anything on the surface. Be thorough.
- Document all of the damages - take photos, videos, and write detailed notes.
- Identify the source of the damages.
- Identify any damage to personal belongings.
This is the stage that will determine what can be fixed. If you miss something important in this step, there’s a chance you may not be able to retract your statement, so take your time and cover everything. Be sure to work closely with your adjuster during this process, as they have experience in this assessment phase of the process.
Step 3: Review Your Insurance Policy
Now that you have all the documentation of the damages, it’s time to review and discuss what can be covered by reviewing your insurance policy. Hopefully, you are already aware of what’s covered, but there are some cases that certain scenarios are not covered. Things to determine:
- What type(s) of damage is covered
- What is the coverage limit for each category: structural damage, personal belongings
- Verify coverage for specific issues like mold
- Amount of deductibles
Reading your insurance policy can be intimidating, so work with your adjuster to understand the language and factors.
Step 4: Assess the Cost of Repairs and Replacement
Now that everything is noted on what’s covered and what’s needed, the adjuster will assess the cost of repairs and replacements needed for the property damage. They will work with contractors and various companies to calculate the following:
- Cost of materials and labor
- Determining if items should be repaired or replaced
In this stage, it’s fair that a homeowner will use their resources as well to research estimates. It’s common for this process to involve comparing various quotes and negotiating with your adjuster to have them advocate for what you see is best.
Step 5: Choose Contractors
Once you’ve derived a plan with your adjuster and team, you’ll need to decide which contractors will handle the repairs. This phase may involve going back and forth with the insurance company, as it's a common process that they will want to work with their preferred contractors. Work with your adjuster to make the decision that is best for you. This is your home and you have the ability to choose the contractor. Your adjuster can play a big role in ensuring that you receive exactly what you need. They will also be sure that the contractors are within the insurance payout, as the adjusters are the liaison for you with the insurance company.
Step 6: Receive Payment
Once the insurance claim is approved, a payout will be issued. If the payout is for a large-scale repair, it could happen in phases. Stay patient, but make sure your insurance adjuster advocates for you if payment is not timely.

Step 7: Start Repairs
Once funds are received, it’s time to start the repair process. Be sure to stay safe at all times during this process, as sometimes the structure of the home may need to be torn down in some areas, or more damage needs to be done in order to repair the home properly. Again, document the process. Take photos and videos and make notes. It’s important to stay thorough to ensure everything is covered with your repairs. Be sure to also:
- Follow building compliance rules and regulations.
- Stay in good communication with the contractors, coordinating schedules will ensure the process runs smoothly.
- Work with your adjuster for continual inspections on the repairing process.
Step 8: Close the Claim
When all work is finally completed, the insurance claim can be closed. Be sure to run a final inspection with your adjuster, ask questions, and review all your notes before closing the claim.
You Deserve the Best
Dealing with insurance claims is a stressful process as it takes up a lot of your time, money, and energy. By working with the right adjusters, and understanding the process, you can set yourself up for a positive outcome to repair your property, and receive the repairs needed. Don’t face an insurance claim alone. Find the best independent adjuster possible and let a team help you with the settlement you deserve.
About the Creator
William Powell
William Powell is a writer and educator with a passion for marketing. He enjoys learning about the latest business trends and analyzing how global events impact domestic and international economies.
Keep reading
More stories from William Powell and writers in 01 and other communities.
Enhancing Legal Strategies with Comprehensive Forensic Damage Assessment
In any case potentially involving damages, both plaintiff and defendant should include a comprehensive forensic damage assessment as part of their legal strategies. Such an assessment will provide the foundation for the legal arguments, move the case along with expert testimony, and play a crucial role in the settlement or damages awarded.
By William Powellabout a year ago in 01
Top 10 SEO Experts In Pakistan In 2026
Introduction Search optimization in 2026 no longer revolves around keywords or isolated ranking tactics. Google’s AI Overviews, entity-based indexing, and answer-first systems have changed how visibility is earned. Search engines now evaluate meaning, credibility, and contextual authority rather than mechanical signals.
By SEO EXPERT IN PAKISTAN 2025a day ago in 01
Hospital App Development: Cost and Planning Guide
I was sat in a Texas clinic last week, fixin' to get my knee looked at. The app for the hospital wouldn't load my chart. Fair dinkum, it was useless. It’s 2026. We have robot taxis, yet my doctor's app acts like a 2004 flip phone.
By Sherry Walkerabout 21 hours ago in 01
How, Too
Many people wonder how, too. You are not alone, and I am an expert. I will teach you how, too! First, you need to remit a small application fee and fill out an application describing the nature of your financial situation and how often payments will be made, as this will have great bearing on how well I teach you how, too.
By Harper Lewis4 days ago in Fiction


Comments
There are no comments for this story
Be the first to respond and start the conversation.