
The Compleate Guide of Connecting Raspberry Pi through SSH
This article will tell you how to connect Raspberry Pi via SSH and troubleshoot some common connection issues.

How to SSH into a Raspberry Pi
This article is designed to educate you on the process of SSHing into a Raspberry Pi and resolving any common connection problems. Additionally, it will introduce a different method for accessing your Pi through SSH with the help of Tailscale.
What is Raspberry Pi?
The Raspberry Pi is a small but powerful single-board computer (SBC) that was created over a decade ago with the goal of making computer science education more affordable and accessible. It has since become a popular choice for many industries due to its low cost and compact size, measuring roughly the same as a standard credit card.
The Pi (commonly referred to as such) has been utilized in various industries, such as education, robotics, and home automation, since its debut.
Although the Pi can function as a desktop computer, it is often utilized in a "headless" setup, without a connected display. This requires remote access and configuration through a Secure Shell (SSH) connection, which is the primary method for managing the Pi.
This article provides instructions for setting up SSH on your Raspberry Pi and troubleshooting common connectivity issues. Additionally, it explores an alternative method for accessing your Pi through SSH using a service such as Tailscale.
Prerequisites to Accessing Pi via SSH
To follow along, you’ll need the following:
1.A working network (wireless or cabled are both fine)
2.A compatible SD card on which to install the OS
3.A Raspberry Pi SBC with its power supply
4.A mouse, keyboard, and monitor (at least initially)
5.A Pi-compatible operating system, like Raspberry Pi OS or Ubuntu
The process of installing an operating system on your Pi may be too advanced for this guide, but can be easily understood by following the official "Getting Started" page.
Be sure to verify if your Pi model has integrated wireless capability or not. If not, an ethernet cable will be necessary to connect your Pi to the network.
Pi First Run: Initial Boot and Configuration
Once the SD card has been imaged, proceed to insert it into the Pi and connect all peripherals. This includes the keyboard, mouse, and monitor, followed by connecting the power supply.
When observing your Pi, you will find that it powers on immediately. This is generally expected, as most users prefer their Pi to remain on at all times in order to carry out its designated function.
Upon initial startup of the Pi, a wizard will guide you through the process which begins with selecting your keyboard options.
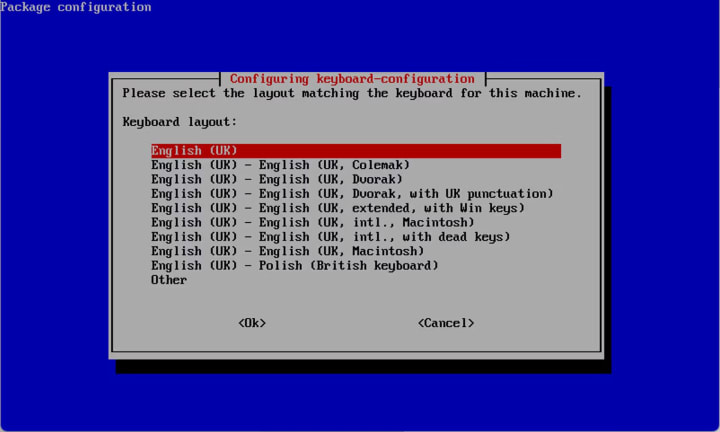
Run through the wizard, selecting the information that pertains to your hardware:
1.Select the correct keyboard.
2.Enter a new username. For this tutorial, you can use pi.
3.Set a password. You can use raspberry for this example.
4.Confirm the password.
Remember to use more secure values for your password if you’re planning on using your Pi on the internet.
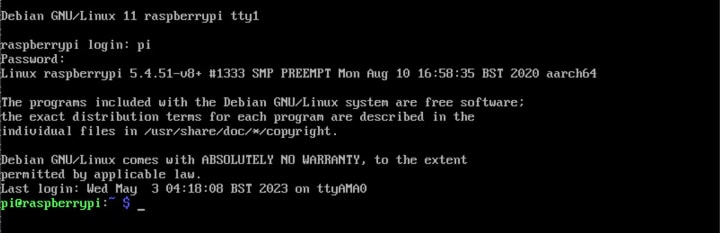
Once all that is done, you should be greeted by the login screen:

Log in using the username and password you just created:
Network Configuration
To properly configure a wireless dongle on your Pi, begin by using the sudo raspi-config command.
Discover numerous customizable options on your Pi with the use of this convenient built-in feature. Take the opportunity to expand your knowledge and explore the possibilities.
To establish a connection between your Pi and the wireless network, choose System Options and Wireless LAN. Then, enter your Wi-Fi SSID and password.
When a cable is connected to your local network, the Pi automatically obtains a DHCP address from your local router, as long as DHCP is enabled.
Upon completing the connection of a cable or configuration of the wireless interface, use the command "ip a l" to verify if an IP has been assigned.
pi@raspberrypi:~ $ ip a l
1: lo: <LOOPBACK,UP,LOWER_UP> mtu 65536 qdisc noqueue state UNKNOWN group default qlen 1000
link/loopback 00:00:00:00:00:00 brd 00:00:00:00:00:00
inet 127.0.0.1/8 scope host lo
valid_lft forever preferred_lft forever
inet6 ::1/128 scope host
valid_lft forever preferred_lft forever
2: eth0: <BROADCAST,MULTICAST,UP,LOWER_UP> mtu 1500 qdisc pfifo_fast state UP group default qlen 1000
link/ether b8:27:eb:a3:81:fb brd ff:ff:ff:ff:ff:ff
inet 192.168.0.21/24 brd 192.168.0.255 scope global dynamic noprefixroute eth0
valid_lft 85914sec preferred_lft 75114sec
inet6 fe80::8138:af41:63a7:d872/64 scope link
valid_lft forever preferred_lft forever
The interface eth0 should have an inet address, which, in this case, is the IP address of the Pi.192.168.0.21.
If your network does not have DHCP, you will need to set a static IP address for your Raspberry Pi. Look for additional resources on configuring a static IP.
Enabling the SSH Server
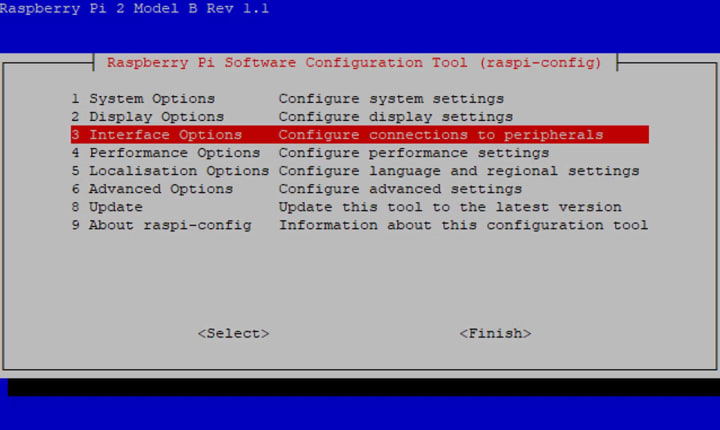
To utilize the full capabilities of your Raspberry Pi, it is necessary to activate the SSH daemon. This can be achieved through the use of the sudo raspi-config command. Once you access the configuration tool, simply select Interface Options.:

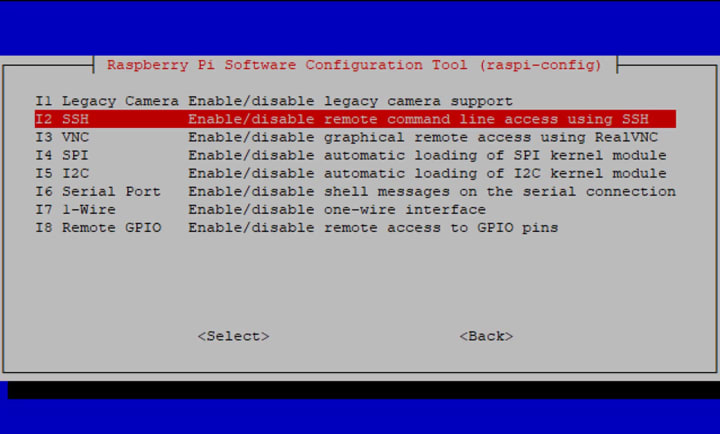
Then select SSH:
Before enabling the SSH server, you will be prompted to confirm and advised of the dangers associated with weak passwords.:
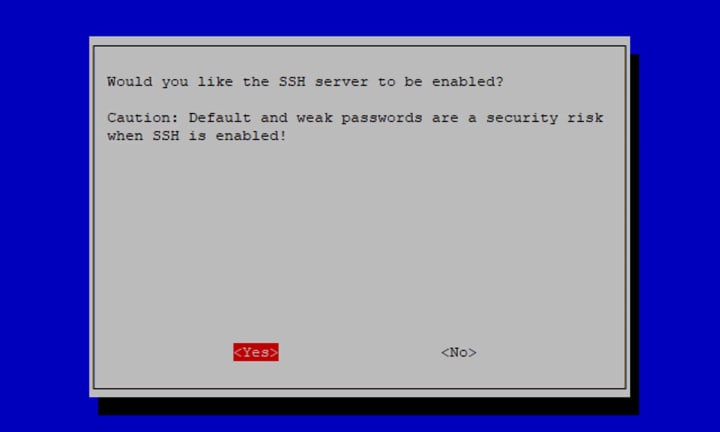
Select Yes. The next screen will confirm that the SSH server has been enabled:
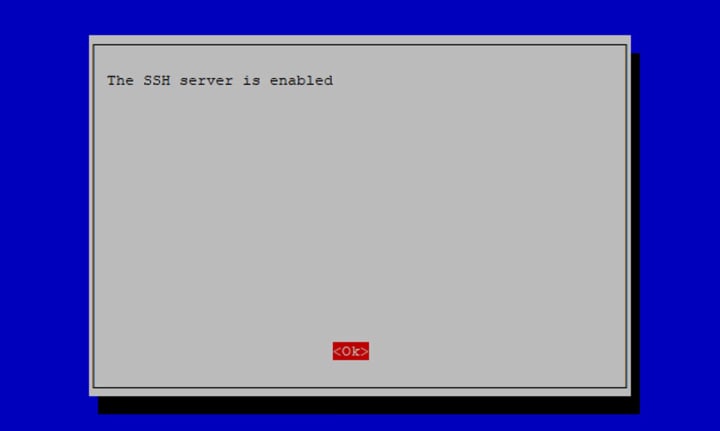
Select Finish to exit the raspi-config tool.
Introduction to RemoteIoT Web SSH
RemoteIoT Web SSH is a convenient solution for remotely managing Raspberry Pi devices through the internet. Unlike traditional SSH, this tool offers a free and easy alternative that eliminates the need for complex configurations and paid services. Say goodbye to complicated port forwarding and dynamic DNS setups with RemoteIoT.
RemoteIoT offers simple setup and strong security measures to safeguard your device from unauthorized access, making it ideal for both beginner and expert users. In fact, minimal technical expertise is needed to get started.
Why Choose RemoteIoT?
1.Free and open-source
2.Simple setup process
3.Highly secure connection
4.Compatible with various operating systems
Raspberry Pi Overview
The Raspberry Pi has transformed the computing and digital making world, providing an affordable and compact computer. Its widespread use extends to education, home automation, robotics, and various other applications. Due to its reasonable price and flexibility, it is a popular choice among both hobbyists and professionals.
Key Features of Raspberry Pi
1.Compact size
2.Low power consumption
3.Supports multiple operating systems
4.Extensive community support
Testing Your SSH Connection
There are numerous SSH clients that can be used to connect to your Pi. Depending on your OS and current software, downloading an SSH client may not even be necessary.
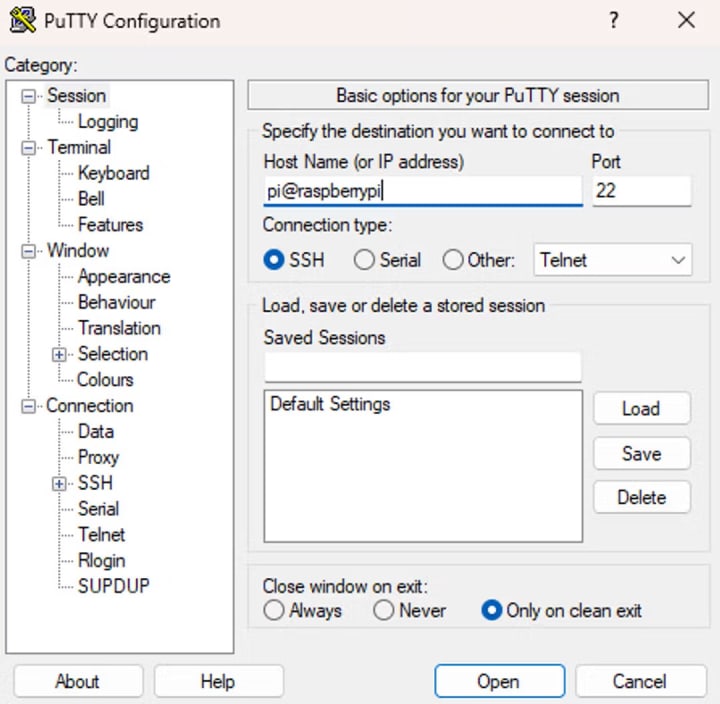
For this guide, we will assume you are using a Windows operating system. A commonly used SSH client for Windows is PuTTY, which can be easily downloaded and installed on your computer.
Upon initial use, PuTTY will prompt you to input an IP address or host name to establish a connection. Enter the IP address discovered through the "ip a l" command into the designated Host Name box.
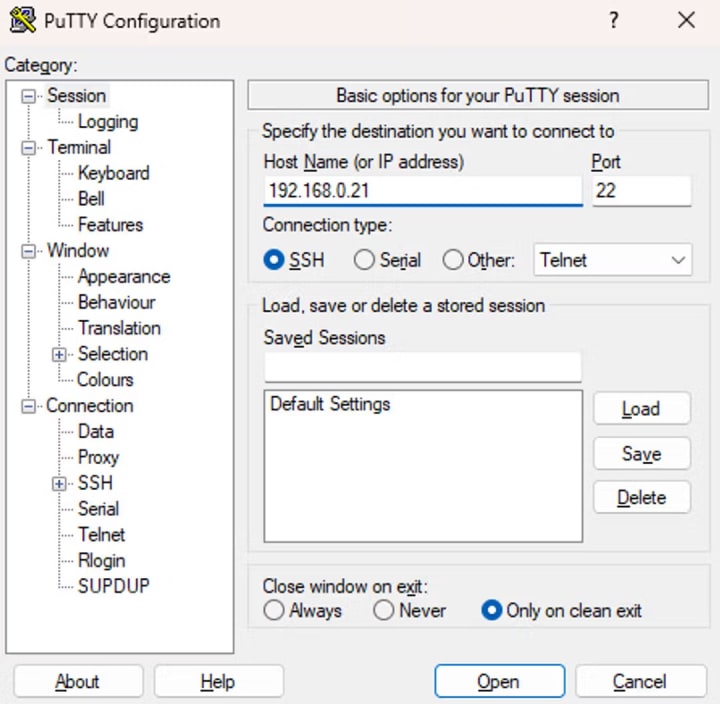
Click Open to connect to your Pi via SSH.
During your initial connection to your Pi, PuTTY may prompt you with a warning about the unrecognized host key for the server. You will have the choice to accept, connect only once, or cancel.
When connecting to a new server via SSH, your client may be given a host key by the server (such as your Pi). This key serves as an identification method and can be helpful in detecting any potential manipulator-in-the-middle (MITM) attacks if the server presents a different key during a subsequent connection attempt.
Upon initial connection to the host, if the host key has not been previously cached, it is recommended to accept the key and proceed with the connection.
Enter your username and password as you did when you were using the Pi with a monitor:
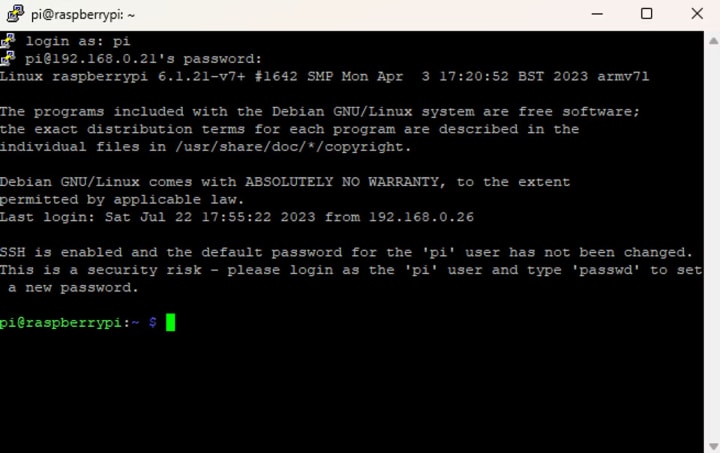
And that’s it! You’ve logged on to your Pi via SSH.
This input allows for further configuration, including the option to detach the monitor from your Pi once it has been properly set up for a headless setup.
Discover other Windows-compatible programs, such as WinSCP, which facilitate file transfers to your Raspberry Pi through the SSH interface.
Networking Limitations
Gain access to your Pi through SSH, allowing connection from any computer on the local network.
With access to your local router, you can easily enable remote connectivity by setting up port forwarding. By creating a port forwarding rule and using a Dynamic DNS, you won't even need to know your ISP-assigned public IP for your router.
However, setting up these things can be difficult if you don’t know what you’re doing.
Enhancing SSH Access with Tailscale SSH
To make SHH access on your Pi easier and more secure, a tool like Tailscale comes in handy.
Tailscale enables secure VPN access for your devices globally, with easy configuration and use of the WireGuard protocol. It creates encrypted tunnels between devices, in a mesh network layout, allowing for seamless communication across any network.
Setting up Tailscale on your Pi eliminates the need to establish port forwarding rules on your router. This ensures that your Pi remains protected from direct exposure to the internet, increasing its security. With Tailscale, only approved devices in the same mesh network can communicate with each other.
Increase the security of your SSH connection with Tailscale SSH, which allows for a dedicated SSH daemon to operate solely over your tailnet (short for Tailscale network). This feature utilizes the Wireguard protocol for encryption and regularly rotates keys for added protection. Your Tailscale dashboard's ACLs and permissions can also be applied to SSH access over your tailnet.
Let’s see what it looks like in action.
Sign Up for a Tailscale account
First, create a Tailscale account using the identity provider of your choice.

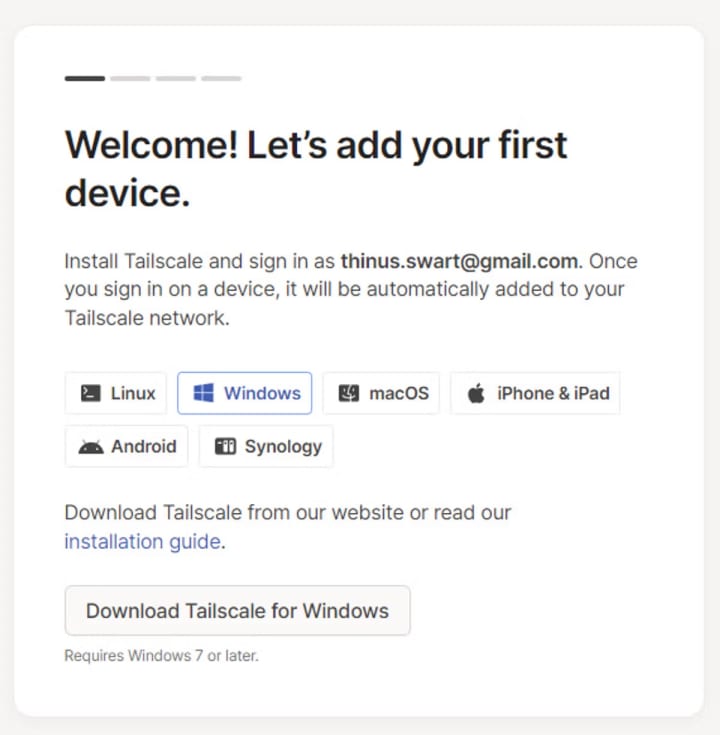
Install Tailscale on Your Device
For the installation process, Tailscale will prompt you to download the app on one of your devices. Although we will be focusing on using a Windows device in this guide, it's important to note that Tailscale has support for a variety of other device types as well, so be sure to download the appropriate one for your device.
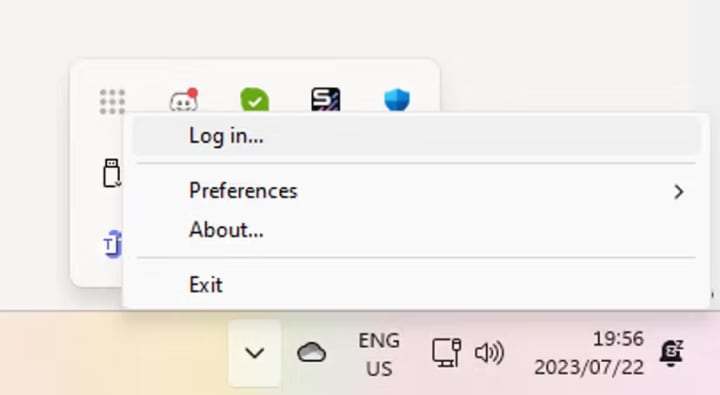
Upon installing the application, the Tailscale icon will appear in your system tray and can be accessed by right-clicking the icon to log in.
Upon opening the browser page, you will be prompted to log in with the same credentials used when creating your Tailscale account.
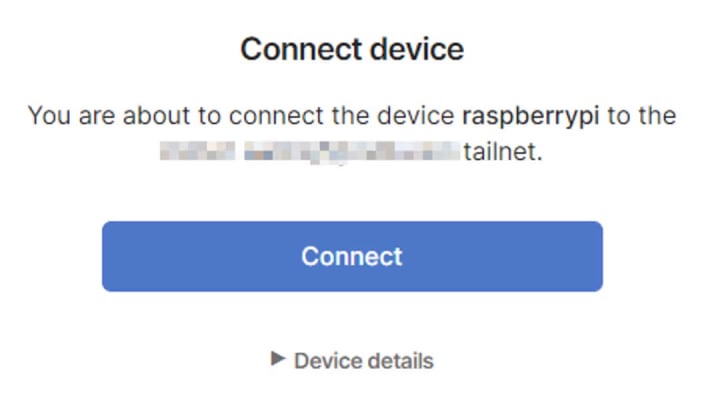
Next, you’ll be asked to confirm whether you want this device to join your tailnet.
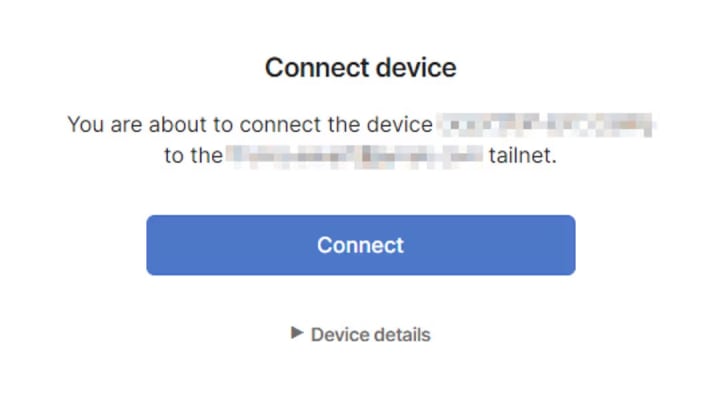
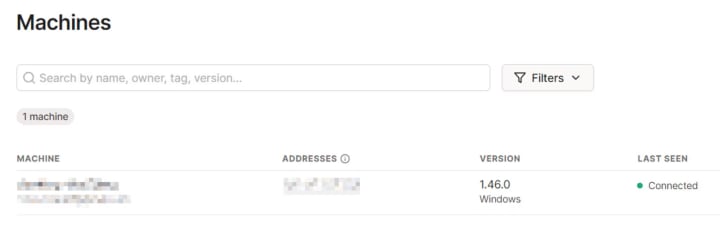
Click Connect to join your device to the tailnet. It will now be visible in the Machines dashboard.
Install Tailscale on Your Pi
To install Tailscale on your Pi, refer to Tailscale's installation document. This guide will be using the "Bullseye" version of Raspberry Pi OS, as mentioned in the article.
To install Tailscale over SSH, connect to your Pi on the same local network and run the provided commands. This method is particularly useful for those who are familiar with remote access and wish to streamline the installation process.
pi@raspberrypi:~ $ sudo apt-get install apt-transport-https
This will install the “apt-transport-https” plugin.
Install Tailscale's package signing key and repository by running the following two commands:
pi@raspberrypi:~ $ curl -fsSL https://pkgs.tailscale.com/stable/raspbian/bullseye.noarmor.gpg | sudo tee /usr/share/keyrings/tailscale-archive-keyring.gpg > /dev/null
pi@raspberrypi:~ $ curl -fsSL https://pkgs.tailscale.com/stable/raspbian/bullseye.tailscale-keyring.list | sudo tee /etc/apt/sources.list.d/tailscale.list
Now update your APT package list and install Tailscale from the new package repository:
pi@raspberrypi:~ $ sudo apt update
pi@raspberrypi:~ $ sudo apt install tailscale
Your Pi will now download and install the Tailscale application.
Run this command to bring up the Tailscale client:
pi@raspberrypi:~ $ sudo tailscale up
To authenticate, visit:
https://login.tailscale.com/a/xxxxxxxxxxxx
To make use of the Tailscale application without a browser, it will prompt you to visit a URL on a different device to verify your Pi's authentication.
Visit the URL to access the login page. Input your login credentials as previously set up for your initial account.
You’ll again be asked whether you want to add this new device to your existing tailnet:
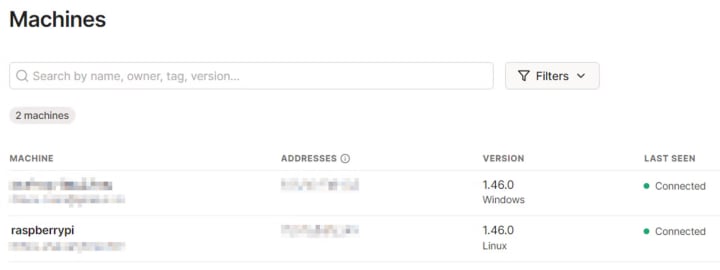
After clicking Connect, the Pi command will indicate a successful connection to the tailnet.
Your machines dashboard should now have both devices linked:
Enabling Tailscale SSH Access
Now it’s time to enable SSH on rpi access via Tailscale:
pi@raspberrypi:~ $ sudo tailscale up --ssh
After completing this step, the machine's dashboard will show that the SSH port is now available on the tailnet:

Editing Your Tailscale Access Control List
To enable SSH access to your Raspberry Pi on your tailnet, you must edit your Tailscale ACL. This can be done through the admin console or Tailscale’s API.
Click on Access Controls in your dashboard:
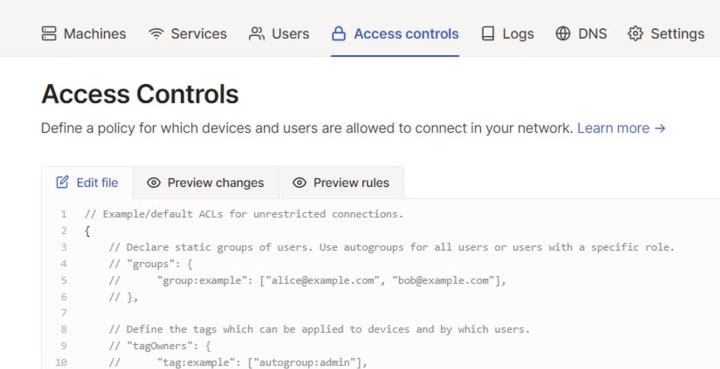
Find the SSH section in your ACL policy:
"ssh": [
// Allow all users to SSH into their own devices in check mode.
// Comment this section out if you want to define specific restrictions.
{
"action": "check",
"src": ["autogroup:members"],
"dst": ["autogroup:self"],
"users": ["autogroup:nonroot", "root"]
},
],
The src can be a username, group, or tag. You can also classify your machines using tags in the same ACL file. However, for this tutorial, the current configuration allows any device owner in the tailnet to access the SSH port of any other device in the tailnet. If you wish to have a more precise access control policy, please consult Tailscale's documentation on tags.
To improve the tutorial, consider modifying the users section to allow SSH access for the root user. However, this practice is generally discouraged, even if you are connected to a private tailnet network.
"ssh": [
// Allow all users to SSH into their own devices in check mode.
// Comment this section out if you want to define specific restrictions.
{
"action": "check",
"src": ["autogroup:members"],
"dst": ["autogroup:self"],
"users": ["autogroup:nonroot"],
},
],
Save the policy file.
Once you have advertised the service on the console and set up the ACL, you can easily connect to your Pi using the Tailscale-generated MagicDNS name:
When using PuTTY, it is important to confirm the host key, as it is considered a new host. Simply accept the key and you will be successfully connected to your Pi through Tailscale.
Tailscale's daemon takes care of key-based authentication for users, eliminating the need to enter a password - a notable difference from previous logins. This feature provides convenience and enhanced security for users.
As an added bonus, Tailscale SSH allows you to connect to your Pi directly from the browser too.
Log in to your Tailscale admin console from any location and locate the raspberrypi machine.
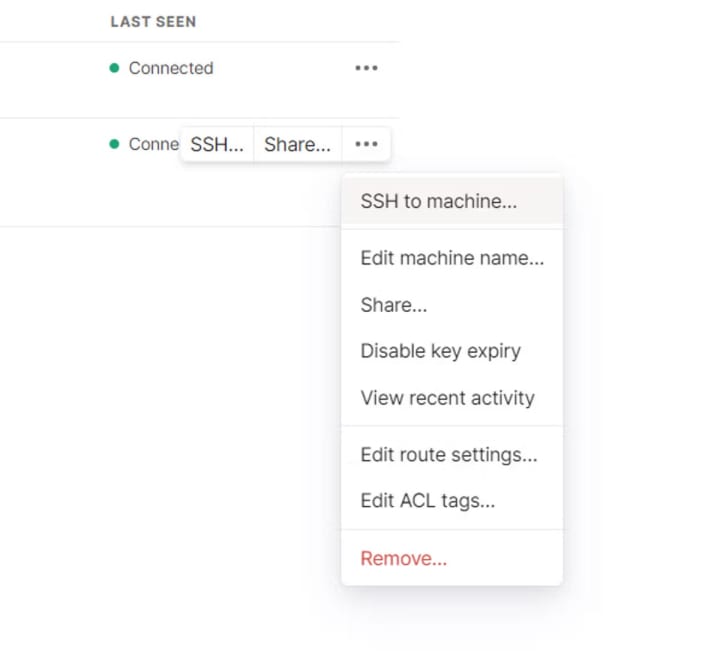
Click on the menu button (…) next to your machine name and then click SSH to machine:
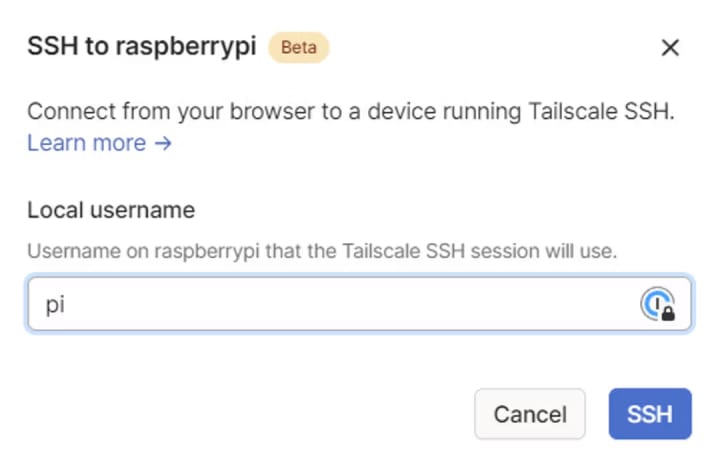
When asked for a username, you can use pi:
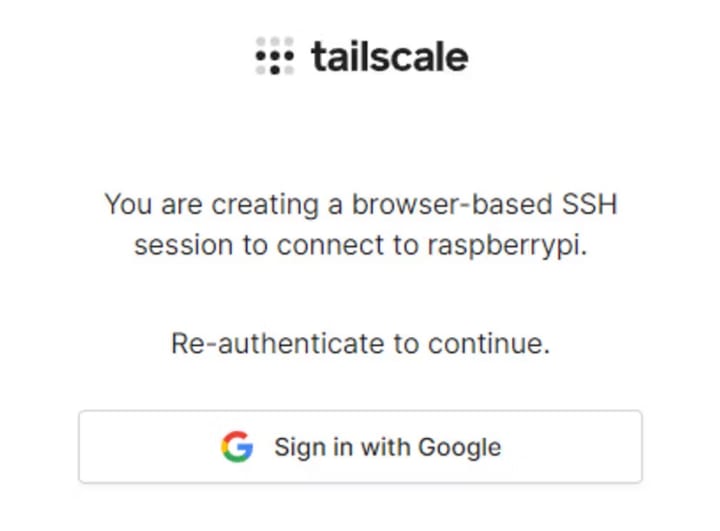
You might be asked to reauthenticate for security reasons:
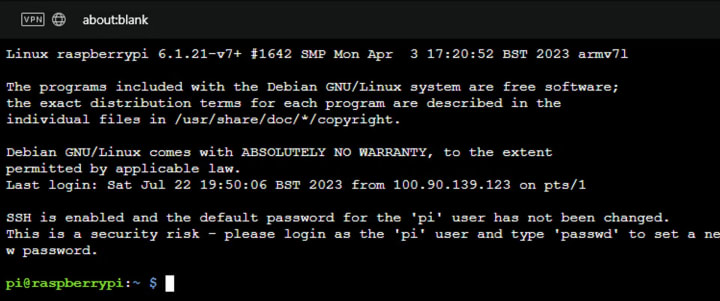
Once you’ve authenticated, a browser window will open and you will be connected to your Pi:
How Tailscale can help
When using a Raspberry Pi, security should be taken into consideration, especially if it is accessible to the general internet. This may attract malicious users attempting to gain access.
Enhance your Pi's accessibility with Tailscale SSH, providing a secure and remote connection available in your home, vehicle, school, or data center.
Conclusion
Enhance your remote IoT device management capabilities with RemoteIoT Web SSH on Raspberry Pi for free. This guide provides step-by-step instructions for setting up a secure and efficient remote access system, making it easy to manage your devices remotely.
About the Creator
Keep reading
More stories from china inspection service and writers in 01 and other communities.
The Complete Guides of PCB Assembly Services: The Process and How Works
What is PCB assembly service? The PCB assembly services comprise a vital step in the electronics manufacturing process, where cutting-edge technology is utilized to mount electrical components onto printed circuit boards. This operation is also referred to as printed wiring assembly, circuit card assembly, and electronics assembly.
By china inspection service12 months ago in 01
How Crypto Arbitrage Bots Find Opportunities Humans Often Miss
The cryptocurrency market operates 24 hours a day, seven days a week, across hundreds of trading platforms around the world. Unlike traditional financial markets that follow fixed trading hours, crypto markets are constantly active, creating continuous fluctuations in asset prices. Because different exchanges operate independently, the same cryptocurrency can sometimes be priced slightly differently across platforms. These price differences create opportunities for a trading strategy known as arbitrage.
By smithtaylor4 days ago in 01
Why Didn't Anyone Tell Us
Men, move along. This is not for you. This is for the women. I was forty-five when I began menopause. It is pretty young for that to be going on in a woman’s life, but I had undiagnosed PCOS, my entire life. Thank you to all the gynecologists I had seen my entire life. That in itself should encourage women to keep seeking second opinions, especially when you are not getting correct answers or any at all.
By Alexandra Grant3 days ago in Humans


Comments
There are no comments for this story
Be the first to respond and start the conversation.