
HOW TO SOLVE A RUBIK'S CUBE
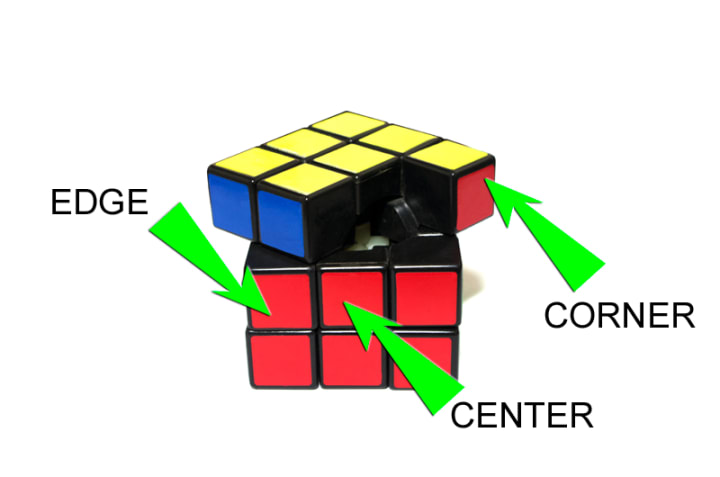
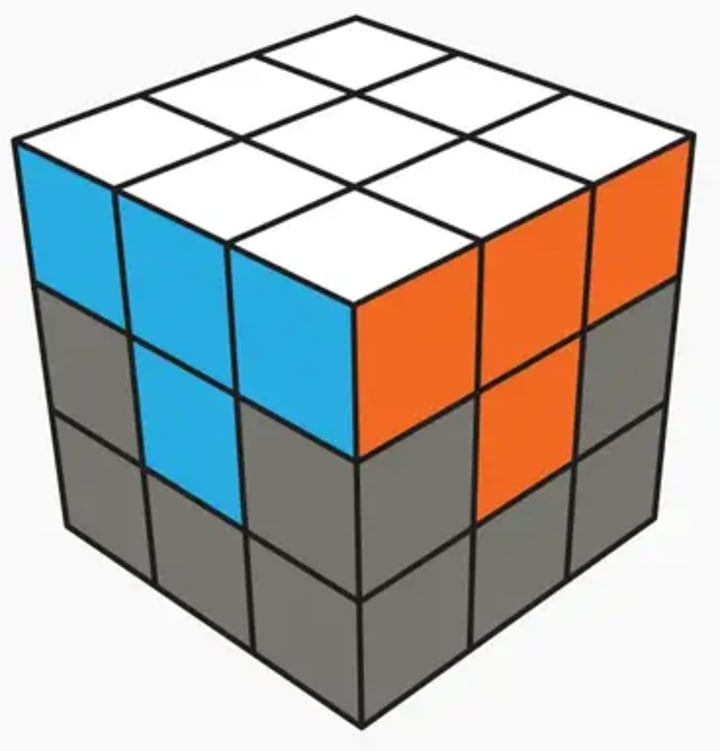
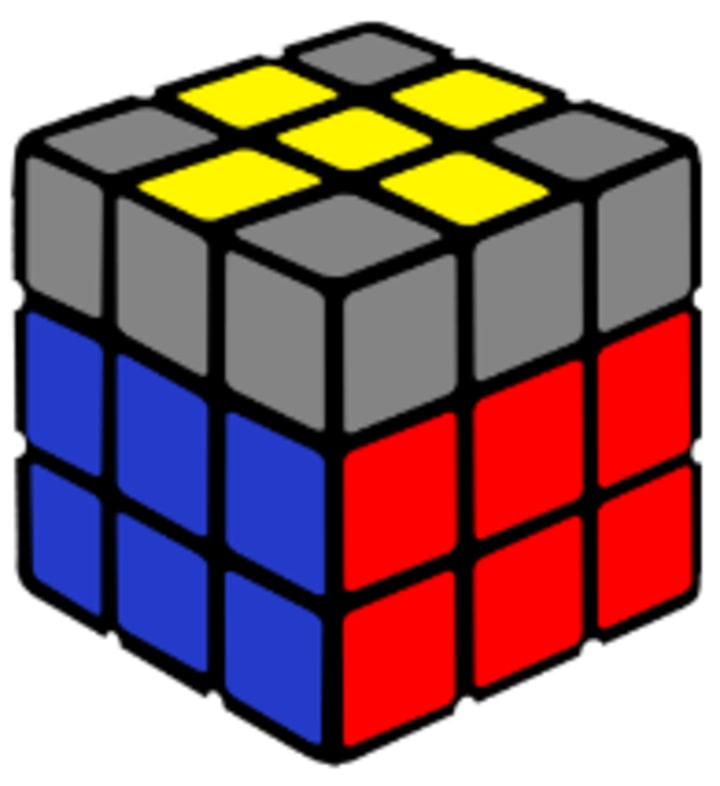
A Rubik's Cube is a 3D combination puzzle invented by Hungarian architect Ernő Rubik in 1974. It is a cube made up of 26 smaller cubes, known as "cubbies" or "cubelets," which are arranged in a 3x3x3 grid. Each of the six faces of the larger cube is covered by nine stickers of one of six solid colors: typically white, red, blue, orange, green, and yellow.


First, we need to memorize some notation of rubik. Just spend some times, you will memorize all.
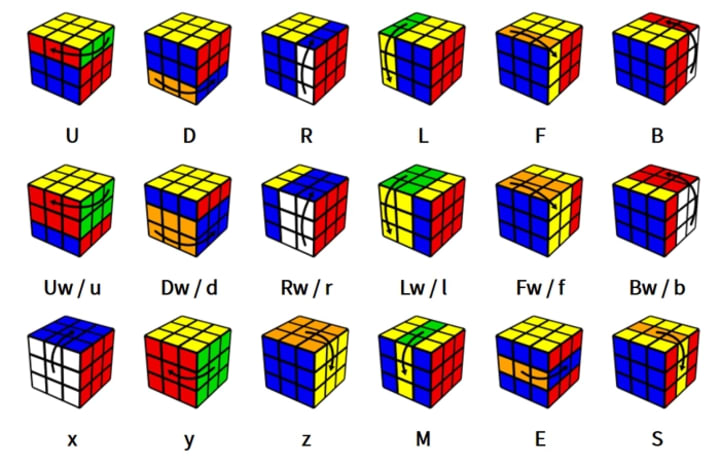
Make sure you remember carefully. And now, let's take steps to solve Rubik.
1. Solve a face of rubik's cube
First, we need to solve the white edges. You can also start with any other color but in this solution guide we're going to use the white so I would advise you to use the same. This step is intuitive and quite easy because at this stage there are no solved pieces that we can break. In most cases you can just simply rotate each piece where they are supposed to be.
Note: The centerpieces are fixed and they define the color of each face. This is why we have to solve the white edges according to the color of the centerpieces.
Second, we need to solve the conners. This is another easy stage where you shouldn't memorize any algorithm just follow your instincts. These are the cases that will occur:
At the end of this step your cube should have a solid white face.
Note: We have to solve the white cross according to the color of the conners.
2. Second layer (F2L)
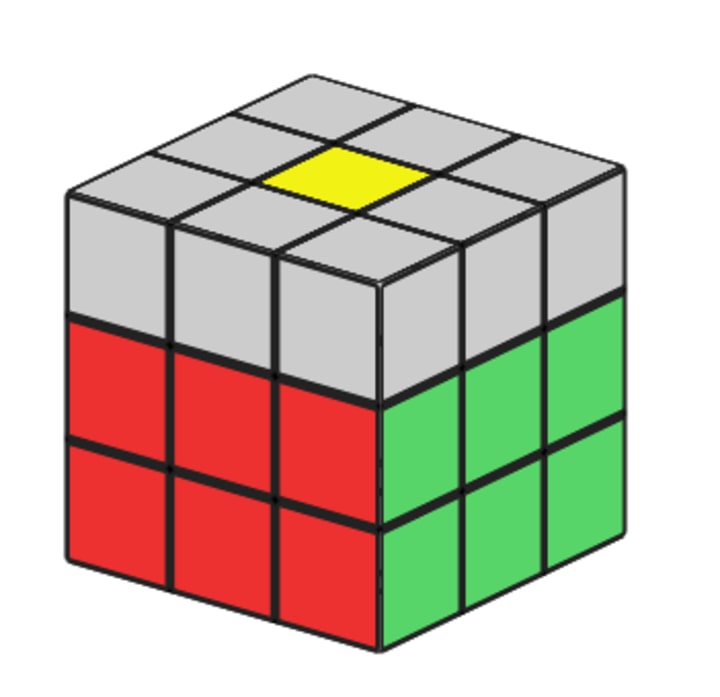
Now that we've finished the white face, let's turn the cube upside down because we don't need to see the solved side anymore.
The solution of the Rubik's Cube could be done intuitively until this point but this is where most people get stuck. The reason for that is that you would have to foresee too many steps to complete the first two layers (F2L).
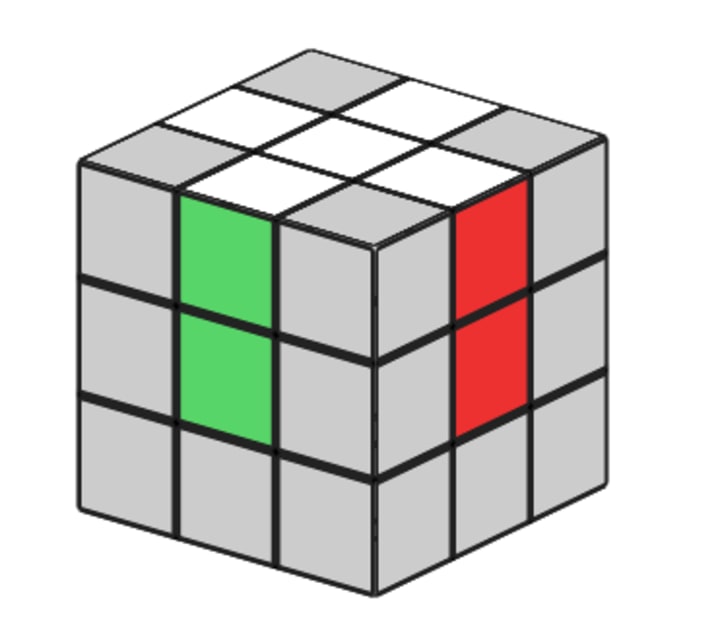
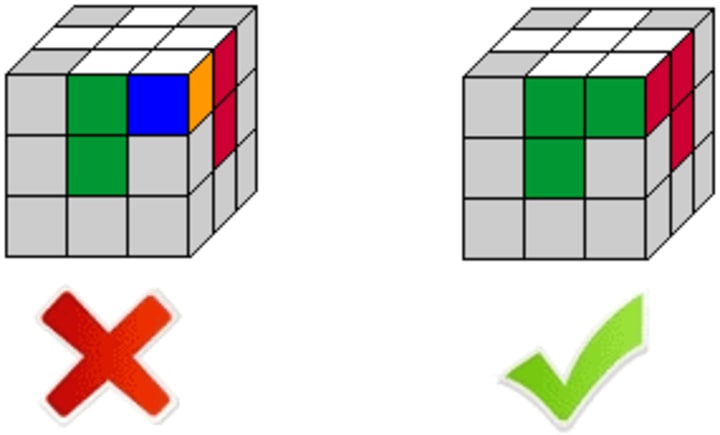
We have to learn two algorithms which are symmetric to each other. We call them Left and Right algorithms.
The Left algorithm sends the edge piece from the Front-Up position to the left side while the Right algorithm sends it to the right as marked with the arrows.
WRONG ORIENTATION
When there's no edge piece to insert into the middle layer you will have to execute the algorithm twice to pop the piece out in the first step.
For example, when the edge is on its place but turned incorrectly:
At the end of this step your cube should have the middle layer solved and an intact white face at the bottom.

3. The top cross
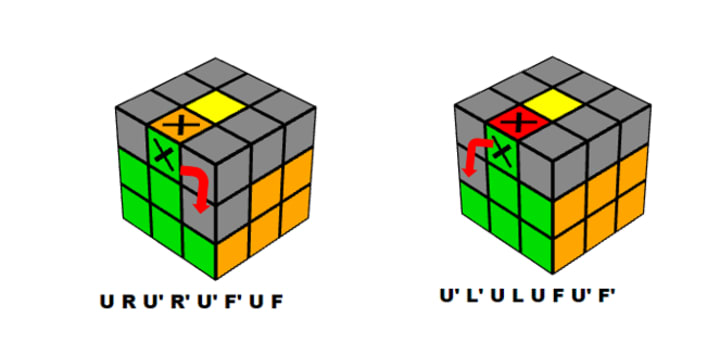
In the fourth step we want to form a yellow cross on the top of the cube. Don't worry if the side colors don't match the side centers because we will send the pieces to their final positions in the next step.
We solve the yellow edges on the top of the Rubik's Cube in two steps:
First we orient them to form a yellow cross on the top, then we swap the pieces to match them with the side colors.
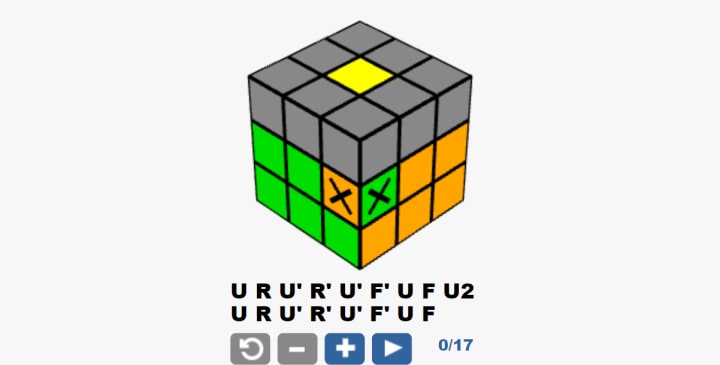
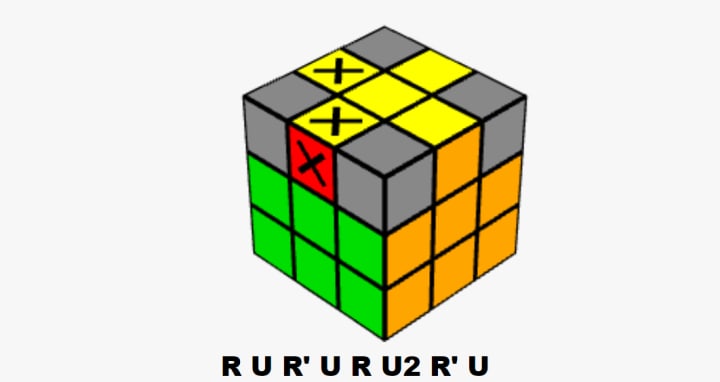
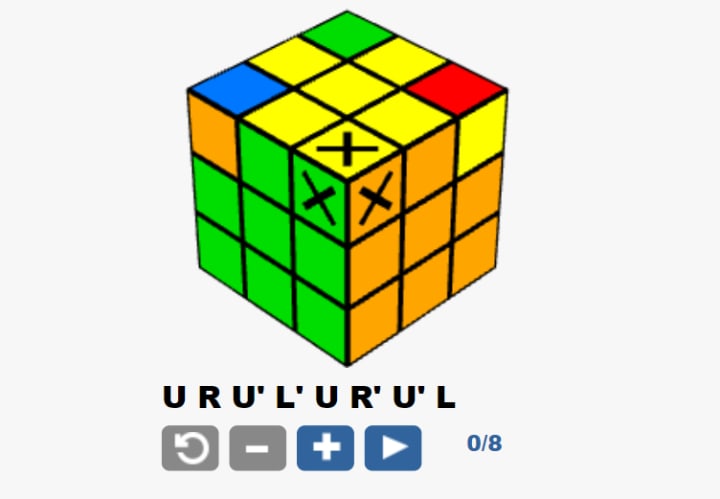
At this point you can have one of these patterns on the top of your cube. Use the algorithm below to jump to the next state until you reach the cross.
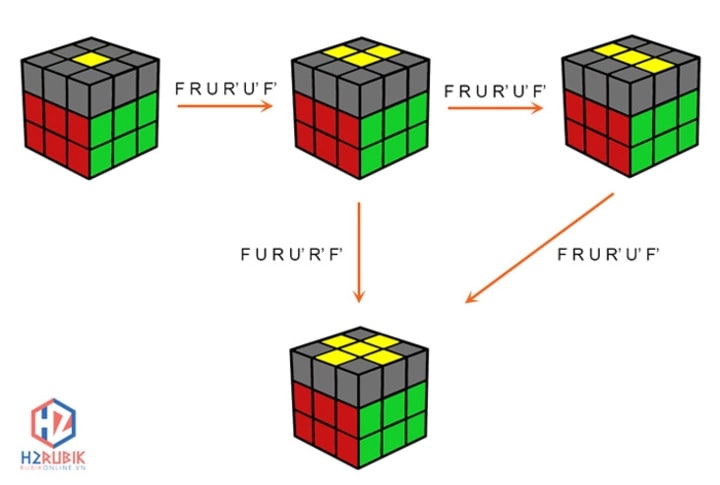
Dot – we have to apply the formula three times when all top edges are oriented wrong and there are no yellow stickers around the yellow center. Make sure you reorient the cube in your hands after the first stage because the "L"-shape will be upside down.
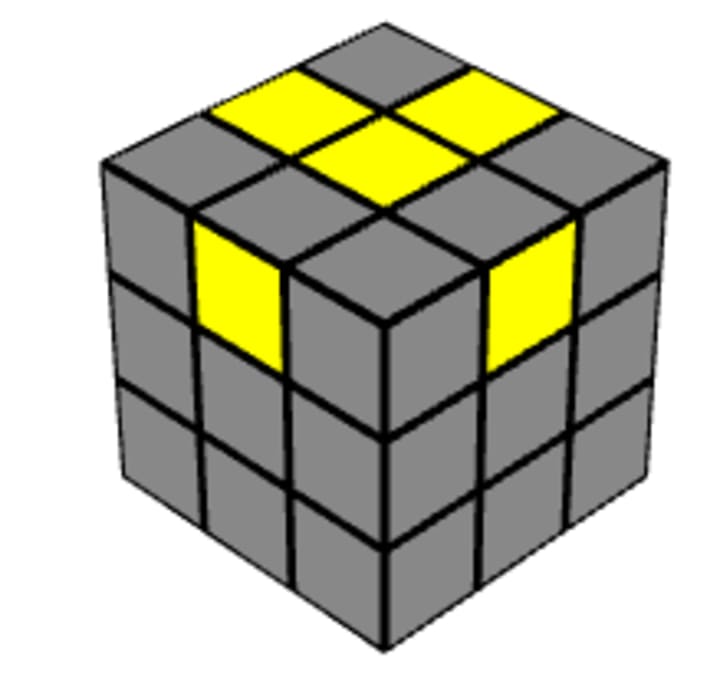
"L"-shape – You're two algorithms away from the target. Make sure the yellow edges are located on the left and back positions as illustrated. (There's a shortcut which jumps from the "L"-shape to the cross in one step, reducing the solution time: F U R U' R' F').
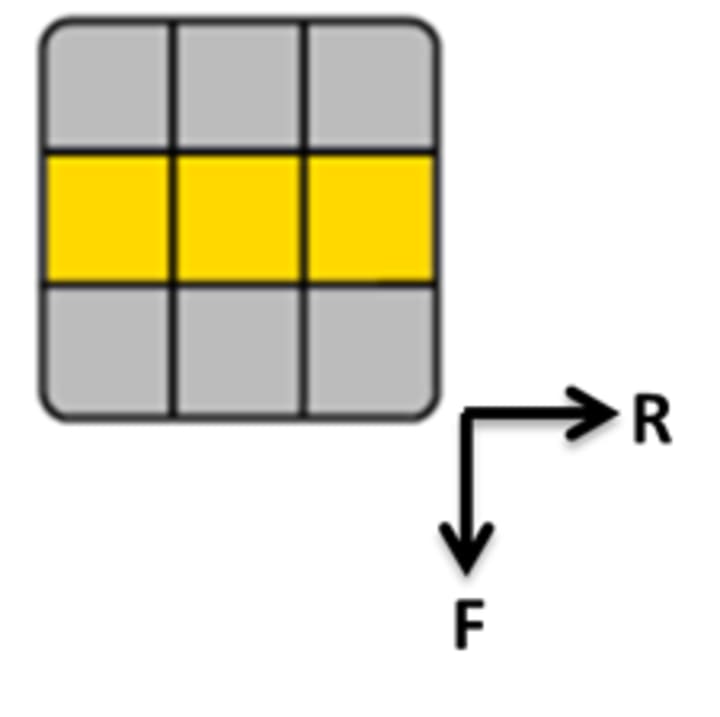
Line – Perform the algorithm once, holding the line horizontally and you're done.
Cross – The cross is complete, you can go to the next level!
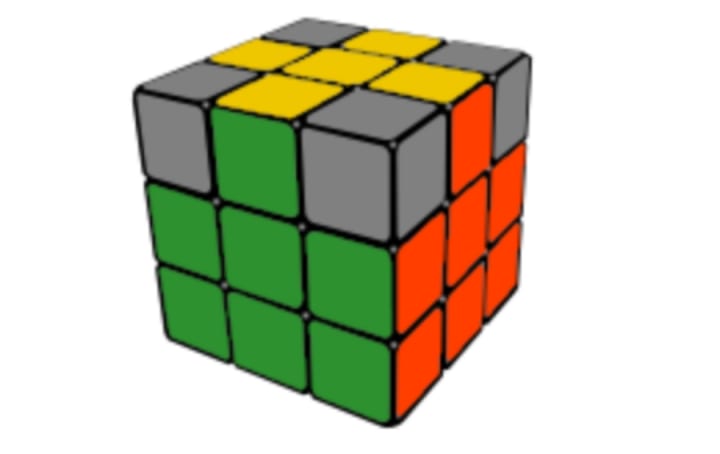
4. Swap last layer edges
We have the cross on the top but the sides of the yellow edges don't match the side colors yet. We need to put them in their final destinations.
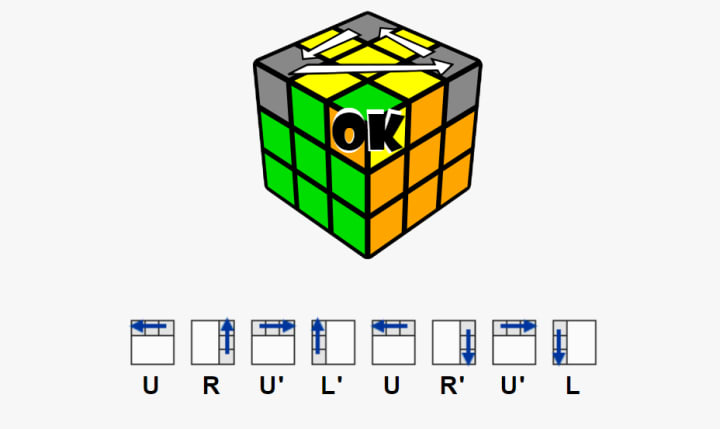
To sort this out we use an algorithm which swaps the Front-Up and the Left-Up adjacent edges marked with the arrow.
In some cases two opposite pieces have to be swapped which needs to be done in two steps.
Perform the algorithm once, then rotate the cube to make sure you are changing the right pieces in the second round:

At the end of this step you should have an almost finished cube, where only the yellow corners are left to solve:
5. Position last layer corners
We are very close to finish solving our Rubik's Cube.
At this point only the yellow corners remained unsolved which we are going to sort out in two steps.
First we have to relocate them and we'll orient them in the next and final step.
We use a trick to cycle the marked corners on the image, while the Front-Right-Up corner, marked with "OK" stays in place.
When you reach this point in the solution look for a corner piece which is in the right place. If you found one then reorient the cube in your hands so this specific piece is on the OK position and perform the formula. In some cases you have to execute it twice.
If there's no yellow corner on the right spot then do the algorithm to reorganize the corners and then look around again because there must be a good one this time.
An interesting fact is that in this step the number of pieces in the right spot can only be 0, 1 or 4.
6. Orient last layer corners
In the last step every piece is where it's supposed to be, but the yellow corners are oriented wrong.
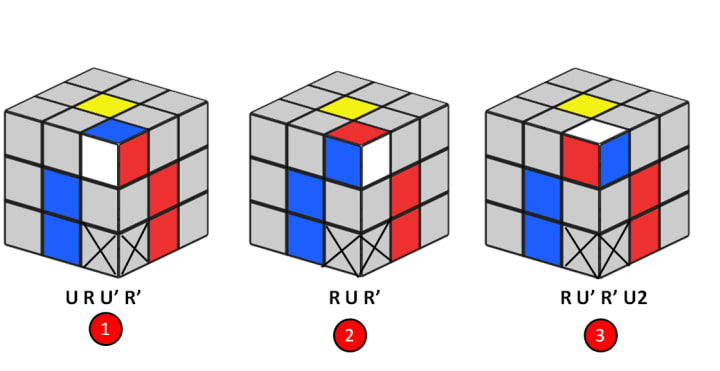
To complete our cube we will use the same algorithm we used to solve the first layer corners but with a little trick:
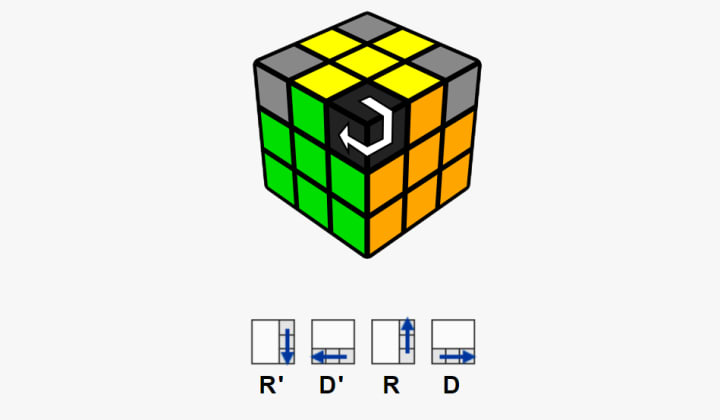
Start by holding the cube in your hand having a misaligned yellow corner in the highlighted Front-Right-Up spot (see image).
Repeat the R' D' R D algorithm until this piece comes to the correct position with the yellow sticker upwards.
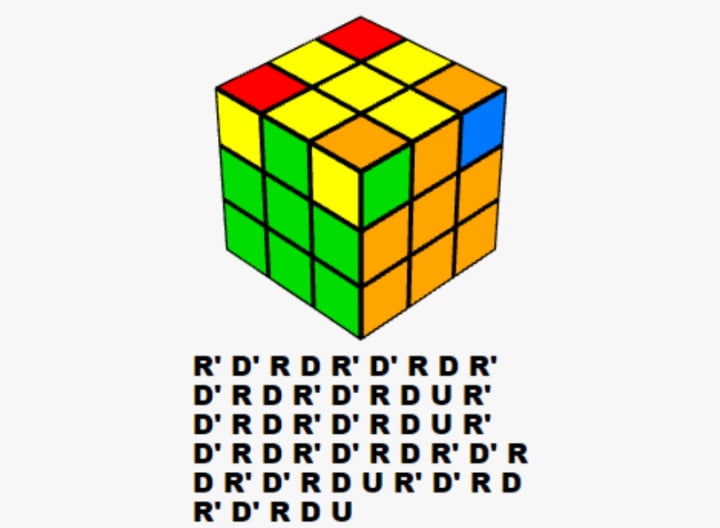
Turning only the Up face, move another wrong yellow corner to the highlighted spot and repeat the R' D' R D algorithm until that yellow piece is oriented correctly.
Move other misaligned yellow corners to the marked spot one by one and do the formula until all corners are solved.
The puzzle might seem to be scrambled between the moves but don't worry because everything will come together when all yellow corners are oriented properly.
Watch the video or the animation below that demonstrates examples of how to use this move.
That is the Rubik 3x3 solution. I hope you will persevere and succeed!!
About the Creator
iPhone 18 Pro Leaks Drama: The Dynamic Island Confusion Explained
The iPhone 18 Pro is already stirring up controversy, and it all started with a viral video from FPT. The renders showed off what looked like a major display redesign—one where the Dynamic Island had been shifted over to the left side of the screen. Unsurprisingly, the internet went into meltdown mode.
By Info Post Gate7 days ago in 01
melania trump documentary
The release of Melania, a new documentary centered on First Lady Melania Trump, has drawn global attention even before its official debut. Promoted as an intimate portrait of one of the most private figures in modern American politics, the film aims to offer audiences a rare glimpse into her personal and public life. Yet the project has sparked discussion not only about its subject but also about the evolving role of political storytelling in contemporary media.
By Saboor Brohi 4 days ago in 01
Cabin Fever Because of Snow, Sleet, and Freezing Rain That Turned to Icy Roads
What Is Cabin Fever? The short answer is that cabin fever is restlessness from being in a confined area. Cabin fever is the distressing irritability or restlessness experienced when a person or group is stuck at an isolated location or in confined quarters for an extended time. Research shows that prolonged cold, gray skies, and being stuck indoors can trigger mood shifts similar to “winter blues.”
By Margaret Minnicksa day ago in Humans


Comments
There are no comments for this story
Be the first to respond and start the conversation.