
Elementor Wordpress: Full Guide Of what You Should Know.
Why is Elementor popular?

Elementor is a popular WordPress plugin that allows users to create and design professional-looking websites without the need for coding or technical expertise. It is a powerful visual page builder that enables users to build custom web pages using a simple drag-and-drop interface.
With Elementor, you can easily create and customize different sections, columns, and elements of your website, such as headers, footers, content blocks, and more. It provides a wide range of pre-designed templates and widgets that can be easily customized to match your brand or website's unique style and requirements.
One of the key features of Elementor is its live preview editor, which allows you to see the changes you make in real-time. This makes the website-building process more intuitive and efficient, as you can instantly see how your design choices impact the final appearance of your website.
Elementor also offers a variety of advanced features and functionality through its premium version called Elementor Pro. This includes features like theme building, dynamic content integration, WooCommerce support, advanced design options, and more.
Overall, Elementor empowers WordPress users to create visually stunning and fully functional websites, regardless of their technical background. It has gained popularity among web designers, developers, and even beginners due to its user-friendly interface, extensive customization options, and the ability to create professional-looking websites quickly and efficiently.Get Started Now.
Why is Elementor popular?
Elementor has gained immense popularity for several reasons:
User-Friendly Interface: Elementor offers a user-friendly and intuitive interface that makes it accessible to users of all skill levels. Its drag-and-drop functionality allows users to easily build and customize web pages without any coding knowledge.
Live Preview Editing: One of the standout features of Elementor is its live preview editing capability. Users can see the changes they make in real-time, eliminating the need for constant previewing or switching between the editing and preview modes. This makes the design process more efficient and visually engaging.
Extensive Template Library: Elementor provides a vast library of pre-designed templates that cater to various industries and website types. These templates serve as a starting point for users, saving them time and effort in creating a design from scratch. Users can customize the templates to match their branding and content needs.
Customization Options: Elementor offers a wide range of customization options, allowing users to have full control over the design of their websites. Users can easily adjust the layout, typography, colors, and styling of different sections and elements. This level of flexibility enables users to create unique and visually appealing websites.
Third-Party Integrations: Elementor seamlessly integrates with many popular third-party plugins, including WooCommerce, contact form plugins, and SEO tools, among others. This allows users to extend the functionality of their websites and integrate various features and services without writing code.
Active Community and Marketplace: Elementor has a large and active community of users and developers. This community contributes to the development of add-ons, plugins, and templates, expanding the capabilities of Elementor even further. Users can access a wide range of free and premium resources in the Elementor marketplace.
Performance Optimization: Elementor is designed to be lightweight and optimized for performance. It generates clean code and ensures fast loading times for web pages, which is crucial for a positive user experience and search engine optimization (SEO).
Continuous Development and Updates: Elementor is constantly evolving and improving with regular updates and new features. The development team actively listens to user feedback and implements enhancements based on user needs and industry trends. This commitment to continuous development keeps Elementor at the forefront of website design tools.
These factors contribute to Elementor's popularity and widespread adoption among WordPress users, making it one of the leading page builders in the market. Get Started Now.
Benefits Of Using Elemtor For WordPress Website
Using Elementor for WordPress websites offers several benefits:
User-Friendly Interface: Elementor provides a user-friendly and intuitive interface that allows users of all skill levels to easily create and customize websites. The drag-and-drop functionality and live preview editing make the design process simple and visually engaging.
No Coding Required: With Elementor, you can design and build websites without any coding knowledge. This eliminates the need to hire a developer or learn complex coding languages, saving time and resources.
Extensive Design Options: Elementor offers a wide range of design options, including customizable templates, sections, columns, and widgets. You have complete control over the layout, styling, typography, colors, and effects, allowing you to create unique and visually appealing websites.
Time and Cost Efficiency: Elementor significantly reduces the time and cost involved in website development. It's pre-designed templates and intuitive design features enable you to create professional-looking websites quickly. You can also save and reuse templates, sections, and elements, making the design process more efficient.
Responsiveness and Mobile Editing: Elementor ensures that your website is responsive and mobile-friendly. You can easily preview and edit the design for different screen sizes, ensuring a seamless user experience across devices.
Third-Party Integrations: Elementor seamlessly integrates with various third-party plugins and services. This allows you to extend the functionality of your website by integrating features like contact forms, e-commerce, analytics, SEO, and more, without writing code or dealing with complex integrations.
Dynamic Content and Personalization: With Elementor Pro, you can leverage dynamic content and personalization features. This enables you to display content based on user interactions, create custom templates for different post types, and dynamically populate content from your WordPress database or external sources.
Performance Optimization: Elementor is designed to be lightweight and optimized for performance. It generates clean code and ensures fast loading times for web pages, enhancing the user experience and improving search engine rankings.
Active Community and Resources: Elementor has a large and active community of users and developers. You can find a wealth of resources, tutorials, add-ons, and templates in the Elementor community, making it easy to enhance and customize your website.
Constant Updates and Improvements: Elementor is continuously updated with new features, enhancements, and bug fixes. The development team actively listens to user feedback and keeps up with the latest web design trends, ensuring that Elementor remains a cutting-edge tool for website creation.
These benefits make Elementor a powerful and popular choice for WordPress websites, empowering users to create stunning and functional websites with ease. Get Started Now.
Getting Started With Elementor
Getting started with Elementor is a straightforward process. Here are the steps to begin using Elementor for your WordPress website:
Install and Activate the Elementor Plugin:
Log in to your WordPress dashboard.
Go to “Plugins” and click on “Add New.”
Search for “Elementor” in the plugin search bar.
Click on “Install Now” next to the Elementor plugin.
After installation, click on “Activate” to activate the plugin.
Create New Page
From the WordPress dashboard, navigate to “Pages” and click on “Add New” to create a new page.
Enter a title for your page.
Launch The Elementor Editor
On the page edit screen, look for the “Edit with Elementor” button.
Click on it to launch the Elementor editor.
Explore The Elementor Interference
Once the editor is launched, you’ll see a clean canvas and a panel on the left-hand side.
The canvas is where you’ll build your page, and the panel contains various elements, templates, and settings.
Choose A Template
Elementor provides a wide range of pre-designed templates to choose from.
To access the templates, click on the folder icon in the panel.
Browse through the available templates, filter them by category, and choose the one that suits your needs.
Click on the template to import it into your page.
Customize The Page
With Elementor, you can easily customize your page’s layout, sections, and content.
To add a new element, drag and drop it from the panel onto the canvas.
To edit an existing element, click on it, and the editing options will appear in the left panel.
Customize the text, images, styling, and other settings according to your preferences.
Preview And Publish The Page
To preview your page, click on the “Preview” button in the bottom left corner of the Elementor editor.
Ensure that your page looks and functions as desired.
Once you’re satisfied with the design, click on the “Publish” button to make your page live.
Assign the Page as the Homepage (Optional):
If you want to set the page you created as your website’s homepage, go to “Settings” and then “Reading” in the WordPress dashboard.
Choose the “A static page” option and select the page you created from the “Homepage” dropdown menu.
Save the changes.
Congratulations, You have successfully started using Elementor for your WordPress website. You can continue exploring the various features, settings, and customization options that Elementor offers to create stunning and dynamic web pages, Get Started Now.
Building Pages with Elementor
Building pages with Elementor is a flexible and creative process. Here’s a step-by-step guide to help you effectively build pages using Elementor for your WordPress website:
Create a New Page or Edit an Existing Page:
Log in to your WordPress dashboard.
Navigate to “Pages” and either create a new page or edit an existing one where you want to build your content using Elementor.
Launch the Elementor Editor:
On the page edit screen, look for the “Edit with Elementor” button.
Click on it to launch the Elementor editor, which will replace the default WordPress editor.
3. Choose a Page Structure:
Once you’re in the Elementor editor, you’ll see a clean canvas.
To start building your page, you need to decide on the overall structure.
Drag and drop the “Section” element from the left panel onto the canvas.
Sections divide your page into different parts, allowing you to organize and customize your content more effectively.
4. Customize Sections and Columns:
After adding a section, you can customize its layout and styling.
Click on the section to reveal its settings in the left panel.
Adjust the section’s background, padding, margins, and other design options.
Within each section, you can add columns to further structure your content.
Drag and drop the “Column” element onto the section, and you can choose the number of columns to create.
5. Add and Customize Elements:
Once you have sections and columns in place, you can start adding elements (also known as widgets) to your page.
Elements include text, images, buttons, videos, forms, testimonials, sliders, and more.
Drag and drop the desired element onto the column where you want it to appear.
Customize each element by clicking on it and using the options in the left panel.
Edit text, upload images, adjust styling, apply animations, and configure other specific settings for each element.
6. Utilize Global Widgets (Optional):
Elementor allows you to create global widgets that can be reused across multiple pages.
Global widgets are helpful for creating consistent elements like headers, footers, or call-to-action sections.
To create a global widget, design an element and right-click on it. Then select “Save as Global”.
You can later add the global widget to other pages, and any changes made to the global widget will reflect on all instances.
7. Preview and Adjust:
As you build your page, you can preview it at any time by clicking on the “Preview” button.
This allows you to see how the page will look to your visitors.
If you need to make adjustments, simply return to the editor and modify the desired elements, sections, or columns.
8. Save and Publish the Page:
Once you’re satisfied with the page design, click on the “Save” button to save your changes.
To make the page live on your website, click on the “Publish” button.
You can also set the page as a draft or schedule it to be published at a later time.
Remember to regularly save your work as you build the page to avoid losing any changes.
By following these steps, you can effectively build pages using Elementor and unleash your creativity to design visually stunning and engaging content for your WordPress website. Get Started Now.
Designing a Custom Header and Footer
Designing a custom header and footer with Elementor allows you to create unique and branded elements for your WordPress website. Here’s a step-by-step guide on how to design a custom header and footer using Elementor:
Launch the Elementor Theme Builder:
From your WordPress dashboard, navigate to “Templates” and click on “Theme Builder.”
This area of Elementor allows you to design custom headers, footers, and other global templates.
Create a New Header Template:
Click on the “Add New” button to create a new template.
Select “Header” as the template type.
Choose whether you want to design for the entire site or specific conditions (e.g., only for blog posts).
Click on “Create Template.”
3. Design the Header:
You will be taken to the Elementor editor with a blank canvas for your header template.
Start by adding a section for your header’s content. Drag and drop the “Section” element onto the canvas.
Customize the section’s layout, background, padding, and other styling options using the left panel.
Within the section, add elements such as a logo, menu, social media icons, search bar, or any other desired components.
Customize each element’s settings, text, styling, and placement according to your design preferences.
4. Customize Header for Different Devices (Optional):
Elementor provides the option to customize your header’s appearance for different devices.
Click on the mobile, tablet, or desktop icons at the bottom of the editor to switch between device views.
Adjust the layout, visibility, or styling of specific elements to optimize the header’s display on different screens.
5. Save the Header Template:
Once you’re satisfied with the header design, click on the green “Update” button to save your template.
You can give it a name for easy reference.
6. Create a New Footer Template:
Return to the Elementor Theme Builder area by clicking on “Templates” and “Theme Builder.”
Click on “Add New” and select “Footer” as the template type.
Choose the desired display conditions, such as the entire site or specific pages.
Click on “Create Template.”
7. Design the Footer:
Similar to the header design process, use sections, columns, and elements to create your footer layout.
Add elements like copyright information, navigation links, contact details, social media icons, or any other relevant content.
Customize the elements’ settings, styling, and alignment to achieve your desired footer design.
8. Save the Footer Template:
Once you’ve finished designing the footer, click on the “Update” button to save the template.
Provide a name to easily identify it later.
9. Assign the Header and Footer to Your Website:
After saving both the header and footer templates, they need to be assigned to your website’s pages.
Go to “Appearance” and click on “Customize” to access the WordPress Customizer.
Look for options related to headers or footers, depending on your theme.
Choose the Elementor header template you created and save the changes.
Repeat the process for the footer template.
10. Preview and Publish:
To see the custom header and footer in action, visit your website and navigate to different pages.
Ensure that the design and functionality meet your expectations.
If everything looks good, publish the changes to make the custom header and footer live on your website.
By following these steps, you can design and implement a custom header and footer using Elementor, giving your WordPress website a distinctive and professional look. Get Started Now.
Extending Elementor with Add-ons and Plugins
Elementor can be extended and enhanced with various add-ons and plugins to further expand its functionality and design capabilities. Here’s how you can extend Elementor using add-ons and plugins:
Explore the Elementor Add-ons Library:
Elementor has its own official add-ons library, which offers additional features, widgets, templates, and design elements.
Visit the Elementor website and browse through the available add-ons to find ones that suit your needs.
Select and install the desired add-ons by following the installation instructions provided by the add-on developers.
Install Third-Party Elementor Plugins:
Numerous third-party developers have created plugins specifically designed to enhance Elementor’s capabilities.
Search for Elementor plugins on the WordPress plugin directory or trusted plugin marketplaces.
Read user reviews, check ratings, and evaluate the compatibility and features of the plugins before making a selection.
Install and activate the desired plugins through the WordPress dashboard.
3. Popular Elementor Add-ons and Plugins:
Some popular Elementor add-ons and plugins include:
Essential Addons for Elementor: Offers additional widgets, templates, and extensions to enhance your Elementor experience.
Ultimate Addons for Elementor: Provides a wide range of unique and creative widgets to expand your design possibilities.
Premium Addons for Elementor: Offers advanced widgets, templates, and features to extend Elementor’s capabilities.
PowerPack for Elementor: Provides an extensive collection of widgets, sections, templates, and design elements.
AnyWhere Elementor: Allows you to use Elementor templates and sections in various locations, including sidebars and custom post types.
4. Install Compatible WordPress Plugins:
Elementor works well with many WordPress plugins that can enhance different aspects of your website.
Install plugins that complement Elementor’s features and functionalities, such as SEO plugins, contact form plugins, caching plugins, e-commerce plugins, and more.
Ensure the compatibility of the plugins with Elementor by checking their documentation or contacting the plugin developers if needed.
5. Activate and Configure the Add-ons and Plugins:
After installing the add-ons and plugins, go to the Elementor settings in the WordPress dashboard.
Look for the specific settings related to the installed add-ons and plugins.
Configure the options and features as per your requirements, and make sure to save the changes.
6. Utilize the Added Functionality:
Once the add-ons and plugins are activated and configured, you can start using their additional features and widgets within the Elementor editor.
Explore the new widgets, templates, and design elements provided by the add-ons and plugins.
Experiment with the added functionality to create more dynamic, interactive, and customized web pages.
Remember to keep your add-ons, plugins, and Elementor itself up to date to ensure compatibility, security, and access to the latest features.
By extending Elementor with add-ons and plugins, you can enhance your design capabilities, access new widgets and templates, and unlock additional functionalities, enabling you to create even more visually impressive and feature-rich websites using Elementor.
Optimizing Elementor Pages for Performance
Optimizing Elementor pages for performance is crucial to ensure fast loading times, smooth user experience, and improved search engine rankings. Here are some tips to optimize your Elementor pages for better performance:
Choose a Lightweight Theme:
Selecting a lightweight and optimized WordPress theme sets a solid foundation for performance optimization.
Look for themes that prioritize speed, clean code, and minimal design elements.
Avoid themes with excessive built-in features and bloated code that can impact page loading times.
2. Use a Reliable Hosting Provider:
Opt for a reputable hosting provider that offers optimized server configurations and fast loading times.
Ensure that your hosting provider supports caching mechanisms, Content Delivery Network (CDN) integration, and has adequate server resources to handle your website’s traffic.
3. Minimize Plugin Usage:
Excessive use of plugins can significantly impact page loading times.
Review your installed plugins and remove any unnecessary or redundant ones.
Evaluate whether certain functionality can be achieved through Elementor or a few essential plugins instead of relying on multiple plugins.
4. Enable Element or's Asset Loading Options:
Elementor provides options to optimize the loading of its assets (CSS and JavaScript) to enhance performance.
Go to the Elementor settings in the WordPress dashboard and navigate to the “Advanced” tab.
Enable the “Optimize CSS Loading” and “Optimize JavaScript Loading” options.
This will minimize the number of requests and optimize the loading of Elementor’s assets.
5. Optimize Images:
Large image file sizes can significantly impact page loading times.
Before uploading images to Elementor, compress them using tools like Photoshop, Squoosh, or image compression plugins.
Resize images to the required dimensions to avoid unnecessary scaling within Elementor.
6. Implement Caching:
Caching mechanisms help speed up page loading by storing static versions of your web pages.
Utilize caching plugins like W3 Total Cache, WP Rocket, or WP Super Cache to enable caching on your website.
Configure caching plugins to store static versions of your Elementor pages and optimize caching settings based on your hosting environment.
7. Optimize CSS and JavaScript:
Minimize and combine CSS and JavaScript files to reduce the number of HTTP requests.
Use plugins like Autoptimize or WP Rocket to automate this process.
Combine multiple CSS files into one and defer the loading of JavaScript files where possible.
8. Lazy Load Images and Videos:
Implement lazy loading for images and videos to load them only when they are visible within the viewport.
Lazy loading plugins like Lazy Load by WP Rocket or a theme with built-in lazy loading support can help achieve this optimization.
9. Limit Animations and Effects:
While Elementor offers various animations and effects, excessive use can impact performance.
Use animations and effects judiciously and avoid overwhelming your pages with too many dynamic elements.
10. Regularly Update Elementor and Plugins:
Keep Elementor and its associated plugins up to date to ensure compatibility with the latest optimizations and bug fixes.
Regular updates often include performance improvements that can positively impact your Elementor pages.
11. Test and Monitor Performance:
Utilize tools like Google PageSpeed Insights, GTmetrix, or Pingdom Tools to analyze and monitor your page loading times.
Identify areas of improvement and implement necessary optimizations based on the insights provided.
By following these optimization techniques, you can enhance the performance of your Elementor pages, resulting in faster loading times, improved user experience, and better search engine rankings.
Collaborating and Sharing with Elementor
Collaborating and sharing projects with Elementor allows you to work with team members or share your designs with others. Here’s how you can collaborate and share using Elementor:
Elementor Pro Collaboration Features:
Elementor Pro offers collaboration features that enable multiple users to work on the same project simultaneously.
To use this feature, ensure that you have Elementor Pro installed and activated on your WordPress website.
Go to Elementor settings in the WordPress dashboard and navigate to the “General” tab.
Enable the “Enable Role Manager” option to access the collaboration features.
2. Assign User Roles and Permissions:
With Elementor Pro’s Role Manager, you can assign different user roles and control their permissions within the Elementor editor.
Determine the access levels for each user, such as editing, designing, or only viewing capabilities.
Assign roles to team members based on their responsibilities and requirements.
3. Collaborate in Real-Time:
Once user roles and permissions are set up, multiple users can access and edit the same Elementor project simultaneously.
Users can work together, make changes, and see each other’s updates in real time within the Elementor editor.
This streamlines the collaboration process and allows for efficient teamwork.
4. Use Elementor Templates and Library:
Elementor’s template and library features make it easy to share designs and collaborate on specific sections or entire pages.
Save sections, columns, or entire page layouts as templates within Elementor.
Export these templates as JSON files and share them with team members or other Elementor users.
Team members can import the templates and integrate them into their own projects, ensuring consistency and saving time.
5. Export and Import Elementor Designs:
Elementor allows you to export and import entire designs or specific sections as JSON files.
Export the design you want to share by right-clicking on the section or template and selecting “Save as Template.”
Save the JSON file and provide it to collaborators or other Elementor users.
They can import the JSON file into their Elementor editor by clicking on “Add Template” and selecting the import option.
6. Utilize Cloud Storage or Project Management Tools:
If you prefer to collaborate outside of the Elementor editor, you can utilize cloud storage platforms like Google Drive, and Dropbox, or project management tools like Asana, Trello, or Slack.
Share design files, templates, or exported JSON files through these platforms to collaborate with team members or share with clients.
7. Provide Documentation or Style Guides:
To ensure consistent design implementation and collaboration, provide documentation or style guides to team members or clients.
Document design principles, brand guidelines, color codes, fonts, and other design-related specifications.
This helps maintain a unified design language and ensures everyone involved in the project understands the design requirements.
By leveraging the collaboration and sharing features of Elementor, you can streamline teamwork, share designs with others, and facilitate efficient collaboration on projects. Whether it’s working together in real-time within the Elementor editor or utilizing external tools and platforms, Elementor offers flexibility to accommodate various collaboration needs.
Elementor Pro: Advanced Features and Functionality
Elementor Pro offers a range of advanced features and functionality that take your website design and development to the next level. Here are some key advanced features and functionalities provided by Elementor Pro:
Theme Builder:
The Theme Builder feature allows you to create and customize your entire website’s theme using Elementor.
Design and customize headers, footers, single post templates, archive pages, and other dynamic templates.
Create and assign different templates to specific sections of your website based on conditions such as post types, categories, or tags.
2. Dynamic Content:
Elementor Pro enables you to dynamically display content from your WordPress database or external sources.
Use dynamic content widgets to showcase posts, custom fields, user information, WooCommerce products, and more.
Create personalized and dynamic templates that automatically populate content based on the context.
3. WooCommerce Integration:
Elementor Pro offers seamless integration with WooCommerce, the popular e-commerce platform.
Design and customize product pages, shop pages, cart pages, and checkout pages using Elementor.
Utilize WooCommerce widgets and dynamic content to showcase products, categories, prices, ratings, and other e-commerce elements.
4. Advanced Design Options:
Elementor Pro provides additional design options and effects to enhance the visual appeal of your website.
Access advanced typography settings, including custom fonts, letter spacing, and line height control.
Apply motion effects such as parallax scrolling, mouse tracking, and entrance animations to add interactivity to your designs.
Use the built-in shape divider feature to create visually appealing section transitions.
5. Custom Field Integration:
Elementor Pro allows you to integrate custom fields created with popular WordPress plugins like Advanced Custom Fields (ACF) and Toolset.
Fetch and display custom field data within your Elementor designs, creating dynamic and personalized content.
6. Form Builder:
Elementor Pro includes an advanced form builder that lets you create custom contact forms and lead generation forms.
Customize form fields, validation messages, success messages, and submit button styling.
Integrate forms with popular email marketing services such as Mailchimp, ConvertKit, and HubSpot to seamlessly capture leads.
7. Role Manager:
Elementor Pro’s Role Manager feature enables you to control user access and permissions within the Elementor editor.
Assign different roles to team members or clients, allowing them to have specific levels of access and editing capabilities.
8. Marketing and Conversion Features:
Elementor Pro offers marketing-oriented features to boost conversions and optimize your website’s performance.
Utilize A/B testing to compare different designs and content variations to optimize conversion rates.
Leverage advanced targeting and display conditions to show or hide specific content based on user behavior and preferences.
These advanced features and functionalities provided by Elementor Pro empower you to create highly customized, dynamic, and feature-rich websites. Whether it’s advanced design options, WooCommerce integration, dynamic content, or marketing-focused features, Elementor Pro gives you the tools to build professional-grade websites with ease.
Troubleshooting and Support
While Elementor is a robust and user-friendly tool, you may encounter occasional issues or need assistance with certain aspects. Here are some troubleshooting steps and support resources to help you resolve problems with Elementor:
Documentation and Knowledge Base:
Elementor provides comprehensive documentation and a knowledge base on its website.
Visit the Elementor Help Center or Documentation section to access tutorials, guides, FAQs, and troubleshooting articles.
Search for specific topics or browse through the available resources to find solutions to common issues.
2. Community Forums and Facebook Groups:
Join Elementor’s official community forums or Facebook groups where users and experts discuss and help each other with Elementor-related queries.
Post your question or problem in the relevant forum or group and seek assistance from the community.
Ensure that you provide detailed information about the issue, including error messages, screenshots, or steps to reproduce the problem.
3. Official Support Ticket:
If you are an Elementor Pro user, you have access to official support provided by Elementor.
Submit a support ticket through the Elementor website or your Elementor account.
Provide relevant details about the issue, such as website URL, WordPress version, Elementor version, and steps to reproduce the problem.
Elementor’s support team will respond to your ticket and provide guidance or resolutions.
4. Check for Plugin or Theme Conflicts:
Sometimes conflicts between Elementor and other plugins or themes can cause issues.
Disable other plugins temporarily to check if the problem persists.
Switch to a default WordPress theme (e.g., Twenty Twenty-One) to see if the issue is related to your current theme.
If the issue resolves after disabling a plugin or switching themes, it indicates a conflict, and you can contact the respective plugin or theme developer for assistance. Get Started Now.
5. Clear Cache and Refresh:
If you make changes to your Elementor pages, but they are not reflecting on the live site, clear your browser cache and refresh the page.
Additionally, clear any caching plugins you may have installed, such as WP Rocket or W3 Total Cache.
Clearing the cache ensures that you see the most up-to-date version of your Elementor pages.
6. Update Elementor and Related Plugins:
Keep your Elementor plugin, Elementor Pro, and other related plugins up to date.
Updates often include bug fixes, performance improvements, and compatibility enhancements.
Check for available updates in the WordPress dashboard and update the plugins accordingly.
7. Reinstall Elementor:
If you encounter persistent issues that are not resolved through other troubleshooting steps, you can try reinstalling Elementor.
Deactivate and delete the Elementor plugin from the WordPress dashboard.
Reinstall Elementor by going to “Plugins” > “Add New” and searching for Elementor.
Activate the plugin again and check if the issue persists.
Remember to always keep a backup of your website before making any major changes or updates.
By following these troubleshooting steps and utilizing the available support resources, you can resolve common issues and seek assistance when needed to ensure a smooth experience with Elementor.
Unleash Your Creativity: Try Elementor for Your WordPress Website Today
Are you looking to take your WordPress website to the next level? Want to design stunning pages without the need for coding skills? Look no further than Elementor, the powerful visual page builder that empowers millions of users worldwide. In this article, we’ll explore the reasons why you should give Elementor a try and how it can revolutionize your website design experience.
Intuitive and User-Friendly Interface: Elementor provides a seamless and user-friendly interface that allows you to effortlessly create and customize your website. With its drag-and-drop functionality and live preview editing, you can visually design your pages in real time, making the process enjoyable and efficient.
2. Endless Design Possibilities: Say goodbye to cookie-cutter websites! Elementor offers a vast library of pre-designed templates, sections, and widgets that you can customize to match your brand and vision. With complete control over layouts, typography, colors, and styling, you can create truly unique and visually stunning websites that stand out from the crowd.
3. No Coding Required: You don’t have to be a coding expert to use Elementor. It eliminates the need to write complex code, making it accessible to users of all skill levels. Now you can bring your creative ideas to life without the technical barriers.
4. Lightning-Fast Performance: Elementor prioritizes performance optimization, ensuring that your website loads quickly and offers a smooth user experience. Its clean code, optimized assets loading, and compatibility with caching plugins help you deliver lightning-fast websites that keep your visitors engaged.
5. Seamless Integration with WordPress and Plugins: Elementor seamlessly integrates with WordPress and a wide range of third-party plugins, enhancing your website’s functionality. Whether you need advanced forms, e-commerce capabilities, SEO optimization, or other features, Elementor plays well with popular plugins, providing a comprehensive solution for your website needs.
6. Active Community and Extensive Resources: Join the thriving Elementor community and tap into a wealth of knowledge, inspiration, and support. Engage with other users in forums and Facebook groups, access official documentation, tutorials, and video guides, and unlock the potential of Elementor through the shared experiences and expertise of the community.
Conclusion
If you’re ready to take your WordPress website design to new heights, it’s time to try Elementor. With its intuitive interface, limitless design possibilities, and seamless integration, Elementor empowers you to create visually stunning and functional websites without coding. Join millions of satisfied users and unlock your creative potential with Elementor. Get started today and watch your website transform into a masterpiece. Get Started Now.
About the Creator
Keep reading
More stories from Collins Ugorji and writers in 01 and other communities.
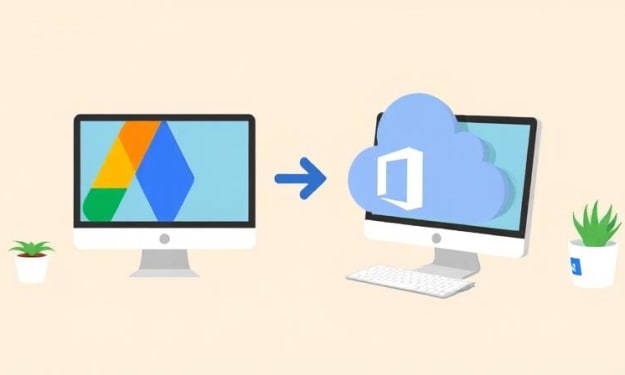
Migrate from G Suite to Office 365 While Preserving Metadata & Permissions
With the growing business size, the storage and resource requirements also start to evolve. Several aspiring businesses migrate from Google Workspace to Office 365 to access advanced collaboration and communication tools. Google Workspace and Office 365, both are feature-rich SaaS platforms, designed to boost the efficiency of business operations. However, they are still quite different from each other and can experience challenges during the shift.
By Xanthe Clay2 days ago in 01


Comments
There are no comments for this story
Be the first to respond and start the conversation.