
CSS Syntax: Your First Lines of Code
So, you’ve decided to dive into the world of web design, and CSS (Cascading Style Sheets) is your new playground. Congratulations!


CSS is the magic wand that turns bland HTML pages into beautiful, engaging websites. But before you can start casting spells and making web pages dance to your tune, you need to understand the basics of CSS syntax. Think of it as learning the alphabet before writing your first novel.
In this article, we’ll walk through the fundamental elements of CSS syntax. By the end, you’ll be equipped to write your first lines of CSS code with confidence and style. Let’s get started!
1. What Is CSS Syntax?
CSS syntax is the set of rules and guidelines you follow when writing CSS code. It’s like the grammar of a language: without it, your sentences (or in this case, your styles) won’t make any sense. CSS syntax is surprisingly straightforward, which is great news for beginners. But don’t let its simplicity fool you — CSS syntax is powerful, enabling you to control the look and feel of every element on your web page.
The Basic Structure
At its core, a CSS rule consists of three main parts:
- Selector: The HTML element you want to style.
- Property: The aspect of the element you want to change (e.g., color, font size).
- Value: The specific change you want to make.
Here’s what it looks like in code:
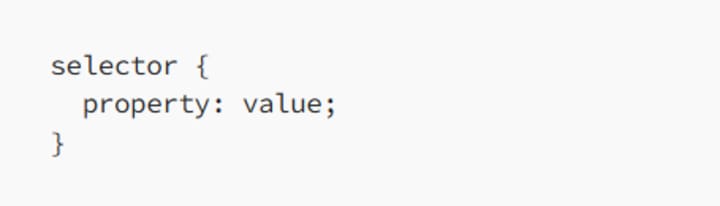
That’s it! It’s a simple, repeatable pattern that you’ll use again and again as you build out your styles. Now, let’s break it down.
2. Selectors: Pointing to the Right Element
The first part of any CSS rule is the selector, which tells the browser which HTML element or elements you want to style. Think of selectors as your way of pointing a finger and saying, “Style this!” Here are some common selectors:
2.1 Element Selectors
Element selectors target HTML tags directly. For example, to style all <p> (paragraph) elements on your page, you would write:
p {
color: blue;
}
This rule changes the text color of every paragraph to blue. Element selectors are great when you want to apply the same style to all instances of an HTML tag.
2.2 Class Selectors
Class selectors are more specific. They allow you to target elements that have a particular class attribute. You create a class selector by prefixing a period (.) to the class name:
.my-class {
font-size: 20px;
}
In your HTML, you’d apply this class to an element like this:
<p class="my-class">This text is styled with a class selector.</p>
This rule only affects elements with the my-class attribute, leaving all other paragraphs alone.
2.3 ID Selectors
ID selectors are even more specific, targeting a single element with a unique ID attribute. ID selectors are created by prefixing a hash (#) to the ID name:
#my-id {
background-color: yellow;
}
In your HTML, you’d use it like this:
<div id="my-id">This div has a yellow background.</div>
ID selectors are powerful but should be used sparingly, as IDs are meant to be unique within a page.
2.4 Grouping Selectors
Sometimes, you want to apply the same style to multiple elements. Rather than writing separate rules, you can group selectors together by separating them with commas:
h1, h2, h3 {
font-family: Arial, sans-serif;
}
This rule applies the same font to all <h1>, <h2>, and <h3> elements.
3. Properties and Values: Defining the Style
After the selector comes the property, which specifies what aspect of the selected element you want to style. Each property is paired with a value that defines how the style should look.
3.1 Common Properties
Here are some of the most commonly used CSS properties:
Color: Changes the text color.
color: red;
Font-size: Adjusts the size of the text.
font-size: 16px;
Background-color: Sets the background color of an element.
background-color: lightgray;
Margin: Adds space around an element, outside of its border.
margin: 10px;
Padding: Adds space inside an element, between its content and its border.
padding: 15px;
3.2 Understanding Units
CSS values often include units. Here are a few you’ll encounter frequently:
Pixels (px): Fixed size, commonly used for precise control.
width: 200px;
Percentages (%): Relative size, based on the parent element.
width: 50%;
Ems (em): Relative to the font size of the element (1em = current font size).
font-size: 1.2em;
Each property-value pair is like an instruction, telling the browser exactly how to style the selected elements.
4. The Role of Curly Braces, Colons, and Semicolons
When writing CSS, you’ll use a few special characters that help organize and structure your code. These characters might seem trivial, but they play an essential role in making your CSS work correctly.
4.1 Curly Braces {}
Curly braces enclose the block of CSS rules that apply to a selector. Everything between the curly braces belongs to the selector:
p {
color: green;
font-size: 18px;
}
In this example, both the color and font-size properties apply to the <p> element.
4.2 Colons :
A colon separates the property from its value:
font-size: 16px;
This tells the browser, “The font-size property should have a value of 16 pixels.”
4.3 Semicolons ;
Semicolons are used to separate different property-value pairs within a selector:
background-color: yellow;
border: 1px solid black;
The semicolon is like a period at the end of a sentence. It tells the browser, “This rule is complete. Move on to the next one.”
Missing a semicolon can cause your entire block of CSS to fail, so always double-check that each property-value pair ends with a semicolon.
5. Writing Your First CSS Rule: A Step-by-Step Guide
Now that you understand the basics, it’s time to write your first CSS rule. Follow these steps to apply a simple style to an HTML document:
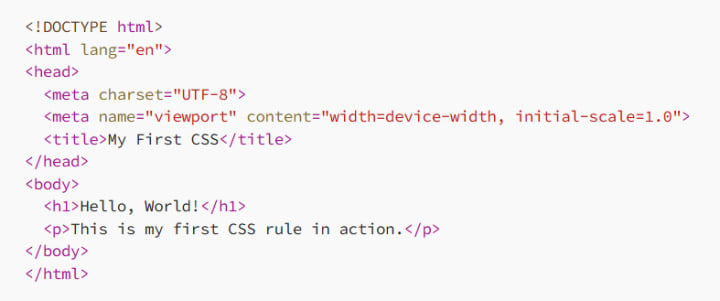
5.1 Set Up Your HTML
Start with a basic HTML structure:
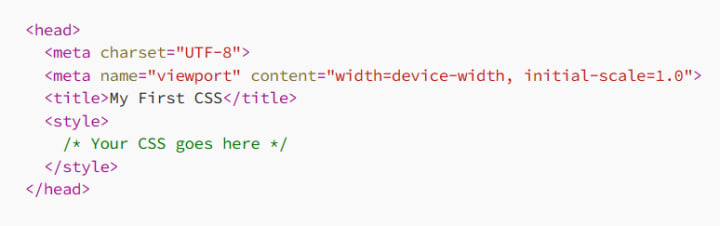
5.2 Add a Style Tag
Next, add a <style> tag in the <head> section to write internal CSS:
5.3 Write Your First Rule
Inside the <style> tag, write a rule to change the color of the <h1> element:
h1 {
color: blue;
}
Now, when you open this HTML file in a browser, the “Hello, World!” heading should appear in blue.
5.4 Add More Styles
Feel free to add more styles to see how they affect your page. For example:
p {
font-size: 18px;
color: darkgray;
}
This rule will style the paragraph with a larger font size and change its color to dark gray.
6. Comments: Writing Notes in Your CSS
As your CSS grows, it’s important to keep things organized. One way to do this is by adding comments. Comments are notes in your code that the browser ignores, but they’re incredibly useful for anyone reading your code (including your future self).
6.1 Writing a Comment
Comments in CSS are written between /* and */:
/* This is a comment */
p {
color: red;
}
You can also place comments on the same line as your code:
p {
color: red; /* This makes the paragraph text red */
}
Use comments to explain what your code does, why you made certain choices, or to mark sections of your CSS for easier navigation.
7. External CSS: Keeping Things Neat and Tidy
As your CSS skills improve and your stylesheets grow, you’ll want to start using external CSS files. External CSS keeps your HTML clean and allows you to reuse the same styles across multiple pages.
7.1 Creating an External CSS File
Start by creating a new file with a .css extension, like styles.css. Then, move your CSS code into this file:

7.2 Linking to Your HTML
In your HTML document, link to the external CSS file by adding a <link> tag inside the <head> section:
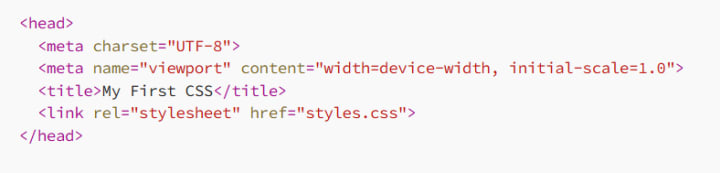
Now, your styles are applied from an external file, keeping your HTML cleaner and making it easier to manage your CSS.
8. Conclusion: Your First Steps into CSS Mastery
Congratulations! You’ve just written your first lines of CSS and learned the basics of CSS syntax. While these are your first steps, they are crucial ones. Understanding selectors, properties, and values is foundational to everything you’ll do with CSS.
As you continue your journey, remember that CSS is both an art and a science. Experiment with different styles, play around with selectors, and don’t be afraid to make mistakes. With practice, you’ll not only master CSS syntax but also develop your own unique style and approach to web design. Happy coding!
About the Creator
MariosDev
Hi, I’m Marios! I’ve been a developer for over 9 years, crafting cool stuff and solving tricky tech puzzles. I’m a total tech enthusiast and love sharing my thoughts and tips through blogging. Also, in love with my bike!
From $5.9B to $19B: Why Data Is Powering the Rise of Payer Analytics in Healthcare
Healthcare systems worldwide generate enormous volumes of data every day—from insurance claims and billing records to patient demographics and treatment histories. As healthcare spending increases and reimbursement models shift toward value-based care, insurers and health plans must analyze this data effectively to remain sustainable. This is where payer analytics in healthcare is becoming a crucial technology foundation.
By Steve Waugha day ago in 01


Comments
There are no comments for this story
Be the first to respond and start the conversation.