
What is the proper order of roof installation?
What is the proper order of roof installation?
Installing a roof is a complex project that requires careful planning and professional execution to ensure durability and long-term protection. Whether you're building a new roof or replacing an existing one, following the correct order of steps is essential for a successful installation. Here's a guide to the proper order of roofing installation and what each stage involves.
1. Initial Inspection and Preparation
Before any work begins, a professional roofing contractor will conduct an initial inspection to assess the condition of the existing roof (if applicable) and the structure beneath it. This inspection helps identify any damage, such as rot or leaks, that must be addressed before installing the new roof.
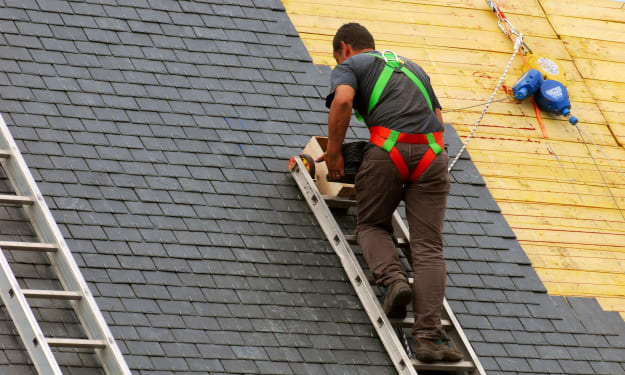
Once the inspection is complete and the materials are chosen, the work area is prepared. This includes setting up safety measures and protecting surrounding areas, such as landscaping or driveways, to prevent damage during the roofing process.
2. Removal of the Old Roof (if applicable)
If you’re replacing an existing roof, the next step is to remove the old roofing material. This includes taking off the shingles, underlayment, flashing, and any other layers down to the bare roof deck. Proper removal ensures that any hidden damage, such as water infiltration or mold, can be detected and repaired before moving forward.
3. Inspecting and Repairing the Roof Deck
Once the old materials are stripped away, the roof deck is inspected for damage. The roof deck is the wooden base that supports the roofing material, and it's essential that this structure is solid and intact. Any damaged or rotten sections of the deck are repaired or replaced at this stage to provide a sturdy foundation for the new roof.
4. Installing the Drip Edge
The next step in the process is to install a drip edge, which is a metal flashing that is attached to the edges of the roof. The drip edge helps direct water away from the fascia and into the gutters, preventing water damage to the home’s structure. It’s installed along the eaves and gables, forming the first layer of defense against water penetration.
5. Laying the Underlayment
After the drip edge, the roofing underlayment is installed. This is a critical layer that provides a waterproof barrier between the roof deck and the outer roofing material. The underlayment helps prevent water from seeping through to the wood deck and causing damage. It’s typically made from felt or synthetic materials and is rolled out across the entire roof surface.
6. Installing Flashing
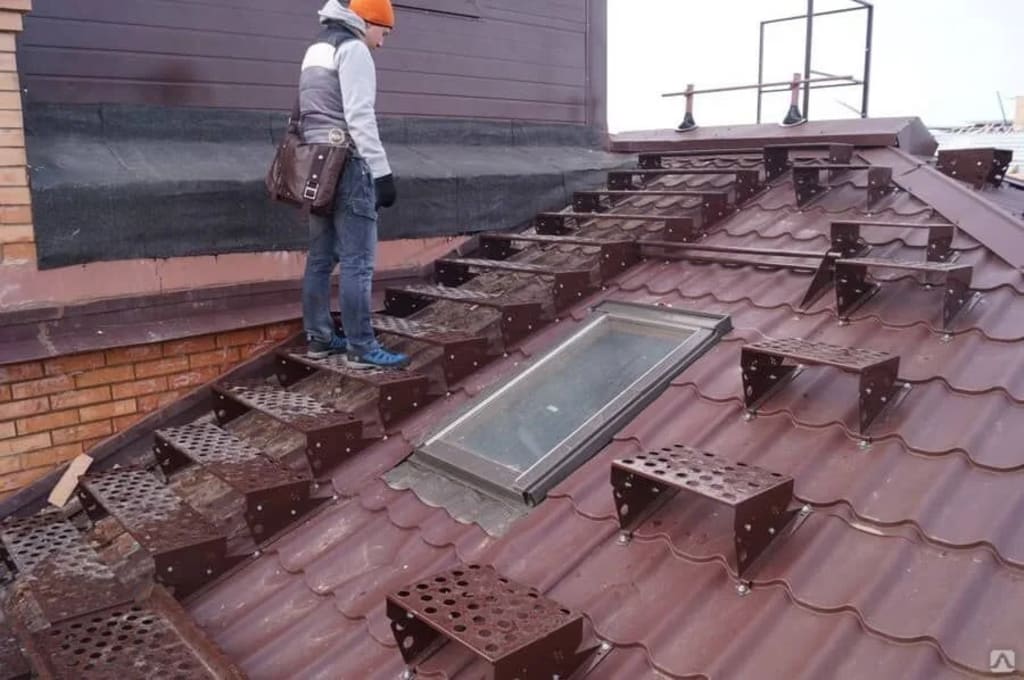
Flashing is installed in vulnerable areas where the roof meets other structures, such as chimneys, vents, skylights, and valleys. Flashing helps divert water away from these points and prevents leaks. Proper installation of flashing is crucial for the roof’s water resistance and overall durability.
7. Installing the Roofing Material
Once the protective layers are in place, the primary roofing material is installed. Whether you’ve chosen asphalt shingles, metal panels, tiles, or another material, this is the stage where the outer surface of your roof takes shape. The material is applied starting from the bottom of the roof and working upward, with each piece overlapping the one below it to create a water-resistant seal.
For example, in shingle roofing:
Shingles are laid in rows from the bottom edge of the roof, overlapping as they go up.
Each shingle is nailed securely in place, and special attention is paid to valleys and roof edges to ensure full coverage and protection.
8. Installing Ridge Caps and Vents
The ridge caps are installed along the roof’s highest point, where the two slopes meet. These caps provide extra protection against water infiltration at the peak of the roof. Proper ventilation is also installed at this point to allow airflow in the attic, which helps regulate temperature and prevent moisture buildup that can damage the roof over time.
Ridge vents or other types of roof ventilation systems are critical for maintaining the energy efficiency of the home and extending the life of the roof.
9. Final Inspection
After the installation is complete, the Outstanding Roofing LLC performs a final inspection. This includes checking all areas for proper sealing, ensuring there are no gaps or issues with the roofing material, and confirming that the flashing and ventilation systems are properly installed. A thorough inspection guarantees the roof is secure, watertight, and built to last.
10. Clean-Up and Debris Removal
Once the roof has passed the final inspection, the job site is cleaned up. This includes removing any leftover roofing materials, nails, and debris from the property. A good contractor will ensure that your yard, driveway, and surrounding areas are free of clutter, leaving your home looking just as it did before the project began.
11. Warranty and Maintenance Tips
After installation, your roofing contractor will provide you with warranty information for both the materials and workmanship. It’s important to understand the terms of the warranty and how to maintain your new roof. Regular inspections and maintenance, such as cleaning gutters and checking for damage after storms, can extend the life of your roof.
Conclusion
The process of installing a roof follows a specific order to ensure structural integrity, durability, and water resistance. By following these steps—from preparation and material installation to final inspection—a professional roofing contractor ensures that your new roof is installed correctly and will protect your home for years to come. Proper roof installation not only enhances the safety and comfort of your home but also adds to its overall value and curb appeal.
About the Creator
Keep reading
More stories from onecallbailbonds and writers in Writers and other communities.
Choosing the Right Materials for Roofing
When it comes to roofing, making the right choices is crucial for the longevity, safety, and appearance of your home or business. Whether you're building a new structure, replacing an old roof, or just looking to improve your property, selecting the best roofing materials and hiring a qualified contractor are vital steps. This blog will guide you through what makes a roofing option "best" for your needs and how to ensure you're making the right decisions for your investment.
By onecallbailbondsabout a year ago in Confessions
March 15, 2026
Merriam Webster - Word of the day: Tranche refers to a division or portion of a whole. World Contact Day is commemorated every year on March 15. It is a unique observance held globally to focus on communicating with extraterrestrial life and exploring the possibility that intelligent beings may exist beyond Earth. World Contact Day inspires people to invoke their curiosity and spend time thinking about the universe and the mysteries surrounding it. What is the “Ides of March”? According to the Roman calendar, the Ides are a monthly occurrence. In March and other months with 31 days, the Ides always falls on the 15th; it falls on the 13th in months with 30 days. The Ides traditionally marked the arrival of the new Moon and was cause for celebration. The word “Ides” is derived from Latin, meaning “to divide.” Mothering Sunday in 2026 falls on Sunday, March 15. Mothering Sunday, celebrated in the United Kingdom and Ireland, occurs on the fourth Sunday of Lent, which is exactly three weeks before Easter. Unlike the fixed-date Mother's Day in countries like the United States, Canada, and Australia, Mothering Sunday’s date changes each year according to the Christian liturgical calendar. On March 15, 2026, several notable observances and events are celebrated: Dumbstruck Day: A day to express frustration. Everything You Think is Wrong Day: A day to challenge and celebrate wrong beliefs. International Day Against Police Brutality: A day to raise awareness and advocate against police violence. My look at today, March 15, 2026 below:
By Denise E Lindquistabout 14 hours ago in Writers
How Supply Chain Disruptions Affect Aircraft Parts Availability
Aircraft operations depend on the steady supply of replacement parts, components and maintenance materials. Airlines, maintenance providers and aviation service companies depend on a steady supply of aircraft parts to keep fleets operating safely and efficiently. However, global supply chains are complex networks involving manufacturers, distributors, logistics providers, and regulatory authorities. When disruptions occur within this system, the availability of aircraft parts can quickly become limited.
By Beckett Dowhan5 days ago in Writers


Comments
There are no comments for this story
Be the first to respond and start the conversation.