
How to Fit Artificial Grass
Fit Artificial Grass

Fitting artificial grass is a fantastic way to transform your outdoor space. It’s durable, low-maintenance, and always looks lush. With proper artificial grass installation, your lawn can remain beautiful year-round. This guide will walk you through installing artificial grass step by step, from preparation to maintenance tips. By the end, you'll have all the knowledge you need to successfully install artificial turf.
Why Choose Artificial Grass?
Before we get into the process of artificial grass installation, it’s worth exploring why it’s such a popular option. Artificial turf is a smart choice for homeowners looking for a green lawn without the hassle of mowing, watering, or dealing with pests. It's perfect for pet owners, families with kids, and anyone looking to reduce their garden upkeep. Plus, with advancements in quality, artificial lawns now look just like the real thing!
Preparing for Artificial Grass Installation
Proper preparation is key to a long-lasting artificial lawn installation. Start by assessing your space and gathering the necessary tools. Being prepared saves time and ensures seamless installing of artificial grass.
Gather Your Tools
You’ll need the following tools and materials before getting started:
Artificial turf
Weed membrane
Tape measure
Utility knife
Garden rake
Shovel
Joining tape and adhesive
Landscape pins or nails
Silica sand for infill
A compactor (either manual or machine)
Clear the Area
Remove existing grass, plants, rocks, and debris. A clear and even base is essential for proper artificial lawn installation. If you're installing artificial turf on concrete, clean the area thoroughly to remove dust and grease.
Level the Ground
Level the ground where you'll lay your artificial grass. Uneven surfaces may cause bumps or lumps in the turf. For soil surfaces, compact the area firmly to create a solid base.
Installing Artificial Grass Step by Step
Now that your space is prepared, you’re ready for the artificial grass installation. By following these steps, your lawn will be flawless and long-lasting.
Step 1: Lay the Base Layer
For most soil installations, start by adding a base layer of crushed stone or gravel, around 2-3 inches deep. This layer improves drainage and ensures your artificial turf stays supported. Use a compactor to press down the base until it’s even.
Step 2: Install Weed Membrane
Place a weed barrier over the crushed stone to prevent weeds from growing up through your artificial grass. Cut the membrane to size, ensuring it covers the entire surface.
Step 3: Roll Out the Artificial Grass
Carefully roll out the artificial turf over the prepared surface. Allow it to settle for at least one to two hours—this helps the turf acclimate to its environment and reduces wrinkles. Ensure the grass fibers face the same direction for a uniform look.
Step 4: Cut to Fit
Using a utility knife, trim the edges of the artificial turf to fit the space perfectly. Take your time to avoid overcutting, especially around curves or corners.
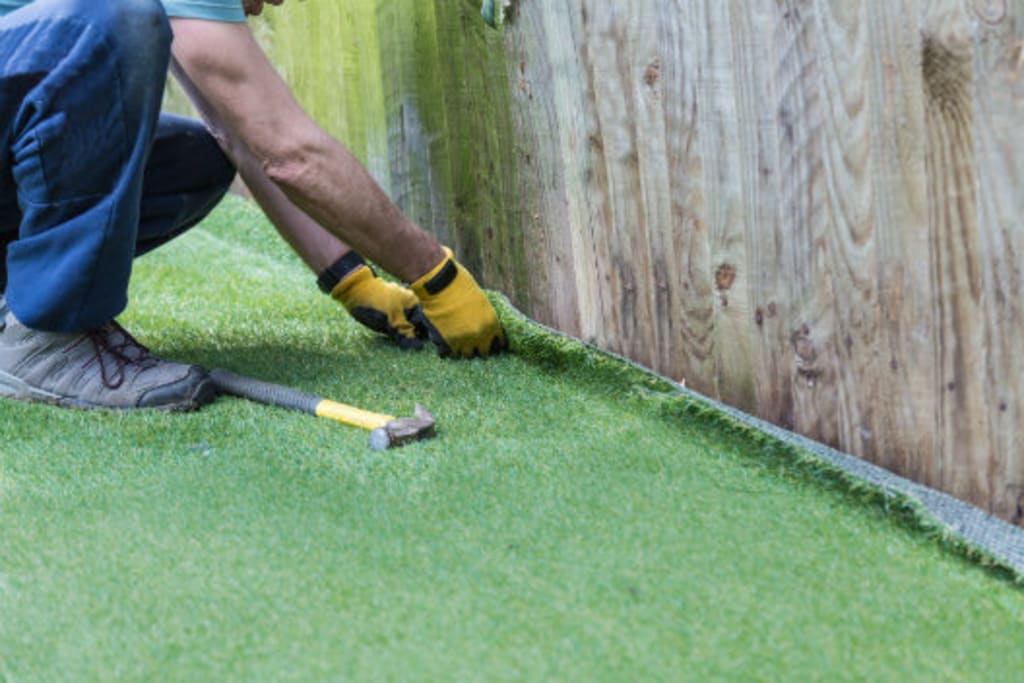
Step 5: Secure the Edges
Secure the edges of the turf with landscape nails or pins. Install nails every 6-8 inches along the perimeter, ensuring the corners are firmly held in place. If you're installing artificial turf on concrete, use adhesive instead of nails.
Step 6: Join Sections of Turf
For larger spaces requiring multiple pieces of turf:
Place the edges of each piece closely together.
Lay joining tape beneath the seam and apply adhesive.
Press the edges together and weigh them down for an even bond. Seamless joining ensures a clean, professional finish for your artificial lawn installation.
Step 7: Add Sand and Brush
Spread silica sand evenly over the artificial grass. Brushing the sand into the turf keeps the fibers upright, enhances weight, and improves stability. Use a soft-bristled broom to distribute the sand without damaging the blades.
Tips for a Professional Finish
Double-check the direction of grass fibers before securing them.
Use a mechanical compactor for a smoother base.
Cut slowly and carefully to avoid errors.
Periodically step back to check your progress for alignment and consistency.
Maintaining Your Artificial Turf
Once your artificial grass installation is complete, maintenance is minimal. Follow these simple tips to keep your artificial lawn in top condition:
Cleaning
Cleaning your artificial turf is easy. Use a leaf blower, broom, or garden hose to remove dirt, debris, and animal waste. For stains, a mild soap solution is often enough to keep your turf looking fresh.
Grooming
To maintain the natural look of the turf, brush it occasionally with a stiff brush or broom. This raises the fibers and ensures they don’t become matted.
Weed Prevention
While the weed membrane minimizes unwanted growth, some weeds may sprout around the edges. Pull them out by hand or apply a safe weed killer.
Inspect the Edges
Inspect your turf’s edges and seams periodically to ensure they remain secure. Over time, you may need to re-apply adhesive or replace nails.
Why Artificial Grass is a Great Investment
A properly done artificial grass installation adds value to your property. Beyond saving time and effort, it also reduces water consumption and provides a consistently green, clean-looking outdoor area. Whether you’re creating a play area, a pet-friendly yard, or a low-maintenance garden, artificial turf is an excellent choice.
By following these steps for installing artificial grass, you’ll have a stunning outdoor space that requires minimal maintenance. Whether you’re a DIY enthusiast or hiring professionals, this guide ensures a smooth installation process. Start planning your project today and enjoy the countless benefits of an artificial lawn!
About the Creator
Landscaper Huddersfield
Transform your outdoor space with our expert landscaping services! Whether you need a new driveway, a bespoke garden design, or regular lawn maintenance, we’re here to help.
Keep reading
More stories from Landscaper Huddersfield and writers in Writers and other communities.
Transforming Your Outdoor Space with Professional Landscaping
Creating a beautiful and functional outdoor area can enhance both the appeal and value of your property. Whether you're looking to relax in a lush, green garden or create a dynamic space for entertaining guests, landscaping is key. For homeowners and property managers in Huddersfield, working with experienced landscapers can make all the difference. With professional expertise, you can bring your outdoor vision to life while making smart investments in landscaping costs.
By Landscaper Huddersfieldabout a year ago in Writers
Unofficial Challenge: Black History Celebration
Forward: February 28th, 10:53 PM, EST... The final hour of Black History Month, 2026. Hello fellow writers. I've had this challenge waiting in my drafts for most of the month. But I held off on publishing it, until now.
By Sam Spinelli5 days ago in Writers
Finding Stability Through Daily Quran Recitation
Life moves quickly. Messages arrive constantly, responsibilities pile up, and quiet moments can feel rare. In that noise, many people notice a deeper kind of fatigue—one that rest alone does not fix. For Muslims, the Quran has long served as a source of grounding in times like these. Daily recitation is not about escaping the world, but about learning how to move through it with clarity and balance.
By Abbasi Publishera day ago in Writers


Comments
There are no comments for this story
Be the first to respond and start the conversation.