
How to Build a Tennis Court in Outdoor
A Comprehensive Guide of Sport Court Construction
Tennis is a sport that is enjoyed by millions of people around the world. It is a great way to stay active, socialize, and have fun. However, playing on a public tennis court can be frustrating at times due to overcrowding, poor maintenance, and long wait times. If you are an avid tennis player, you may have considered building your own private tennis court. In this guide, we will take you through the step-by-step process of building your very own tennis court.
Step 1: Choosing the Right Location
The first step in building a tennis court is to find the right location. A tennis court requires a flat, level surface that is free from any obstructions such as trees or rocks. The ideal location is an area with good drainage and plenty of sunlight. You also need to make sure that the location is easily accessible from your home or other buildings on your property.
Step 2: Getting Permits and Approvals
Before you begin construction, you need to obtain the necessary permits and approvals from your local government. This will likely include a building permit and zoning approval. Check with your local government to find out what permits and approvals you need before starting construction.
Step 3: Preparing the Site
Once you have chosen the location and obtained the necessary permits and approvals, you can begin preparing the site. The first step is to clear the area of any obstructions such as trees, rocks, and debris. Next, you need to level the surface to ensure that it is flat and even. You may need to bring in fill dirt or other materials to create a level surface.
Step 4: Building the Foundation
The foundation of your tennis court is crucial to its longevity and performance. There are two types of foundations commonly used for tennis courts: a concrete slab or a post-tensioned concrete slab. A concrete slab is a solid, thick layer of concrete that is poured directly onto the prepared surface. A post-tensioned concrete slab is similar to a regular concrete slab, but it has cables or tendons running through it that are tightened after the concrete has cured. This creates a more stable and durable foundation.
Step 5: Installing the Fencing
Once the foundation is complete, you can begin installing the fencing. The fencing should be at least 10 feet high and made of a durable material such as chain link or vinyl. The fencing should be installed around the entire perimeter of the court to ensure that balls do not escape and to provide a barrier between the court and any surrounding structures.
Step 6: Pouring the Surface
The surface of the tennis court is the final step in the construction process. There are several options for the surface, including asphalt, concrete, and synthetic materials. Each surface has its advantages and disadvantages, so it is important to choose the one that best meets your needs and budget.
Asphalt is the most commonly used surface for tennis courts. It is durable, relatively inexpensive, and provides good traction. Concrete is another option, but it is less commonly used because it can be slippery when wet. Synthetic surfaces, such as acrylic or rubber, are becoming increasingly popular due to their durability and low maintenance.
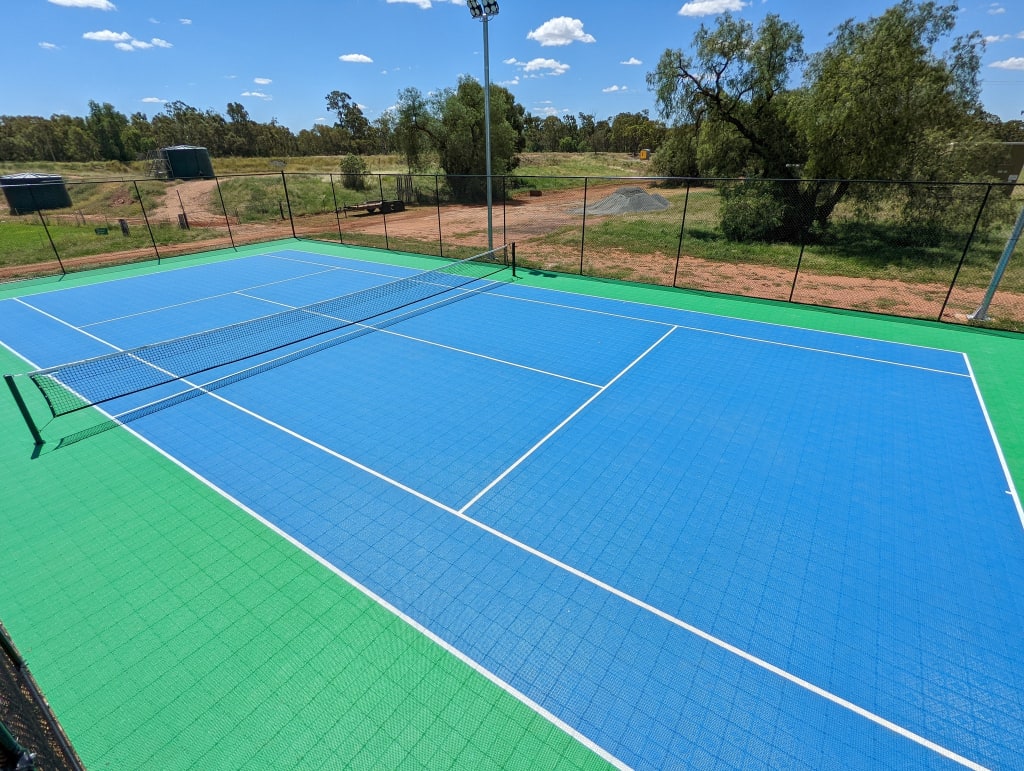
Step 7: Marking the Court
Once the surface is complete, you need to mark the court lines. The lines should be white and should be painted on the surface using a special paint that is designed for use on tennis courts. The dimensions of a standard tennis court are 78 feet long by 36 feet wide for singles and 78 feet long by 27 feet wide for doubles. The net should be 3 feet high at the center and should be installed in the middle of the court.
Step 8: Adding Accessories
The final step in building a tennis court is to add accessories. These include items such as nets, net posts, and court benches. You may also want to consider installing lighting if you plan on playing at night.
The net posts should be securely anchored to the ground and should be placed 3 feet outside the court lines. The net should be attached to the posts using tension cables or straps.
Court benches are a great addition to any tennis court. They provide a place to rest during breaks and can be used to store equipment. When choosing benches, make sure to select ones that are durable and weather-resistant.
If you plan on playing at night, you will need to install lighting. This can be done using either overhead lighting or mounted lights on the fencing. Make sure to choose lighting that is designed for use on tennis courts and that provides adequate illumination for the entire court.
Conclusion
Building your own private tennis court can be a rewarding and enjoyable experience. It provides a convenient and comfortable place to play and can enhance your overall tennis experience. While it may seem like a daunting task, following these steps will help ensure that your tennis court is built properly and to your satisfaction. Remember to obtain the necessary permits and approvals, prepare the site, build a solid foundation, install fencing, pour the surface, mark the court, and add accessories. With these steps completed, you'll be well on your way to enjoying your very own private tennis court.
About the Creator
edward.zhang
I am a sports person and I have fun sharing more skills with those who love to hit the basketball court.
Keep reading
More stories from writers in Unbalanced and other communities.
Wild Card Weekend Recap: What Happens Now?
I think I figured out why I love Wild Card Weekend so much. It's because it's the first playoff anything of the calendar year. The NFL season starts in the fall, and once upon a time, the champion was crowned either on or slightly before New Year's. The evolution of the NFL schedule has resulted in the playoffs starting just into the New Year, and currently, the final week of the season falls on the first weekend of the New Year, with Wild Card Weekend coming a week after that. So yes, chronologically, the NFL's Wild Card Weekend serves as the first playoff anything of the calendar year.
By Clyde E. Dawkins12 days ago in Unbalanced
The Raptors-Kings Game Shows How NBA Parity Has Evolved into Data-Driven Balance
In past eras, a January matchup between the Toronto Raptors and Sacramento Kings might have drawn little attention beyond their respective markets. Yet in early 2026, such games have become a barometer of something bigger: the NBA’s new equilibrium. Parity isn’t just a buzzword this season—it’s a design goal, increasingly reinforced by data, development, and cap strategy. Watching the Raptors face the Kings isn’t just about who wins the game, but which organizational model prevails in this data-defined era of basketball.
By Trend Vantage3 days ago in Unbalanced
🅼🅸🅳🅽🅸🅶🅷🆃 🆂🅽🅰🅲🅺🆂
"It's 10 in Tuscon! We all know what that means... It's Time for Midnight Snacks with your man, Gerald Gee! Ready to spend the night together? Me too! I'm full of snacks and can't wait to regurgitate them all back into your hungry ears. Crack a brew! Pop some corn! Anything to get ready for one hell of a show where the talk maybe cheap but the words cut deep...
By Lamar Wiggins3 days ago in Fiction


Comments
There are no comments for this story
Be the first to respond and start the conversation.