
DIY Fix for Faded Bumpers, Hoods and Scuffed Corners: Andrew’s Guide to Automotive Aerosols
Restore faded bumpers and scuffed corners at home with professional aerosol results.

I’m Andrew – yes, that Andrew who spends his life restoring cars that seem to be magnets for shopping trolleys, bollards, and the occasional enthusiastic Labrador. If you’ve stared at your faded bumper thinking it’s turning grey before you do, don’t panic. A well-matched automotive spray paint can put proper colour back where mother nature (and UV rays) stole it.
You don’t need a full respray, a body-shop oven, or the patience of a saint. What you need is decent aerosol paint, the right process, and my step-by-step guide that avoids the usual DIY mishaps.
What Aerosol Paints Actually Are
Let’s demystify the stuff in the tin.
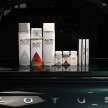
Automotive aerosol paints are not the same as cheap craft spray cans from the pound shop. Proper car aerosols include:
- Primer: sticks to plastic and metal surfaces
- Basecoat: your actual vehicle colour
- Clear coat: UV protection and gloss
- Special textures: especially useful on bumpers
They’re perfect when:
- UV has faded your bumper
- The colour has gone patchy
- You’ve scraped corner panels or wheel arches
- The finish looks dull compared to the rest of the car
They’re not perfect when:
- Half the bumper has been gouged out
- Someone has carved initials into the paint (seen it, yes)
Why I Recommend Aerosols (Even as a Professional Painter)
Aerosols are brilliant because:
- They restore faded plastics and bumper paint without fancy gear
- They’re cheap, especially compared to a bumper respray
- They’re quick – you can fix Saturday morning, show off Saturday evening
- Colour matching works well using the car’s paint code
- Ideal for beginners with patience and sandpaper
And let’s be honest: if you’re only fixing the corner where “the concrete wall materialised out of nowhere”, aerosols touch ups are the smart choice.
Step-By-Step: How Andrew Restores Faded Bumpers with Aerosols
Right, let’s get our hands dirty.
1) Clean Properly
Wash and degrease. Don’t paint over mud, dog hair, or last month’s chicken tikka takeaway stains.
2) Sand the Surface
- Use 800 grit for faded areas
- 600 grit if you’ve got scratches
The aim: smooth, consistent surface.
3) Mask Like a Professional
Mask wider than the repair. Overspray has the range of a gossiping neighbour.
4) Primer Application
Two coats. Light, even, not “dumped on”.
Allow at least 20 minutes between coats.
5) Basecoat Technique
Shake for a full minute. You’re mixing chemicals, not making lemonade.
Spray at 15–20 cm distance :
- Even passes
- 30–40% overlap
- Stop before you build up puddles
6) Drying
Patience. Don’t poke it. Don’t “test with a fingernail”.
7) Clear Coat
Two to three passes.
This is where it stops looking chalky and starts looking glossy again.
8) Polish (The Secret Sauce)
After curing, gently polish.
This blends everything and is the difference between “DIY” and “professional”.
9) Safety Warning
Wear a mask. Otherwise you’ll smell colours and see music.
Realistic Use Cases & Expectations
- Faded black plastic bumper: looks rich, darker, factory-fresh
- Grey chalky corners: restored to proper colour
- Door edge scuffs: nearly invisible
- Wheel arch fade: blends beautifully
Expect results so good you’ll start inspecting strangers’ bumpers with your new-found confidence. Just don’t get arrested.
Benefits of Using Automotive Aerosols
- Budget friendly
- Ideal for restoring faded plastics
- Quick and convenient
- No spray gun needed
- Great for beginners
- Colour match achievable using paint code
Key Takeaways
- Faded bumpers are easy DIY jobs
- Prep and masking matter more than ego
- Light coats > heavy coats
- Clear coat makes the gloss
- Polishing completes the job
FAQ Section
Will aerosol paint work on faded plastic bumpers?
Yes – with primer, basecoat, then clear coat.
Does aerosol colour match factory paint?
With correct paint code, it’s extremely close.
How long will bumper aerosol repair last?
Years with proper clear coating.
Can aerosols fix scrape marks?
Yes, as long as you sand and prime.
Do I need clear coat?
Absolutely – that’s your UV shield.
How many coats do I need?
- Primer: 2
- Basecoat: 2–3
- Clear coat: 2–3
Do I have to sand faded bumpers?
Yes. You’re removing oxidation and chalky residue.
Can I spray in cold weather?
Below 12°C, results go patchy and dull.
Final Word from Andrew
Faded bumpers aren’t a life sentence. They’re just paint crying for attention. With aerosols done properly, you can bring them back to life without paying a body shop or selling a kidney.
Prep well, take your time, don’t inhale the fumes, and enjoy the result. Go give your bumper the colour therapy it deserves. Cheers!
About the Creator
AustrianPainter
I paint with aerosol—car touchups, custom colors, and graffiti art. I blend technical skill with creativity to transform surfaces with clean, bold work.
Keep reading
More stories from AustrianPainter and writers in Serve and other communities.
Touch Up Your BMW : Matching, Applying, and Restoring Your Original Finish
BMW vehicles are built to look sharp. That sleek finish, bold metallic tones, and deep gloss are part of the brand's identity. But with daily use, even the most careful owner will encounter chips, scratches, swirl marks, or stone impacts. That’s where using the right BMW touch up paint makes all the difference.
By AustrianPainter3 months ago in Lifehack
War Between Pakistan And Afghanistan
Tension Escalates Sharply at the Pakistan-Afghanistan Border What’s happening now? Tensions between Pakistan and Afghanistan have suddenly escalated into heavy fighting along their shared border, known as the Durand Line. Both sides are accusing each other of attacks, and military clashes have intensified in recent days. 
By shaoor afridia day ago in Serve
Non Stop War Between Pakistan And Afghanistan
The situation between Pakistan and Afghanistan has suddenly gotten much worse. In late February 2026, Pakistan said it is now in what it calls an “open war” with Afghanistan. Pakistan’s military carried out airstrikes on several major Afghan cities, including the capital Kabul and places like Kandahar and Paktia. This has caused fighting to grow significantly between the two neighbors. �
By shaoor afridiabout 10 hours ago in Serve


Comments
There are no comments for this story
Be the first to respond and start the conversation.