
Witch Doctor!
photo, wardrobe, and edited by: Karl Huber Model: Vera Marlowe

This is a plague doctor/Witch doctor, photoshoot I did back in september of 2020. The purpose was to create a horror fantasy cosplay look for the "plague doctor skull mask" I made for my on line store. (The wardrobe was also designed by myself.) I've worked with this model on a few other photoshoots. So I knew she would be excited to come on board. First we did a set with her wearing the plague doctor mask. Then did another set to highlight her face as well as the wardrobe and props. The camera that was used was a Sony a7s with 24, 35 and 100mm rokinon lenses. We shot inside Cineview studios in st. petersburg, florida. Chris Jackson, (The owner of the studio) set up the lighting for us.

While the model was in very good shape already. Some of her body features needed to be tweaked in order to give the character a seductive yet warrior like physic.

After opening the file in photoshop. I clicked "images" at the top left of the screen. Then clicked on "adjustments" and selected "Brightness and contrast". With this you can raise and lower both brightness and contrast to your desired look. It's not a magical wand though. You can only raise the brightness so much before seeing a degrade in resolution. so it's important to make sure you have enough light during the photoshoot.

After I made the proper adjustment to the brightness and contrast. I went back into "Adjustments" and clicked "color balance". From here, I was able to change the colors of the shadow's, Mid tones, and high lights. I mainly changed the colors of the mid tone and highlights.

After that was adjusted, I went into "filters" and clicked "smart sharpen". The picture was slightly soft on focus. So I only had to bring the sharpness to %25. (Try not to raise it to high, otherwise it'll start to look like everything was trace over with a marker.)

I clicked on the "filters" tab again and hit "liquified". This tool is mainly used to slim the models waist line if needed. it can also be used to stretch, pull, or tuck certain parts of the body. Once I adjusted the pen size and pressure. I was ready to pull her waist line in slightly and push both side of abs closer to the belly button to give them a leaner and stronger look. I even used the tool to slightly raise her rib cage for longer torso look. This may take a little practice, but an important rule to remember is if you know your going to use this technique during a shoot. Then be sure your model is in front of a solid back drop. otherwise you'll end up warping the things in the back round of the area you're working in.
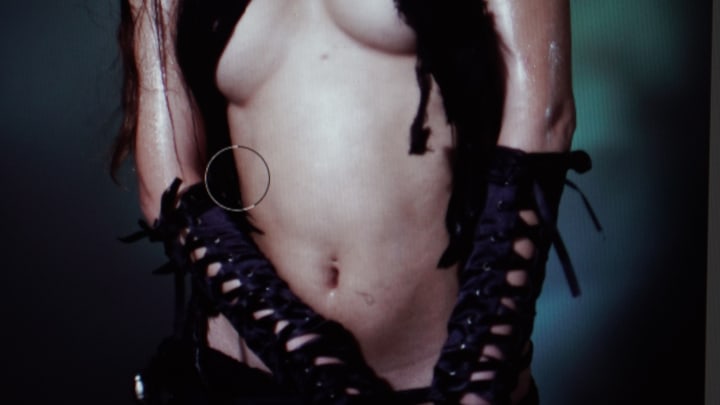
This is the part where a drawing pad and stylus come into play. Make sure the stylus has pen pressure sensitivity. To smooth out the complexion of her skin I used the "smudge tool" with the stylus. (it's very important to work in small lite moving circles and stay with in the lines of all edges, shadow areas and bright spots especially). Be sure to CTRL and Z to quickly erase mistakes.

I then used the "dodge" tool to boost brightness in the abs and cleavage area. Once everything was smooth and brightened. I clicked the "quick select" tool and masked off the exposed ceiling in the top back round.

I then used the pen tool to blacken it out. Then deleted the masking lines and feathered the dark part into the rest of the back drop, using a navy blue soft brush.
This was used to paint over the light socket at bottom right corner as well. once the back round was fixed. I added three new "layers" above the main picture.

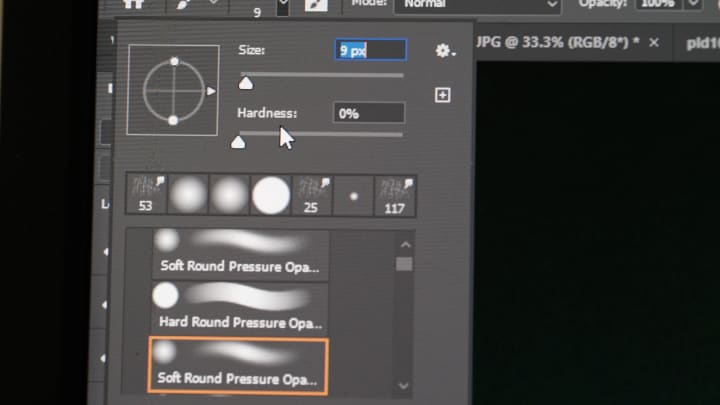
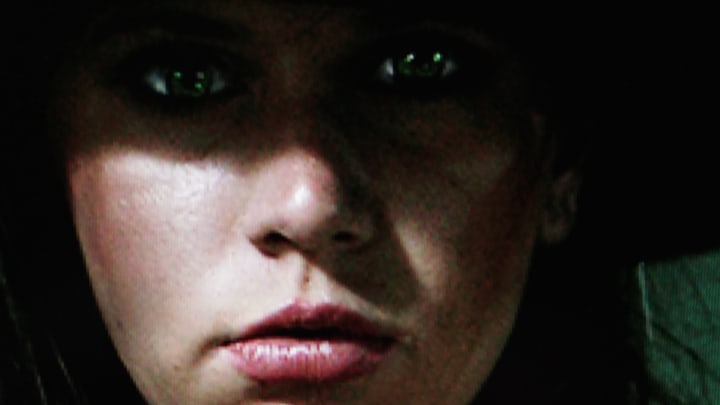
The first layer was used to draw the green in her eye's. I used the pen tool with the size set to 9. and worked with various shades of bright green. The second layer was used to add a white glossy shine to the lower lip. As well as small light glimmer in her eye's and to high light the edges of the hat in order to give it that back lighting look. The third layer was to bring out the whites of her eye's. I used the "soft pen pressure" for that. The reason for the three layer instead of one. was so if needed, I could go to the brightness and contrast tool in the "adjustments" menu. And adjust the level of each one.


Then after all that. I was ready to save it. There's been several other photoshoot I've done, where these same methods are used in editing. If your new to photo editing. Then hopefully this article will have provided you with some new knowledge and understanding on not only how to use the tools in photoshop. but to also avoid time consuming mistakes as well.
About the Creator
Karl Huber
My name is Karl Huber, I am a special artist, writer, director, and cinematographer in Tampa, Florida.
Keep reading
More stories from Karl Huber and writers in Photography and other communities.
Wendy
In Canadian folk lore. The Wendigo is often described as a giant hideous creature with rotting hairy flesh and a ram or deer like head with antlers. It's believed that the Wendigo Spirit, haunts the North western woods of Ontario, Canada. and mainly chooses to inhabit the bodies of greedy or cannibalistic people. Once possessed, these people will inherit super human strength, and will crave human meat. They will also alter their appearance to resemble the wendigo's original form.
By Karl Huber5 years ago in Horror
Leavie Scott
ORDER HERE Chicago – A Radiant Urban Masterpiece by Leavie Scott Arts & Culture Review – Feature Story In his striking new work Chicago, photographer Leavie Scott captures the soul of the Windy City with a level of vibrancy and emotional resonance that is impossible to ignore. The image immerses viewers in a dazzling skyline bathed in mesmerizing tones of purple, pink, and gold—a palette rarely seen in traditional urban photography and one that instantly distinguishes Scott’s artistic voice.
By Organic Products 3 days ago in Photography
Curious Photography Tips Every Beginner Should Try
Have you ever wondered why two people using the same camera can produce completely different photos? The answer often lies in how well the photographer understands the camera itself. For beginners, cameras can seem filled with confusing buttons, dials, and settings. But what if those settings are actually the key to better photos?
By Craig Spiesmanabout 11 hours ago in Photography
📢 Raise Your Voice Thread: 03/05/2026
Our “Raise Your Voice Threads” are hosted most alternating Thursdays at 12PM ET to offer creators more avenues to uncover exceptional stories on Vocal. As we are continuously searching for fresh creators and inspiring stories, this thread provides an opportunity to exchange and discuss the stories that have moved and motivated us on Vocal.
By Raise Your Voice by Vocalabout 8 hours ago in Resources


Comments
There are no comments for this story
Be the first to respond and start the conversation.