
Instructions to Shoot in Manual Mode with Your Android Camera
For Beginners


Cell phone cameras have progressed significantly somewhat recently or something like that. From dim, pixelated pictures to approach proficient standard photographs. The picture quality is drawing near to DSLR and mirrorless cameras.
In any case, telephone cameras can be disappointing. You'll be outlining the ideal shot, then, at that point, the auto mode dominates. Then, at that point, your photograph isn't what you anticipated. This is the reason you should change to manual mode.
Changing to your Android manual camera is the most ideal way of getting the picture you need. There's very little to it, and we'll take you through the rudiments in this post.
Why Switch to Manual Mode?
The picture quality from cell phone cameras these days is faltering. Its like having a DSLR in your pocket constantly.
The issue is the auto mode on your camera has a great deal of imaginative control. Changing to manual mode, or utilizing a camera application, gives you full oversight.
Manual camera mode permits you to change the settings for various impacts. You can play with ISO and shade speed. The white equilibrium can be changed. Furthermore, you can even adjust the central length.
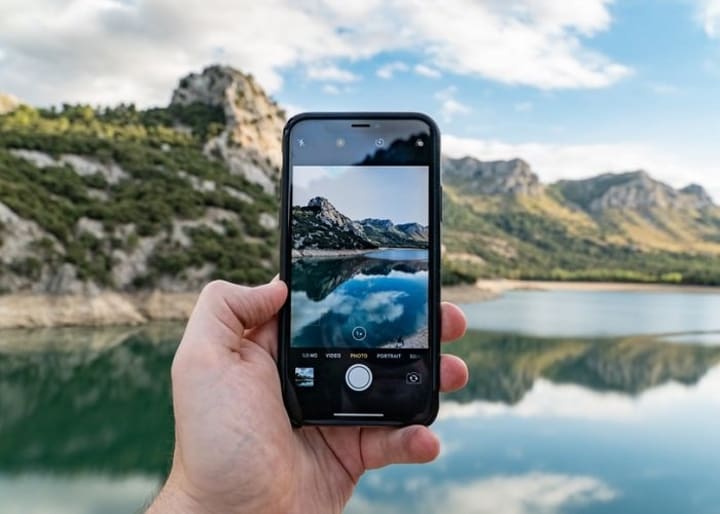
Manual modes expand the skylines of cell phone photography. You can go for staggering scenes with an endless concentration. Or then again you can attempt close-up full scale photography with a shallow profundity of field.
Pictures give you incredible degree to rehearse. Furthermore, you can transform your selfies into self-pictures.
This multitude of imaginative freedoms are on your Android telephone. Manual camera applications for Android telephones put the power in your pocket. Also, you can share your fab pictures via web-based media surprisingly fast.
Change to Manual Mode on Your Android
Cell phone photography isn't pretty much selfies and informal breakfast. Individuals are presently delivering some shocking pictures utilizing their cell phone cameras. However, all things being equal, many are as yet stuck on auto mode.
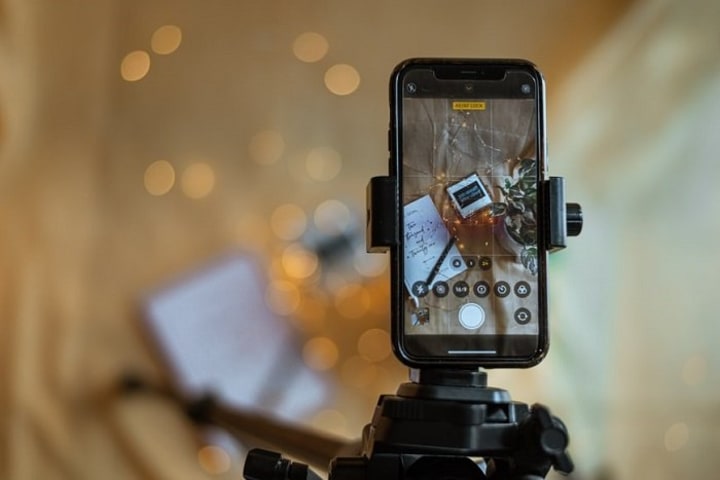
Changing to manual mode is simple. Open your stock camera application, then, at that point, scroll left or right to get to manual mode. That is it. On certain telephones, it very well may be called genius or expert mode.
Not all Android telephones have manual camera controls. The Google Pixel 5a has an extraordinary camera, yet no manual mode. Some cell phones do have exceptionally essential manual camera controls.
If your telephone doesn't have a manual camera, there are a few camera applications that put you steering the ship. Camera FV-5 and Proshot have incredible manual controls. In any case, nor are free.
Open Camera is one of the most amazing camera applications for Android. Its free and it gives you amazing manual camera controls.

Camera Settings in Manual Mode
You may be new to photography. Or then again perhaps you're utilizing your Android camera as an entrance into photography. Assuming this is the case, you probably won't be comfortable with a portion of the settings in manual camera mode.
Well assist you with getting to know a portion of the essential terms and settings so you can take your versatile photography to a higher level. These are a portion of the principle elements of your camera application manual mode.
Shutter Speed
In computerized photography, the screen speed decides the timeframe the sensor is presented to light. The more drawn out the screen speed, the more light arrives at the sensor.
On the off chance that you're in a low-light climate, a more slow shade speed is best. Yet, if the shade speed is excessively sluggish, you may encounter movement obscure. This can likewise happen when your subject is moving rapidly.
Not all telephone applications have a screen speed determination in manual mode. However, in the event that that choice is accessible, think about your lighting and the measure of development in your scene.
Shade speed is isolated into parts of a second. So the bigger the number, the faster the shade opens and closes. (1/1000th of a second is a quicker shade speed than 1/125th of a second.)
You may likewise get a manual shade choice, which permits you to keep the screen open as long as you prefer. This choice may be marked B as it would be on a normal camera.
Gap
The gap is the opening through which light arrives at the sensor. It very well may be made greater or more modest by changing the f-stop. Typically, f-prevents range from f/22 to f/1.4.
The tightest gap is f/22 and permits minimal measure of light through. The vastest opening is f/1.4 and permits the most light through.
Your Android camera application will permit you to choose the f-stop. Or then again some have an image of a camera opening, which you can make greater or more modest.
ISO
Customarily, ISO alludes to how touchy the film is to light. In advanced photography, it alludes to the affectability of the sensor.
A lower ISO, like 100, needs more light however gives you more detail. A higher ISO needs less light, yet the picture may have commotion.
Manual mode on your camera application will give you the choice to choose the ISO. When in doubt, the hazier your scene, the higher ISO you really want to choose.
Exposure Triangle
The shade speed, opening, and ISO are the three components of the openness triangle. The openness triangle is one of the most central components in photography.
You change each setting comparable to the others to accomplish the ideal openness. The lighting circumstance can decide the settings you pick. Or on the other hand it very well may be down with the impact you need.
Exposure Compensation
Some camera applications incorporate openness remuneration. This permits you to change the openness worth of your shot.
The default openness esteem is set at 0. Be that as it may, openness pay permits you to change the openness esteem if your scene is excessively dim or excessively light.
Changing to EV-1 will alter the shade speed and gap to suit a lighter scene. Change to EV+1 and the settings will be adapted to a hazier scene.
If your camera application has openness pay, it can assist you with figuring out manual openings. Also, its speedier and more straightforward than changing the screen speed and f-stop.
White Balance
The white equilibrium keeps your whites white. Normally, the programmed white equilibrium ought to get the job done. However, in the event that you observe your whites becoming blue or yellow, you can roll out an improvement to your cameras white balance.

Track down Your Focus Manually
The self-adjust on current camera applications is quick and dependable. In any case, the issue with self-adjust mode is that the camera will as a rule center around whatever is in the focal point of your shot.
Changing to manual center mode gives you command over your point of convergence. You can have a subject askew and still have it in center. The point of convergence doesn't must be in your shot in manual mode.
To physically zero in on a camera application, you can regularly utilize your finger to choose the subject you need in center. Or on the other hand you can hold down the screen button as the application takes you through the center reach. You simply pull your finger away when your subject is in center.
Numerous camera applications will likewise have manual center choices. You may get a limitlessness choice, which is great for scenes. Its likewise great if you have bunches of development in your shot. Also, you may get representation or large scale center presets.
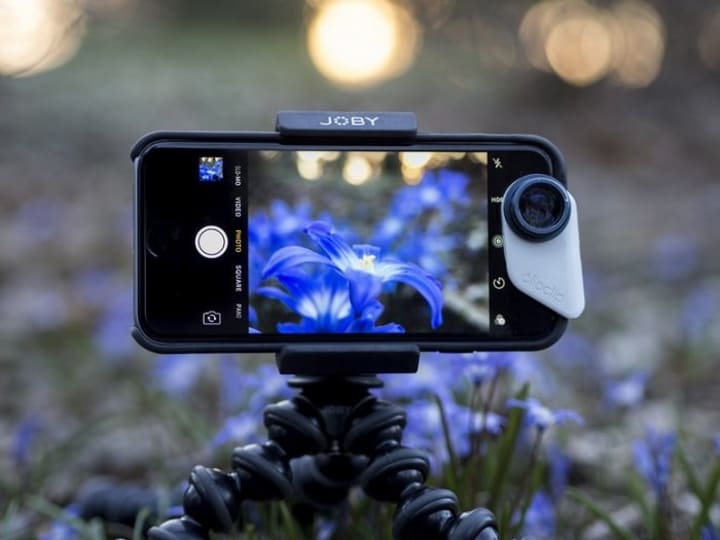
Play With Depth of Field
The opportunity of manual controls on your camera implies you can play with profundity of field. The profundity of field is the amount of your shot is in center.
A shallow profundity of field implies your subject is in concentration and everything in front and behind is out of concentration. A more profound profundity of field implies substantially more of your shot is in center.
The center presets may give you a few pointers. However, in the event that you go totally manual, you really want a wide opening (f1.4 is great) for a shallow profundity of field. Furthermore, on a telephone camera, this is the same.
You can physically change the settings to get a delicate bokeh impact on pictures or large scale shots. You want to choose the amplest opening your telephone application has. You would then be able to have a quicker shade speed. Furthermore, a lower ISO will give you more detail.
Save Your Phone Camera Photos as RAW
At the point when you snap a picture on your telephone camera, it will generally save it as a JPEG record.
JPEGs arent an issue and they are handily transferred to web-based media. Yet, assuming you need to alter your photographs, its best to save the photographs as RAW records.
You can stack RAW records into altering programming like Adobe Lightroom. Also, this record design gives you more opportunity when altering.
Stock camera applications may not give you the choice to save as RAW. So in case you are keen on altering your photographs, you may have to download a further developed manual camera application.

Begin Shooting in Manual Mode
Going manual on your cell phone camera is an extraordinary way of finding out with regards to photography. It transforms your cell phone into a mirrorless camera.
You might think that it is baffling from the outset, however practice makes awesome. Evaluate new things and play with the settings. Give yourself new ventures and investigation with various sorts of photography.
An incredible aspect concerning shooting with a telephone camera is that it offers you a review before you snap the chance. At the point when you roll out an improvement to the settings, you can see the outcome on the screen. On the off chance that you don't like it, you can transform it without squandering a shot.
All the information you gain from shooting in manual mode will move over if you move up to a DSLR or mirrorless camera. From f-stops to ISO, the hypothesis is no different either way.
However, you can learn as much hypothesis as you like. The most ideal way of learning is to begin shooting with manual controls. So have a good time with off the preparation haggles.
End
Utilizing your Android manual camera is the ideal entryway into photography. Telephone camera applications are not difficult to utilize. What's more, going manual enables you to make staggering photographs.
If your telephone doesn't have a manual mode, download one of the magnificent camera applications for Android. Its an extraordinary way of fostering your photography information and sharpen your abilities.
Take as much time as necessary and play around with various settings. You might be disappointed from the outset, however shooting in manual mode will make you a superior photographic artist.
About the Creator
Thomas Vasas
Hello, my name is Thomas Vasas. I'm a Professional Photographer, living and residing in Columbus, Georgia. I also enjoy art as well. I also enjoy reading books; astronomy, weather, geology, archaeology, art history.
Keep reading
More stories from Thomas Vasas and writers in Photography and other communities.
20 Several Exciting Photo Prompts To Get You Inspired
Disarray and absence of inspiration are unavoidable. In case you're in an inventive square, relax. You may require a couple of straightforward activities to invigorate your mind and find an entirely different universe of photography thoughts.
By Thomas Vasas4 years ago in Photography
Leavie Scott
ORDER HERE Chicago – A Radiant Urban Masterpiece by Leavie Scott Arts & Culture Review – Feature Story In his striking new work Chicago, photographer Leavie Scott captures the soul of the Windy City with a level of vibrancy and emotional resonance that is impossible to ignore. The image immerses viewers in a dazzling skyline bathed in mesmerizing tones of purple, pink, and gold—a palette rarely seen in traditional urban photography and one that instantly distinguishes Scott’s artistic voice.
By Organic Products 2 days ago in Photography
Curious Photography Tips Every Beginner Should Try
Have you ever wondered why two people using the same camera can produce completely different photos? The answer often lies in how well the photographer understands the camera itself. For beginners, cameras can seem filled with confusing buttons, dials, and settings. But what if those settings are actually the key to better photos?
By Craig Spiesmanabout 2 hours ago in Photography
I wanted to title this something different, but worried that my chosen title might cause problems entering the United States in the future so this is the new title. It's the greatest title. No one has ever written a title better than this. (All titles unrelated to content).
Let me be honest. I am finding this difficult. Now, I like a challenge, a stretch, a bit of an obstacle course. “Write about the decline of the British Empire in the form of a narrative poem in which your protagonist is an artichoke” I read, and flex my fingers. “Write a haiku to evoke the sensation of sibilance using only the first half of the alphabet.” “Well”, I think to myself, “this should be fun.” But “write about a system that isn’t working”? A system that isn’t working? Now? In 2026? ONE system? My favourite system that isn’t working? The sexiest system that isn’t working? The one giving me the most angst day to day? The one giving me the most existential dread? I am, as I say, finding this difficult. I will own that I have contemplated writing a thousand words on why the steady “all on” setting on my fairy lights is the EIGHTH of seven options which must be sequentially activated to get there, because that is a system that some fool came up with and it definitely doesn’t work, and now who is paying the price, eh? But how can I write about my fairy lights when…. When…. When….
By Hannah Moore7 days ago in Humans


Comments
There are no comments for this story
Be the first to respond and start the conversation.