
How to Edit and Enhance Your Photos Online with PhotoCut
How to Edit and Enhance Your Photos Online with PhotoCut


Today, the digital world, where photography and photo editing stand out as basic skills, allows any content creator, business owner, or someone who wants to improve their photos to do so with PhotoCut, an online photo editing tool easy on the pocket and anybody without a professional design background. PhotoCut provides a full plethora of online photo-editing tools, from Cropping images to Color Picking from images, Face Swap, Retouching, and Image Overlay, without requiring payment of any fee whatsoever. This guide will explain how these features can be utilized on PhotoCut to add further finesse to your photos and take your editing to another level.
Create amazing photo grids with PhotoCut’s Image Combiner.
1. How to Crop Images Online for Free with PhotoCut
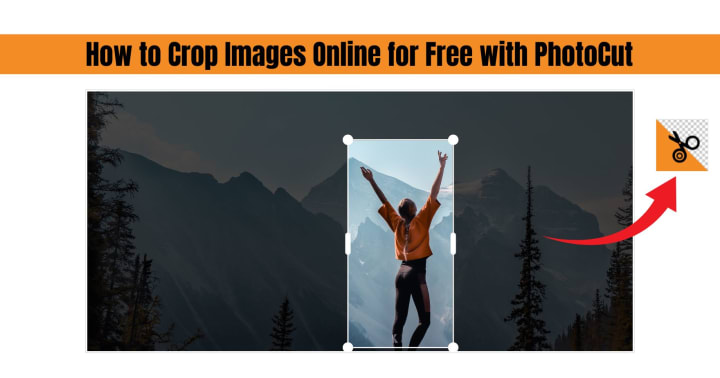
Cropping is one of the most basic yet perhaps the most important post-processing jobs. Cropping deals with the unwanted parts of an image and leaves the most important subject intact. Be it to prepare for social media, websites, or print project preparation, an efficient means of cropping images is a useful skill.
Cropping your photo online using PhotoCut is easy and simple enough for someone with little editing skills. Here is how it goes about cropping an image on PhotoCut:
- Open PhotoCut and click the Upload button to choose the image you want to crop.
- After upload, select the Crop Tool from the menu. The image will then have a grid or box shown over it.
- Use the corners or edges of the crop box to drag for your preferred area to keep in the image. You can also move the whole block to focus on specific areas.
- As soon as you are done cropping, hit the Apply button for it to apply the crop to your previously selected area.
- After applying the crop, download your edited image for the project purpose.
The cropping tool that PhotoCut offers can thus be described as a versatile function, allowing resizing and customization of any image to a specific aspect ratio; very suitable for creating profile pictures, banner images, or even posts on social media.
2. How to Choose Colors from Images Online for Free with PhotoCut
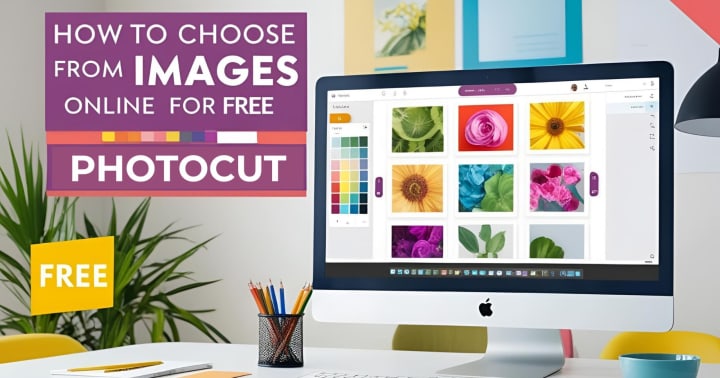
To choose the right color from an image on design projects, digital paintings, or color work is very vital. With a free tool on PhotoCut, you can color-pick directly from your photos to complement any color project you are working on.
To choose colors from images using PhotoCut online:
- Upload your image into PhotoCut. Once your image is up, it will be seen on the editor screen.
- The color picker tool is usually shown as an eyedropper icon.
- Click on any region of the image to select the color you want, and the tool will choose the color and provide you with its hex code.
- After you've identified the color, copy the hex code and use it in your design, website, or artwork.
- If you are designing and developing an overlay, using the chosen color on other components such as text, shapes, and other places will make your designs unified and visually appealing.
It is that much better since it enables you to select colors straight from the design such that they perfectly match with the colors of the original image and are within the scope of your creative thinking.
Change the color of your image with PhotoCut’s Color Changer.
3. How to Swap Faces Online for Free with PhotoCut
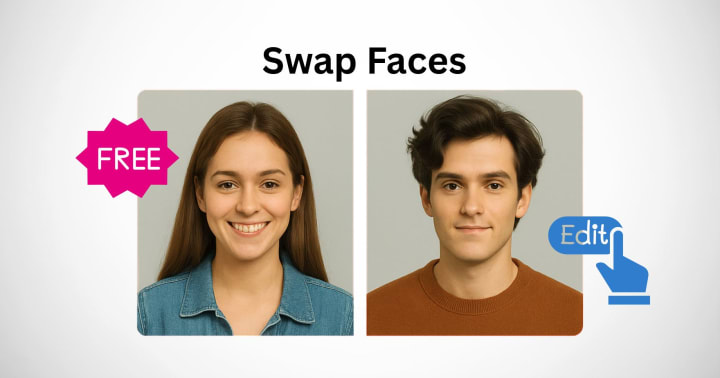
Face swapping is a creative and fun way to alter pictures. It can be used for funny content, digital paintings, or simply experimenting with looks. PhotoCut lets you swap faces in photo-editing quickly and easily with no large software to get in the way.
To swap faces online using PhotoCut, follow these steps for free:
- Upload the two images in which you want to swap faces. Ensure that both have well-defined facial features for better results.
- Once both images are loaded, select the Face Swap Tool from the toolbar.
- The tool will prompt you to highlight the faces you want to swap in both images. Use the cursor to select the face in each image carefully.
- Once both faces are selected, click on the Swap Faces button. PhotoCut will automatically swap the faces between the two images.
- If required, you can adjust the size and alignment of the faces as needed to seamlessly fit into the rest of the image.
- After you have finalized your image adjustments, simply click on Apply and download your edited picture.
The face swap feature in PhotoCut is the answer for a humorous light edit and, on serious occasions, for digital marketing materials and advertisements. The interface is fast and fun to work with.
Enhance your video quality with PhotoCut’s AI Video Enhancer.
4. How to Retouch Your Images Online for Free with PhotoCut
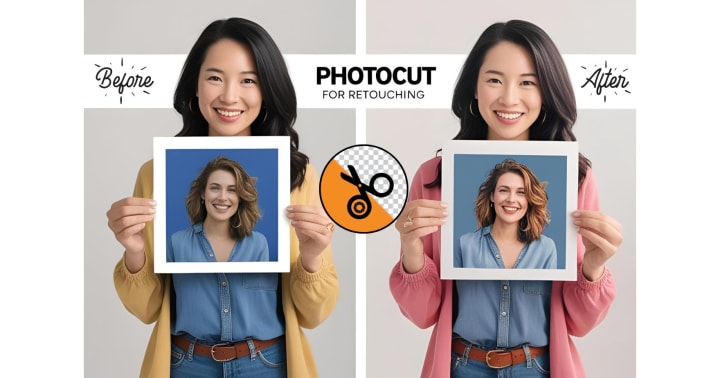
Images must always be retouched to improve the quality of these images, for example, remove blemishes, smoothen skin, brighten the face, or correct lighting issues. This free retouching tool from PhotoCut empowers anyone to carry out these edits without any advanced skill level.
Here's how to retouch your images free online on PhotoCut:
- Go to PhotoCut to upload the image for retouching.
- Select the Retouch Tool from the menu. The retouch tool typically offers options for blemish removal, skin smoothing, whitening teeth, etc.
- Click on the image's sections where you wish to apply retouching effects using your pointer. Blemishes can be removed, skin smoothed, and features enhanced.
- Adjust the level of retouching effects to your liking so that the changes remain subtle and natural.
- After you have made all the changes to your satisfaction, simply apply and download the image.
For portrait photography and personal pictures, retouch work is essential; achieving professional results with PhotoCut is an easy task.
Learn the simplest ways to make photo collages.
5. How to Overlay Images Online for Free with PhotoCut
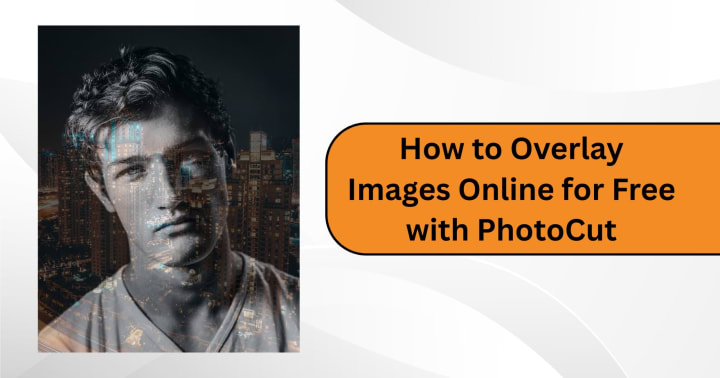
Overlaying pictures is one great technique to bring various elements into one cohesive image, creating effects and making novel compositions. PhotoCut gives a simple means to create image overlaying online for free, blending multiple photos.
Here’s how you can overlay images online using PhotoCut:
- Start by uploading the base image (the image you want to place other images over).
- Choose Overlay Tool from the menu. This allows one image to sit over another.
- Upload the image you want to overlay onto the image. Resize, rotate, and place the overlay image as needed.
- You have some options to work with for controlling how much of the background image shows through the overlay image in terms of transparency.
- The overlay image may be given certain effects that would allow it to blur, shadow, or filter itself so that it would seamlessly blend with the background.
- Click on Apply to save and download your newly edited image.
Overlaying images can serve any purpose, be it advertisements, promotional messages, or just some fun social-media content. The interface of PhotoCut makes it intuitive for any image manipulation to get done quickly and easily.
Conclusion
PhotoCut presents a powerful online tool offering cropping, retouching, face swapping, color picking, and image overlay. All these options are free to use. Whether you are creating content, marketing, or just someone passionate about editing photos, everything in PhotoCut's simple tool allows you to resize and structure your images into awe-inspiring artwork. It is easier for you to use this website with no need to engage capable graphic designers or pay exorbitant amounts for expensive software to process photos. Instead, using PhotoCut, you can get advanced online-level photo editors applied directly in a browser with the simplest of interfaces that enables polished and beautiful images.
Resize your images online without losing quality using PhotoCut’s Photo Resizer.
FAQs
Q1. What file formats are supported by online cropping tools?
Ans. Most of the tools support standard file formats like JPEG, PNG, and GIF. Also, some tools might support less common formats like TIFF and WebP. The tool's documentation has information about file formats supported.
Q2. Will cropping reduce the quality of my image?
Ans. Cropping itself doesn't necessarily reduce the quality as much as the resolution if you crop excessively. You're simply using fewer pixels from the original image. If the remaining pixels are still sufficient for your intended use (e.g., web display, small print), the reduction may be negligible. Be mindful of the final image size after cropping.
Q3. What color formats are typically provided?
Ans. Commonly, color formats are provided as:
HEX (hexadecimal - e.g., #FFFFFF)
RGB (Red, Green, Blue - e.g., rgb(255, 255, 255))
HSL (Hue, Saturation, Lightness)
CMYK (Cyan, Magenta, Yellow, Black)
Q4. Can I create a color palette from an image using these tools?
Ans. Some online color picking tools have the functionality to extract a whole palette from an image. Usually, you just upload your picture, and the tool analyzes the image to determine the most dominant or important colors.
Q5. Is face swapping accurate and realistic?
Ans. Results vary greatly depending on the quality of the images and the sophistication of the AI. Good lighting, clear faces, and similar angles usually lead to better results. Some tools produce more realistic swaps than others.
Q6. What are face-swapping ethics?
Ans. Just ensure that it is not used with bad intent, like for fake news, or impersonate someone without their consent. Think about privacy and respecting people's images.
Q7. What kind of retouching can I do online for free?
Ans. Many decent free internet programs can do basic retouching tasks including removing blemishes, whitening teeth, correcting red-eye, and smoothing skin. Some advanced functions would require paid subscriptions.
Q8. Will retouching make my images look unnatural?
Ans. It depends on the intensity of the retouching. Keeping changes subtle will make it look more natural. Avoid over-smoothing of skin or changing features too much.
Q9. What are the usual applications for image overlaying?
Ans. Watermarking, photo collage making, printing of texts or graphics over photos, creating layers, and putting together social media graphics.
Q10. How do I go about making an image transparent for overlay?
Ans. The majority of the tools feature a "opacity" or "transparency" slider option, which may be used to control how visible the top picture is over the background image. For more complex overlays, use an image editor to clear the background of the image you want to overlay, then save it as a PNG.
About the Creator
PhotoCut
AI Photo Editing Tool - Remove or Change your Background & Enhance Product Photos
Keep reading
More stories from PhotoCut and writers in Photography and other communities.
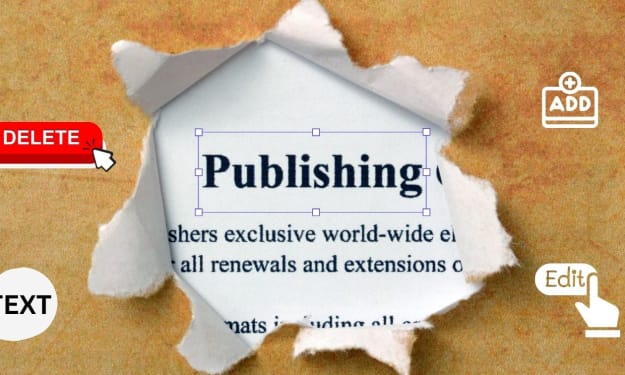
How to Edit, Add, and Remove Text from Images Using PhotoCut
The visual image above is a communication of its kind; it can sometimes convey a meaning or even convey messages without having to use a word or a kind of written expression. It is always possible to add or delete some text, change some colors, or do other adjustments whenever the image demands or requires this specific action in enhancing its visual storytelling capabilities. Whether dealing with an advertisement, a post on social media, or something entirely personal, one needs to know exactly how to carry out image editing and image modifications.
By PhotoCut9 months ago in Photography
My Year, in Prattling and Photos
It's been a year since... last year. Ironically, it seems I've found myself a new tradition of getting sick during the New Year holidays. At least, this year (that is, this inter-year period remarkable for its shiny decorations in the streets and houses, and closed supermarkets and pretty much everything), I'm doubtlessly doing better: I've managed to come visit my friends in Germany for Christmas (which I failed to do last year) and—after having some good quality time eating machanka, playing Munchkin and swinging machetes (the last one obviously crept into this checklist only for the sake of the phonological form)—I came back home via proverbial Deutche Bahn and probably less known Schweizerische Bundesbahnen, my body hosting a family of viruses, virions and who knows what other tiny critters somewhere inside my chest.
By Andrei Z.18 days ago in Photography

Comments
There are no comments for this story
Be the first to respond and start the conversation.