
For the Grid
My job as a social media coach and someone who partners with brands has become more and more challenging as photo editing has become the norm.

Find yourself a mini photog.
First off, can we take a minute to appreciate my daughter Isla's gift to capture the most ridiculous photo's of me? "hey mom, I took pictures the whole time", so many outtakes, haha! These usually end up in the never-to-be-seen-by-the-light-of-day album, but once in a while a hilarious winner such as this one emerges.
Instagram as a platform has created a society where taking pictures of even the mundane parts of life has become the norm. I mean, I can guarantee none of our parents have a shot of them from above, wearing a hat, reading a book with a sprig of eucalyptus infringing to the right of the frame. This is not a bad thing - I have four children and I love that their entire life is well documented.
Instagram, not so instant anymore.
Okay, but I want to share a fast and fun little way to stand out on the grid, which I feel like all of us on social media struggle with often. Gone are the days of holding your phone above your plate of pasta with sundried tomatoes, basil and balsamic glaze, snapping it and stating "just a sec, I want to post this". The process now is to take 100 photos, keep one, cull the rest and edit the one winning photo.
Presets.
I am sure that real photographers shutter shudder at this word, but truth be told, after years of struggling with my DSLR, I decided my iPhone would be my camera. It's always with me, it's quick and easy and with all the editing apps these days, pretty simple to get a beautiful shot. Now, it won't be print quality, but for 99% of the material we want to capture, that's alright. Presets can be found for free, or not. I buy mine through a few different sources, my current one being the Coco series from Etsy. A Lightroom preset is an image with certain qualities such as tone, warmth and colour, you upload this into Lightroom and "create a preset". Now, all your photos will pull the same shades and tones and ensure your feed looks consistent and appears to have a theme.
That's Not All.
Presets definitely do assist with photo editing, but you still need to analyze the photo for other measures of quality. I am fairly picky about horizontal lines being perfectly straight across and adjust levels of particular colours since photos taken in different lighting may be adversely affected by the preset. For example, using Coco 1 preset, sometimes my whites turn bright blue, so I need to go into my colour balance in Lightroom and adjust accordingly.
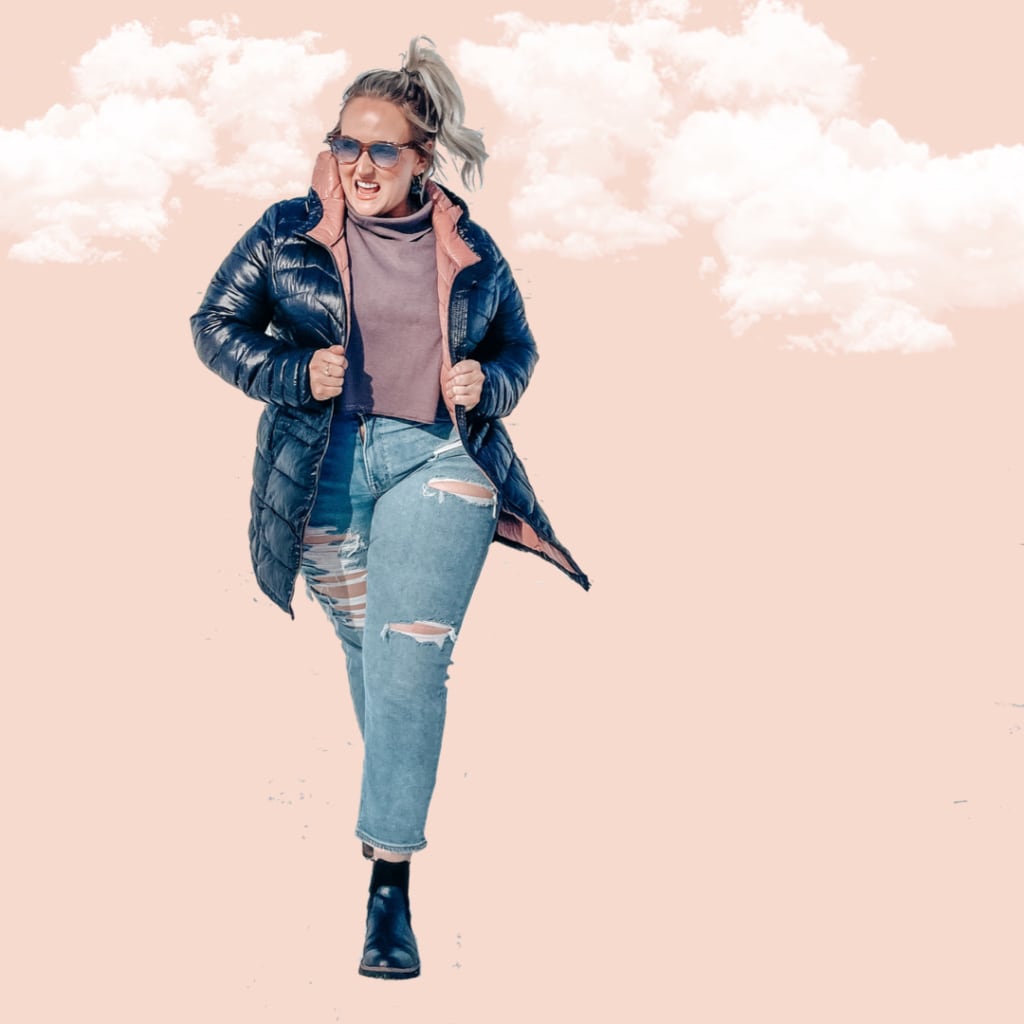
How I created the above image.
Time required: 8 minutes
Step 1: apply your regular preset in Lightroom. I used Coco 1 on this.
Step 2: use a background eraser (I used an app called MagicEraser but there are lots out there!). I expanded the image so I could capture every detail and erase only the background.
Step 3: save the photo to your camera roll with a transparent background.
Step 4: upload that photo to Canva (the app is adequate here and desktop is not required), and replace your background, if you have brand colours this would be a great place to use them. For my company, Brittany Kolba Social, one of my brand colours is hex #F6DACE, a beautiful blush colour that I used in the above photo.
Step 5: if you want to be super extra, throw in some fun effects, clouds, sparkles etc. I used the PinkPapaya app for this one, and have the free version. I added clouds, and then uploaded to the camera roll.
TA DA! Cute and fun, right?
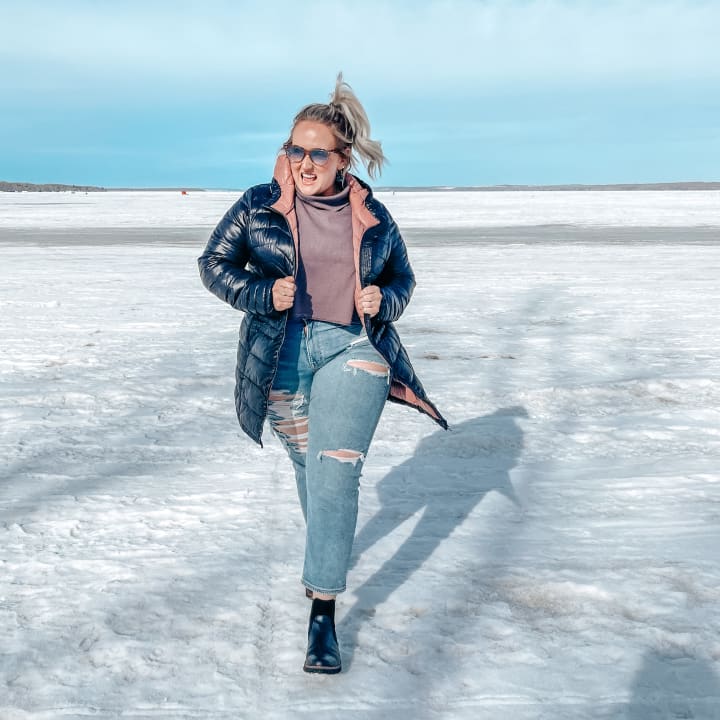
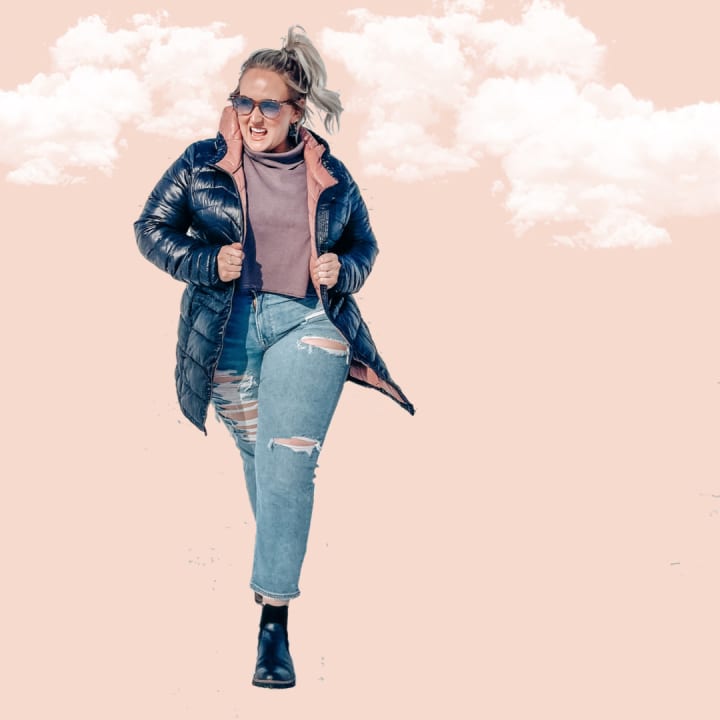
Before & After
About the Creator
Brittany Kolba
Social Media Un-Guru from Calgary, Alberta.
Mom of four.
Moscow Mules.
Teaching others how to run their business on social media without resorting to sketchy methods and low-integrity shortcuts. Founder of Brittany Kolba Social School.
Keep reading
More stories from Brittany Kolba and writers in Photography and other communities.
Schitt's Creek
Where do I go from here? This challenge feels particularly personal because Schitt's Creek ending has left a two-star motel-sized hotel star in my heart, so filling that hole and finding something that could rub me the same way might be a stretch. That's why it's called a challenge, right?
By Brittany Kolba5 years ago in Geeks
Leavie Scott
ORDER HERE Chicago – A Radiant Urban Masterpiece by Leavie Scott Arts & Culture Review – Feature Story In his striking new work Chicago, photographer Leavie Scott captures the soul of the Windy City with a level of vibrancy and emotional resonance that is impossible to ignore. The image immerses viewers in a dazzling skyline bathed in mesmerizing tones of purple, pink, and gold—a palette rarely seen in traditional urban photography and one that instantly distinguishes Scott’s artistic voice.
By Organic Products a day ago in Photography
Unofficial Challenge: Black History Celebration
Forward: February 28th, 10:53 PM, EST... The final hour of Black History Month, 2026. Hello fellow writers. I've had this challenge waiting in my drafts for most of the month. But I held off on publishing it, until now.
By Sam Spinelli3 days ago in Writers
"Scream 7" (2026): Running out of Fresh Screams
This is the seventh time we’ve had a Ghostface crisis. Scream 7 is the latest edition of the Scream franchise. Sydney Prescott and her family are under attack by another anonymous killer dressed in a Ghostface costume. While having issues with her daughter, Tatum, they run from the bloody murders, trying to determine who is behind it all.
By Marielle Sabbag3 days ago in Horror


Comments
There are no comments for this story
Be the first to respond and start the conversation.