
Best Times of Day for a Photo Shoot: A Comprehensive Guide to Perfect Lighting
Best Times of Day for a Photo Shoot


Photography is an art form deeply intertwined with light. Whether you're a commercial photographer aiming to showcase a brand, a professional photographer perfecting your craft, or an enthusiast capturing fleeting moments, timing your photo shoot can make or break the quality of your images. The "best times of day for a photo shoot" depend on the type of photography, the mood you want to convey, and the natural lighting conditions available.
Why Timing Matters in Photography
Lighting is the backbone of any great photograph. The position of the sun, the intensity of light, and the surrounding atmosphere all shift throughout the day, creating unique opportunities for photographers. Choosing the right time enhances color, texture, and depth while minimizing harsh shadows or overexposure. Key factors influenced by timing include:
Natural Light Quality: Soft, warm, or cool tones depending on the hour.
Shadow Control: Avoid harsh midday shadows or embrace long, dramatic ones.
Mood and Atmosphere: From dreamy golden hues to crisp, vibrant daylight.
Let’s dive into the best times of day for a photo shoot and how to leverage them effectively.
1. Golden Hour: The Photographer’s Dream Time
What is Golden Hour?
The golden hour occurs shortly after sunrise and just before sunset, typically lasting about an hour (though this varies by location and season). During this time, the sun is low on the horizon, casting a warm, diffused light that enhances colors and softens shadows.
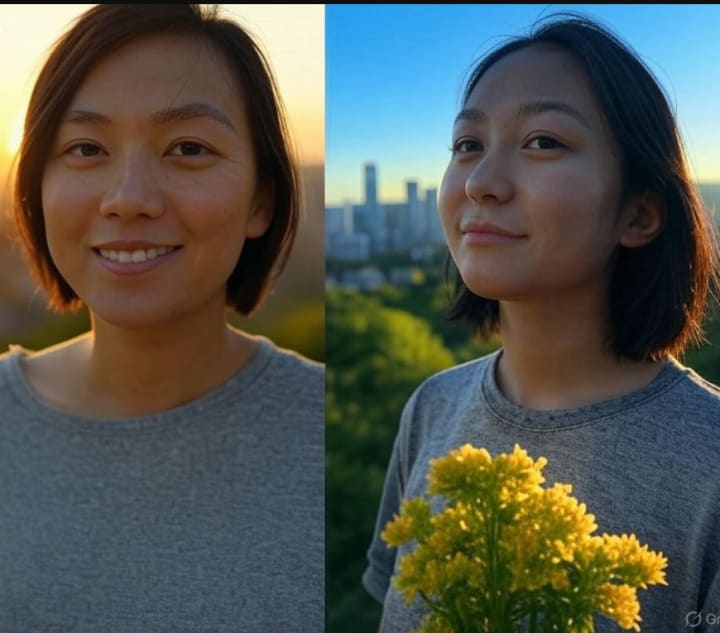
Why It’s Ideal
Warm Tones: The golden glow adds a flattering hue to skin tones and landscapes.
Soft Lighting: Diffused light reduces harsh contrasts, perfect for portraits and nature photography.
Long Shadows: Creates depth and dimension in your shots.
Best For
Portrait Photography: Flattering light for faces without squinting or overexposure.
Landscape Photography: Highlights rolling hills, forests, or beaches with a magical glow.
Wedding Photography: Captures romantic, ethereal moments.
Tips for Golden Hour Shoots
Plan Ahead: Use apps like PhotoPills or SunCalc to pinpoint golden hour times at your location.
Arrive Early: Set up before the light peaks to maximize your window.
Use Reflectors: Bounce light onto subjects for even illumination.
Experiment with Angles: Shoot into the sun for a backlit silhouette or sideways for a warm glow.
2. Blue Hour: The Twilight Magic
What is Blue Hour?
The blue hour occurs just before sunrise and after sunset, when the sky takes on a deep blue hue with cool tones. It’s shorter than the golden hour, often lasting 20–40 minutes, depending on your latitude.
Why It’s Ideal
Cool Tones: Adds a serene, mystical vibe to your images.
Low Light: Perfect for long-exposure shots or cityscapes with artificial lights.
Subtle Contrast: Balances natural and artificial light beautifully.
Best For
Cityscape Photography: Captures twinkling lights against a blue sky.
Night Photography Prep: A transition into darker conditions.
Creative Portraits: Adds an artistic, moody feel.
Tips for Blue Hour Shoots
Use a Tripod: Low light requires slower shutter speeds to avoid blur.
Adjust White Balance: Enhance the cool tones by tweaking your camera settings.
Incorporate Lights: Streetlights, car trails, or candles pair well with the blue backdrop.
Shoot in RAW: Retain flexibility for post-processing adjustments.
3. Midday: Harnessing the Power of Bright Light
What is Midday Lighting?
Midday, typically from 10 a.m. to 2 p.m., features the sun at its highest point, delivering intense, direct light. While often avoided due to harsh shadows, it can be a powerful tool when used strategically.
Why It’s Ideal
Vivid Colors: Bright light saturates hues, especially in nature or product photography.
High Contrast: Emphasizes textures and bold compositions.
Consistency: Stable light for extended shoots.
Best For
Product Photography: Showcases details and clarity.
Architectural Photography: Highlights lines and structures.
Beach or Outdoor Sports: Captures action with vibrant energy.
Tips for Midday Shoots
Use Diffusers: Soften harsh light with a scrim or translucent fabric.
Seek Shade: Position subjects under trees or awnings for even lighting.
Embrace Shadows: Use them creatively for dramatic effects.
Polarizing Filters: Reduce glare and enhance sky blues.
4. Overcast Days: Nature’s Softbox
What is Overcast Lighting?
Overcast conditions occur when clouds diffuse sunlight, creating soft, even illumination throughout the day. While not tied to a specific time, overcast lighting can transform any hour into an ideal shooting window.
Why It’s Ideal
Even Light: Eliminates harsh shadows and highlights.
Versatility: Works for almost any photography style.
Subtle Colors: Muted tones create a calm, timeless feel.
Best For
Portrait Photography: Flattering for all skin types with no squinting.
Macro Photography: Highlights fine details in flowers or insects.
Black-and-White Photography: Enhances texture and contrast.
Tips for Overcast Shoots
Boost Saturation: Slightly increase color in post-production for vibrancy.
Use Reflectors: Add subtle highlights to avoid flatness.
Avoid Heavy Editing: Preserve the natural softness of the light.
Shoot Wide Open: Take advantage of lower light with a wide aperture.
5. Sunrise and Sunset: Beyond the Golden Hour
Why Extend Beyond Golden Hour?
While golden hour gets the spotlight, the moments just before sunrise or after sunset offer unique opportunities. These times blend golden and blue hour qualities, providing a dynamic range of light.
Why It’s Ideal
Dramatic Skies: Vibrant clouds and gradients elevate your frame.
Silhouettes: Perfect for bold, graphic compositions.
Transition Lighting: Captures a story as light shifts.
Best For
Landscape Photography: Showcases sky and terrain in harmony.
Silhouette Photography: Highlights shapes against colorful backdrops.
Event Photography: Adds a cinematic feel to candid moments.
Tips for Sunrise/Sunset Shoots
Scout Locations: Find spots with unobstructed horizons.
Bracket Exposures: Capture details in both highlights and shadows.
Stay Late/Early: The sky often peaks after the sun dips or before it rises.
Use Filters: Graduated ND filters balance sky and foreground.
Factors That Influence the Best Time for a Photo Shoot
The "best time" isn’t universal—it varies based on several factors:
Season: Winter offers shorter golden hours, while summer extends them.
Location: Urban settings may favor blue hour, while rural areas shine at sunrise.
Weather: Cloud cover or fog can shift your ideal window.
Subject: Portraits thrive in soft light, while architecture may need bold contrast.
Conclusion: Timing Your Perfect Shot
Choosing the best time of day for a photo shoot boils down to understanding your creative vision and the tools nature provides. The golden hour bathes your subjects in warmth, the blue hour adds a mystical edge, midday brings bold energy, and overcast skies offer timeless softness. By planning around these windows and adapting with practical tips, you’ll elevate your photography game.
About the Creator
Paving Direct - Porcelain Outdoor Tiles
We are top Porcelain Outdoor Tiles suppliers in Uk.
Keep reading
More stories from Paving Direct - Porcelain Outdoor Tiles and writers in Photography and other communities.
Why Porcelain Tiles Are the Best Choice for Flooring 2025
Flooring is one of the most important elements in interior design, influencing both the aesthetics and functionality of a space. When it comes to selecting the ideal flooring material, porcelain tiles consistently rank at the top for homeowners, architects, and interior designers alike. Renowned for their strength, elegance, and versatility, porcelain tiles are a top-tier choice for both residential and commercial flooring.
By Paving Direct - Porcelain Outdoor Tiles8 months ago in Styled
My Year, in Prattling and Photos
It's been a year since... last year. Ironically, it seems I've found myself a new tradition of getting sick during the New Year holidays. At least, this year (that is, this inter-year period remarkable for its shiny decorations in the streets and houses, and closed supermarkets and pretty much everything), I'm doubtlessly doing better: I've managed to come visit my friends in Germany for Christmas (which I failed to do last year) and—after having some good quality time eating machanka, playing Munchkin and swinging machetes (the last one obviously crept into this checklist only for the sake of the phonological form)—I came back home via proverbial Deutche Bahn and probably less known Schweizerische Bundesbahnen, my body hosting a family of viruses, virions and who knows what other tiny critters somewhere inside my chest.
By Andrei Z.10 days ago in Photography
2026 Product Photography Tips: How to Style Your Products Like a Pro
Product photography is extremely important if you are selling your products online. It can influence the buying decision of customers. Good-looking product images can attract customers effortlessly. In contrast, poor-quality product images can repel the interested buyers.
By Impression Photography5 days ago in Photography


Comments
There are no comments for this story
Be the first to respond and start the conversation.