
Celebratory Craft
Custom Ornaments for all Occasions

Hello friend—yes, you!
For the occasion of Today (because why not!) – and really any occasion, I am sharing my crafting process with you, one that I use to introduce a little bit of happiness into my world.
My hope is that this will inspire you to create objects that you can use as ornaments, mobiles, and wall hangings! This is derived from my own method of creating seasonal crafts, as a means of injecting more personality into the objects around me, and to bring joy and colour into my home. The versatility in application is endless and this is a great way to get the creative juices flowing!
What I used and what you will need:
Materials
- Paper/Cardstock
- Drawing Instrument (marker works best)
- Felt in various colours
- Embroidery Thread in various colours
- Embroidery Needle
- Jump Rings (optional)
- Your Favourite Ribbon
- Fiber Filling
Tools
- Your trusty pair of Fiskars Scissors
- Internet to search video tutorials
- Computer/Tablet & Printer (optional)
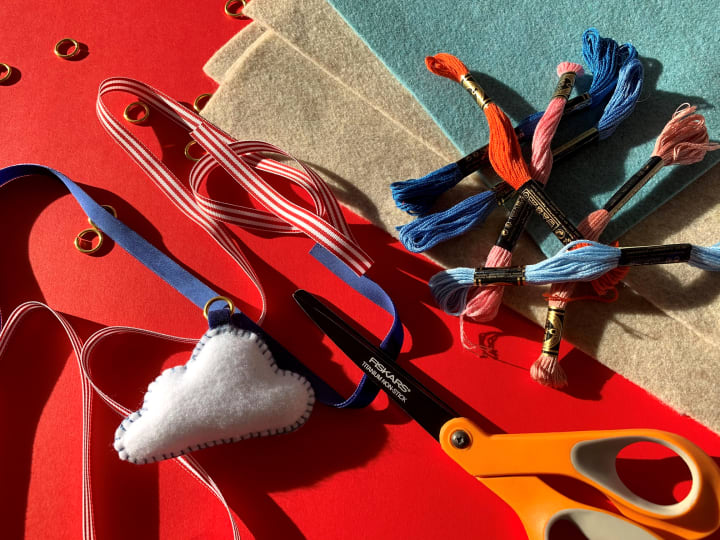
Gather all your materials and tools
You will need everything listed in the Materials and Tools list, all of which you can purchase at your local craft store (support small when you can!) or online retailers for ease. You can also get creative if you cannot source felt, most types of fabric not prone to fraying will work as well.
Choose your shapes or Draw your design
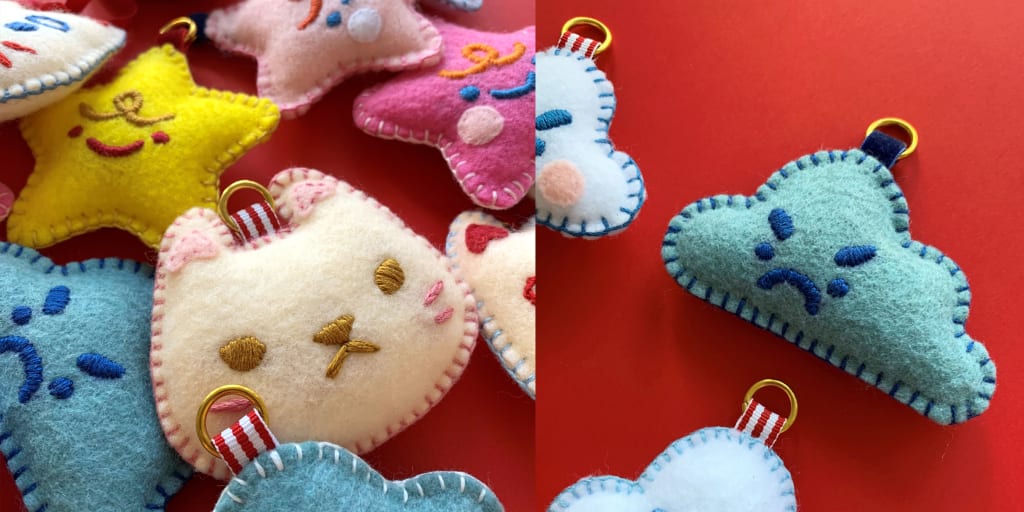
To begin, you will need to know what object you would like to transform into an ornament. I typically choose shapes that I can embroider an expressive face on – clouds, stars, cats. You can pick anything of your choosing. Yes—anything! Do you have a green thumb? Perhaps you could translate your favourite floral or leaf contour. An object or motif from your favorite video game? Even your own characters! To me, this is the most exhilarating– transforming your own doodles into something tangible!
I like to produce my drawings digitally by creating vectors in a design software. If you lean more toward physical tools, take out that pencil and sketch – your – heart – out!
Create your Stencil
If you created your design digitally, you may proceed to scale to your liking and print it out for use. Otherwise, you can trace your design onto a scrap piece of paper or cardstock that you will cut out. Break out those sharp and trusty Fiskars scissors to carefully cut and capture any intricate or complex curve. This will become your stencil which you can use time after time, so ideally you want to use the best tool possible!
Transfer your Design onto Felt
Choose the felt material you wish to use as the overall body of the piece. You may choose conventional colours (white for clouds, yellow for stars) or even mix-and-match different colours to create unexpected combinations to add personality to your pieces. With your stencil laid directly on top of the material, trace the outline of your design onto the felt sheet with a marker. It may not always be easy to transfer your design with a typical drawing tool due to the texture of felt. If you find this to be true, cut a piece of felt close to the size of the stencil and hold or pin it in place. Cut tightly along the edge of the stencil and felt with your Fiskars blades to skip the tracing step.
Make sure you cut two pieces of the body, as we will combine these layers together in the following steps.
Design tip: the front and back pieces do not need to be the same colour!
Embroider the Details
Should your design include faces or significant details, you can add these by using different coloured embroidery threads. For solid-coloured details, I like to cut out felt shapes or draw the shape and ‘fill’ in the parts by layering straight stiches. Felt holds these stitches well and allows you to easily undo any stitches you are not content with, even if you are a beginner! Embroidering these details gives the piece a nice look when complete, but you can also choose to glue or adhere any decorations that your design requires.
Start Stitching - Create your Pocket!
Next, we will sandwich and stitch the edge of the pieces together to create a pocket for our filling. The filling will add weight to the ornament, as well as a bit of dimension. Cut a long piece of embroidery thread (longer than you think you will need) and fasten a double knot at one end, and thread it through the eye of the needle on the other. With the pieces together, strategically decide the best place to start your first stitch. I like to start somewhere that draws less attention to the starting and ending stitch, near the bottom or tucked-in between the point of two curves.
To start your first stitch, you will need to know how to create a blanket stitch. The blanket stitch helps creates a nice outline along the edge and will be secure enough to withstand the addition of the fill inside the ornament. I learned how to use this stitch by watching short instructional videos online. Make sure you have an idea of how the blanket stitch is created, continued, and terminated before you start! If you already possess this bit of knowledge, please proceed!
Space out your stitches by maintaining a consistent distance between the stiches along the edge of your felt pieces. Make sure that the needle is pulling through both layers of the material.
Before you finish stitching along the edge, leave space to insert an optional hanging attachment and a gap large enough to insert the filling.
Add a Hanging Attachment
With your Fiskars scissors, cut a 2-inch piece of ribbon, fold it in half and feed through a large jump ring if you please. Place the ribbon loop in between the two felt layers, and stitch through the entire assembly to secure it along the edge. For me, a little piece of hardware adds functionality but also a bit of polish!
Fill, fill, fill!
Add ample filling into the pocket. You can use any sort of fiber filling, or reuse cut-up strips of felt or fabric. Make sure you get into all the corners if your design is more intricate, you may not want areas intentionally without any filling. Keep adding this until you feel there is a consistency throughout your piece. Complete the stitching along the edge with an end stitch to ensure that the filling stays inside. Snip the remainder of the thread with your scissors. With your needle, tuck the hanging bit of thread back into the ornament to conceal it.
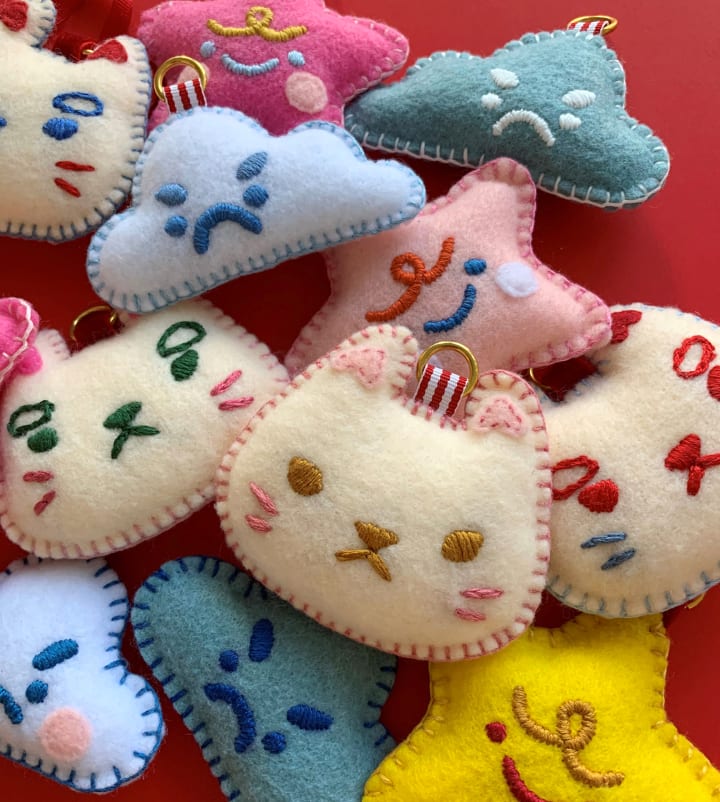
Display your work!
At this point we are just about finished; if you can make it to this point I am sure you are pleased with your work already and eager to share it! To show off your hard work, cut and thread a string through the jump ring or ribbon loop and hang it where you please! Create a family of pieces to create a hanging mobile, display them on your wall, or store away while you anticipate a long-awaited occasion!
So—go out there and create what brings you happiness—create your happiness!
About the Creator
Janine Yeung
Artist, designer, creative.
Keep reading
More stories from Janine Yeung and writers in Motivation and other communities.
Shaping Happiness
I grew up wanting to become an artist. Perhaps it was growing up in my grandmother’s house when I first developed this affinity. Every morning I walked down the pink-painted hall adorned with paintings; some framed, some exposing the carefully painted edge of the canvas. They were all mounted center to the adjacent piece to form a line, almost as if done with the same care you would see in a gallery. In this house, not a single wall was bare. If not decorated with framed and embroidered verses, or butterflies preserved in shadow boxes, the walls were made known with patterned wallpaper in retro orange and greens. Everyday I walked down the hall that stretched from the front entry to my grandfather’s study, and I would look up at the paintings.
By Janine Yeung5 years ago in Families
A System That Isn’t Working Challenge Winners
Systems promise order. They organize behavior, distribute opportunity, and suggest that if everyone follows the rules, things will work. The entries in A System That Isn’t Working look closely at what happens when that promise begins to slip.
By Vocal Curation Team3 days ago in Resources


Comments
There are no comments for this story
Be the first to respond and start the conversation.