
How to make eggshell chalk at home
Before you trash those eggshells…check this out!

Are you bored doing the same old DIY projects over and over again? Or maybe you are interested in creating your first DIY project but everything you come across is overly complex? Well, not today — get ready to take on a simple yet exciting activity with eggshells!
And guess what? You can engage your kids in this fun activity while using it as an opportunity to teach them about reducing and repurposing waste for a more eco-friendly environment. This article will walk you through how to make your first eggshell chalk at home in just a few easy steps. So, gather your eggshells, and let’s dive in!
Ingredients:
- Eggshells (about 6 to 8 needed for 1 chalk)
- Flour
- Water
- Food coloring
Tools:
- 1 teaspoon
- 1 tablespoon
- Mixing bowl & spatula
- Crusher (eg. Mortar & pestle, blender, coffee grinder, food processor, etc.)
- Kitchen sieve (optional)
Step 1
Gather and thoroughly rinse your eggshells, while removing their inner membranes. It doesn’t matter if the shells break during this process, you’ll crush them later anyway. Just make sure to collect all the pieces.
Step 2
Spread out the egg shells on a flat surface and dry them out in the sun for a few hours. You can choose to speed up the process by placing the shells in a 200oF oven for about 30 to 45 minutes. Ensure they’re completely dry before moving on to the next step.
Step 3
Crush the eggshells into small pieces using any of the crushers (mentioned above) you have available.
Step 4
Skip this step if you are okay with the texture of your powdered eggshell chalk. If not, sift it with a kitchen sieve for a smoother texture.
Step 5
Place 1 teaspoon of flour in a mixing bowl, then add 1 teaspoon of hot water. Mix them with a spatula until a paste is formed.
Step 6
Add the eggshell powder to the bowl and mix them to form a dough-like consistency. If you’re making the chalks in bulk, measure and add 1 tablespoon of powder for 1 chalk.
Step 7
Add 3 to 7 drops of food coloring to the mixture (depending on how bright you want the chalk to be) and mix till the color is evenly distributed. You can skip this step if you want to make white chalk.
Step 8
Mold the mixture into any shape of your choice — one of the easiest is to roll it in your palms to form a ball or cylinder. If your chalk’s shape isn’t staying in place, add a bit more water. You can also use silicone molds or any other container that will give you your desired shape and size.
Step 9
Let the chalk dry until it's completely hardened. To do this, you can wrap it in a paper towel and let it sit in a cool, dry place for 3 to 5 days. If you want to shorten the number of days to 1 or 2, then you first need to bake it in a 200oF oven for about 60 minutes.
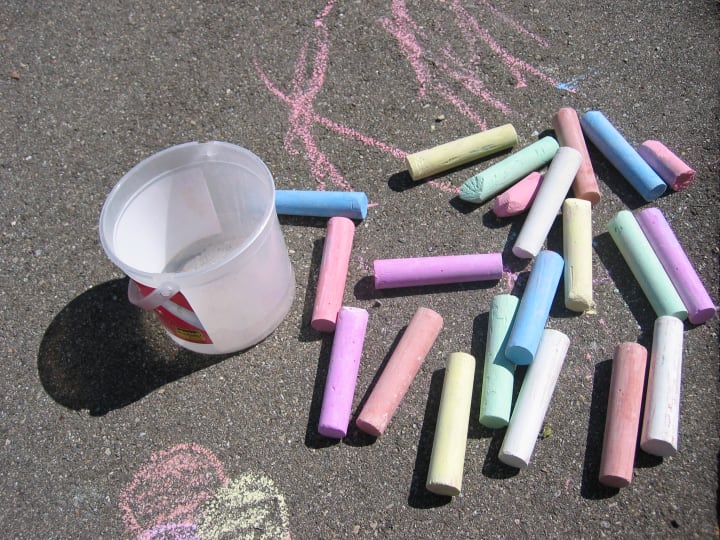
Now your eggshell chalk is ready to use!

Why eggshells are best for making chalks
Eggshells are mainly composed of calcium carbonate, which is the same substance commonly found in traditional chalk, making it an excellent alternative.
With that said, eggshell chalks (aka sidewalk chalks) cannot be used on blackboards due to their abrasive nature. Their bright and vibrant colors are perfect for creating eye-catching designs on sidewalks, driveways, and other outdoor surfaces.
Conclusion
Eggshell chalk is a great alternative to traditional or “store-bought” chalk, whose industrial production process could have harmful effects on the environment.
Making these chalks is not only a fun DIY project but can also serve as a way to teach your children about recycling and repurposing. So next time you crack an egg, don't throw away those shells — use them to make eggshell chalk instead!
Thanks for reading, check out my previous article here:
About the Creator
Keep reading
More stories from Narichica Handy and writers in Longevity and other communities.
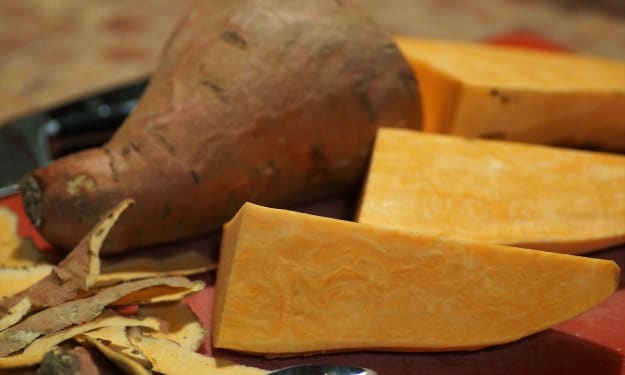
What will happen to your body if you eat sweet potatoes every day?
Sweet potatoes are not only sweet and super tasty, but they can also work wonders for your health! I mean, who doesn't love a vegetable that can do double duty? From keeping your gut happy to giving you a glowing complexion, sweet potatoes are a true powerhouse of nutrition.
By Narichica Handy3 years ago in Longevity
Early Warning Signs: Minor Symptoms That Evolve Into Chronic Pain
Most people dismiss minor aches and stiffness as temporary inconveniences or inevitable parts of aging. However, medical experts across multiple specialties warn that these seemingly insignificant symptoms often serve as early warning signs of chronic pain conditions that become far more difficult and expensive to treat once they progress. Understanding which minor symptoms deserve immediate attention can prevent years of unnecessary suffering and disability.
By Tim Clarke6 days ago in Longevity
The impact of sleep on our mental state
Introduction Sleep is a critical pillar of our daily lives, yet it’s often treated as an afterthought. While comfort and personal preference matter, the idea that we should just sleep “whenever and however” is a trap. To truly function at your peak, you need more than just rest — you need a disciplined strategy. It sounds harsh and at first, if you are used to staying up all night and not paying attention to your mental and physical health, it might seem impossible. However, great things do require some small sacrifices, so let us begin with the three tips.
By Charilaos Spanoudis3 days ago in Longevity


Comments
There are no comments for this story
Be the first to respond and start the conversation.