
What Is the Purpose of Fashion Croquis Drawings
Fashion Croquis
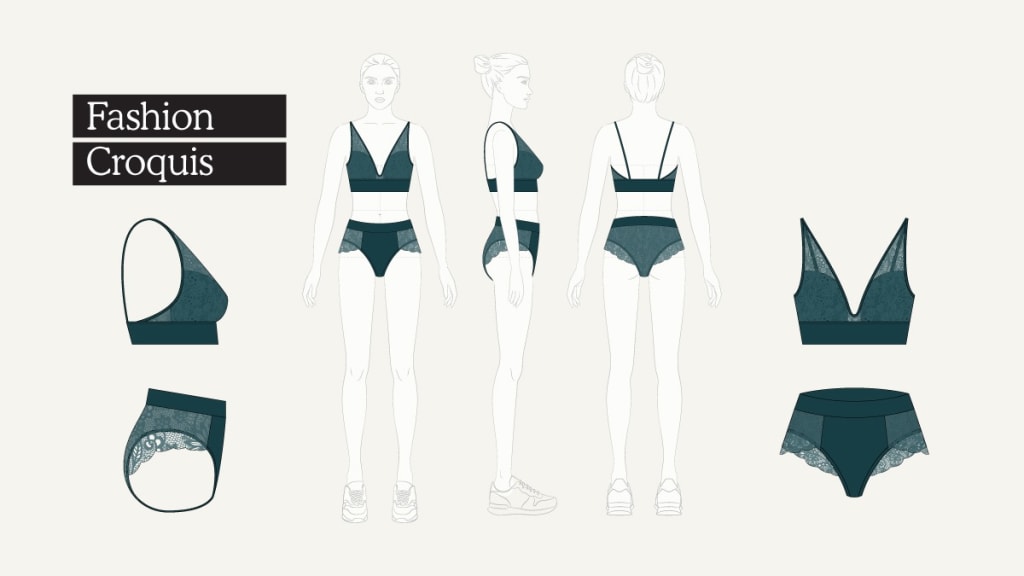
Croquis is a name which translates to "sketch" and "sketch" in French. In the field of fashion the term"croquis" is the fastest sketch of a model in fashion. It can also mean the practice of drawing models live. The drawings of croquis are minimalist in appearance and serve as a blank surface for sketch clothing.
What's included in the Croquis sketch?
Fashion croquis sketches don't really care as much about drawing figures and are more focused on the clothes. For instance, these drawings typically don't include specifics about the hands, feet or faces. Fashion figure templates may add to croquis designs to highlight the texture, color as well as accessories after the design concept is established.
What is the purpose for Croquis Illustrations?
Croquis sketches show the technical aspects of the garment, including:
- Fit
- Shape
- Sleeve length
- Total length
- The position of seams and darts
These exact fashion sketches communicate the style to patternmakers who develop a first prototype with Your croquis.
The fashion croquis template can be used as an example of different styles in a collection of clothing. For instance , Fashion designer Marc Jacobs uses the same croquis pattern throughout the year to give pattern makers the knowledge of how clothes are made to form the exact shape. The consistency between croquis sketches permits designers to understand the height and size of clothing in relation to one another.
Guidelines on Creating Croquis Illustrations
Fashion sketch template are the very first step to bring your fashion concepts to life. If this is the first time you're drawing an image on paper, draw croquis using the help of a croquis design template that has been designed. If you decide to create the croquis on your own design, here's some tips to remember:
The most effective tool to draw croquis is a large piece of paper and an non-breakable lead pencil.
Before you write your thoughts on paper, create an idea board that you can use in your mood, to visualize your thoughts. Use magazines, images and photos of street fashions to make distinct boards that feature colors, patterns of fabrics as well as textures and accessories.
Take note that proportions for the body parts in croquis drawings are not proportional in proportion to the human body. Legs are stretched to emphasise the height. The average length of croquis figure starting at the top and finishing at the bottom is approximately 9.3 times larger that the figure drawn head.
Croquis styles can be displayed in a variety of ways to convey the motion of the pattern, and also to emphasize the style. For example, by placing your hands over your hips with the pelvic area tilted, or legs stretched out to show the silhouette that the skirt has.
How to Draw a Croquis in 6 Steps
The first step in drawing your croquis, is drawing the balance line which is drawn through in the center of the drawing. It is important to split your 8.5x11-inch document into nine equal pieces. This is known as the typical "nine heads" size of the croquis. There is the option of drawing horizontal lines that symbolize the nine points which are approximately one eighth of an inch to act as markers to identify the various sections.
Draw your balance line. Draw a horizontal line to depict the figure's center of balance. The line should begin above the head and should extend down to the bottom of the leg in the image.
Create the region of your pelvis. Below, in the middle on your balance line, draw an oval that symbolizes the pelvis. It is able to be tilted to create different positions.
Draw shoulders and the torso. From the top of the square pelvic , draw two lines that form the torso. Lines should be curled upwards toward the waist and then extended outwards until shoulders are formed. The shoulders must be of similar size to your pelvis square.
Draw your skull and neck. The neck should be about 1/3 of what your shoulder is wide, and the remaining half of the head. Draw a circle around the head, proportionally to your the body.
Draw legs. Legs of the figure should be four times the size of the head drawn. The legs are divided into two parts , which are calves and thighs. The tops of your thighs should be as long from that of the head's top. Begin by tapering the line until you reach your knee, and then return to the ankle so that your ankles measure about one-fourth of the size of your head.
Draw the feet and arms. The feet must be as big as the head and arranged in the shape of an arc. The arms in the picture are believed to be slightly bigger than they actually are. The arms are created using an elbow that taper to the wrist. Finish with hands and fingers.
About the Creator
Keep reading
More stories from georgerobertde and writers in Lifehack and other communities.
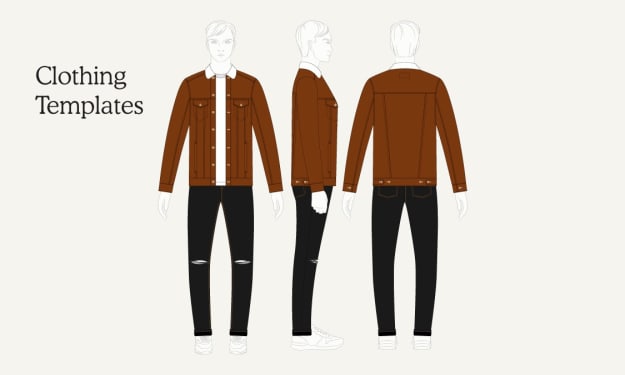
All Types Of Fashion Clothing Templates 2023
It demands investment and inventiveness to make garments, particularly when you are attempting to make something unmistakable. The main part of any attire paying little mind to how well it is made it is the design layouts.
By georgerobertde3 years ago in Lifehack
How to repair chipped quartz benchtops
Quartz benchtops have become a staple in contemporary kitchen and bathroom renovations throughout Sydney. Homeowners favour them for their clean appearance, durability and relatively simple maintenance. From family homes in Parramatta and Ryde to coastal properties in Manly and modern apartments across the Eastern Suburbs, engineered quartz surfaces are widely used because they balance practicality with a refined aesthetic.
By John Zhangabout 14 hours ago in Lifehack


Comments
There are no comments for this story
Be the first to respond and start the conversation.