
The Joy of Beading
Learning the Art of Seed Bead Embroidery
I’m a self taught jewelry designer. During the course of my design education, I discovered the art of seed bead embroidery. I love all aspects of jewelry design but I find tremendous joy making this type of jewelry.
Seed bead embroidery allows you to create beautiful jewelry. It can be a relaxing hobby, cultivated talent or even a business. Through my photos, I wanted to share the art of seed bead embroidery. If you’re new to jewelry making, I’m hoping to inspire you. This art form allows you to create jewelry that is saleable and wearable.
I’ve provided photos to show you the entire process of seed bead embroidery. This art form can be easily learned. It takes me longer to design a piece than to make one. I find the use of color and my own twist on a design always a challenge. I am able to give a new identity and feel to each piece.
This is a good technique to learn if you would like to become a jewelry designer or fashion designer. I include fashion design because hand beaded embroidery work is a rare talent. Many fashion design houses seek that skill, so it’s a great way to add to your skill set.
If you’re a hobby enthusiast like me, follow along and I’ll explain the process of this hobby. I will also tell you the supplies required and how to acquire them. It’s a rather budget friendly way to make jewelry.
I hope to spark your imagination. My jewelry work provided me an entrepreneurial path and my own business. I want you to think about careers outside of traditional office cubes. These talents can take you from local craft fairs to trade shows.
I’m showing you each step of the development of the piece because it’s not entirely difficult and it allows your own imagination to soar. I want to motivate you to discover the realm of art. From painting and writing to beading and sewing, you can turn a hobby into a business. Perhaps, even an empire. So, follow along as we explore the colorful and amazing outlet these little seed beads can provide to your world. They’re inexpensive and a fantastic niche market for jewelry design.
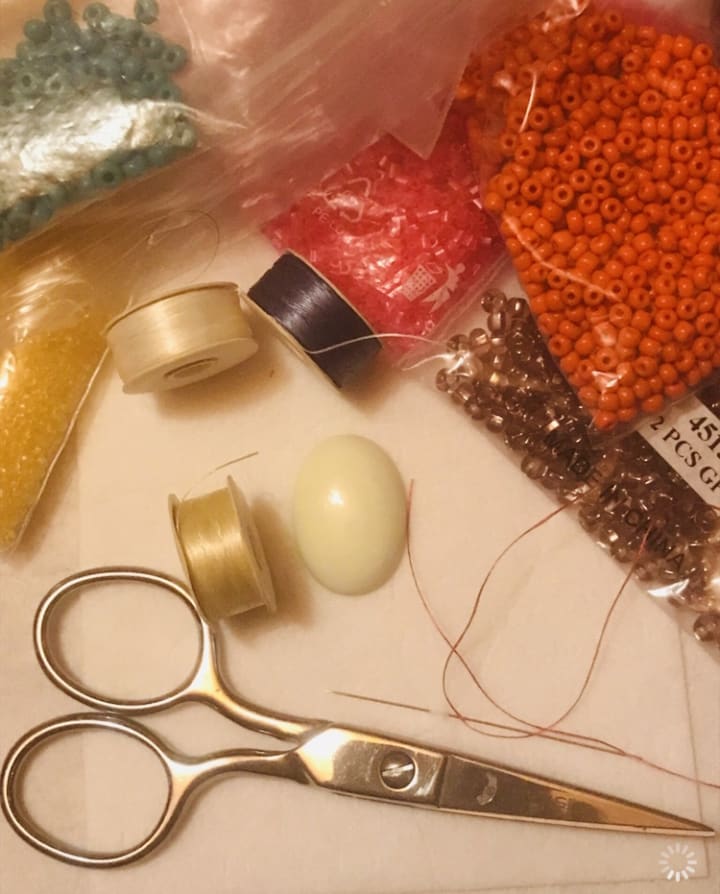
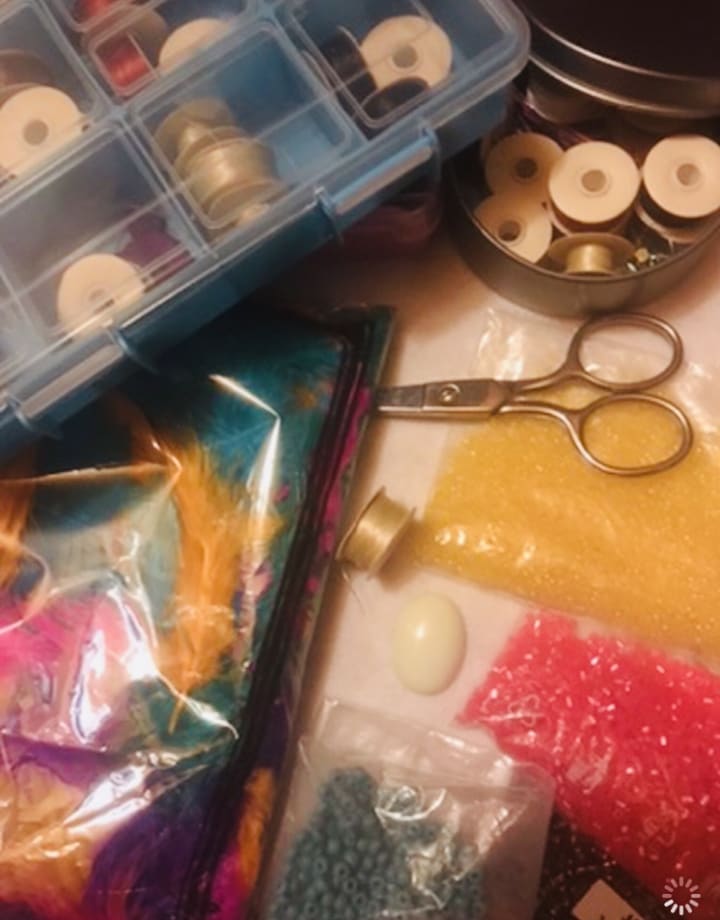
You can easily find your supplies the internet. Search Amazon or look up jewelry supply companies. You can also visit your local craft store. I’ve even found beading supplies at the Dollar Store.
Here’s what you need:
1. Your special product investments include Lacy’s stiff stuff (beading foundation for your bead work) and a guide book to create Seed Bead Embroidery.
2. A cabochon for the center stone. You can use anything from acrylic to gemstones. Oval and round shapes are the best.
3. Seed beads (size 6 and 8) are preferable for beginners.
4. Beading needles and beading.
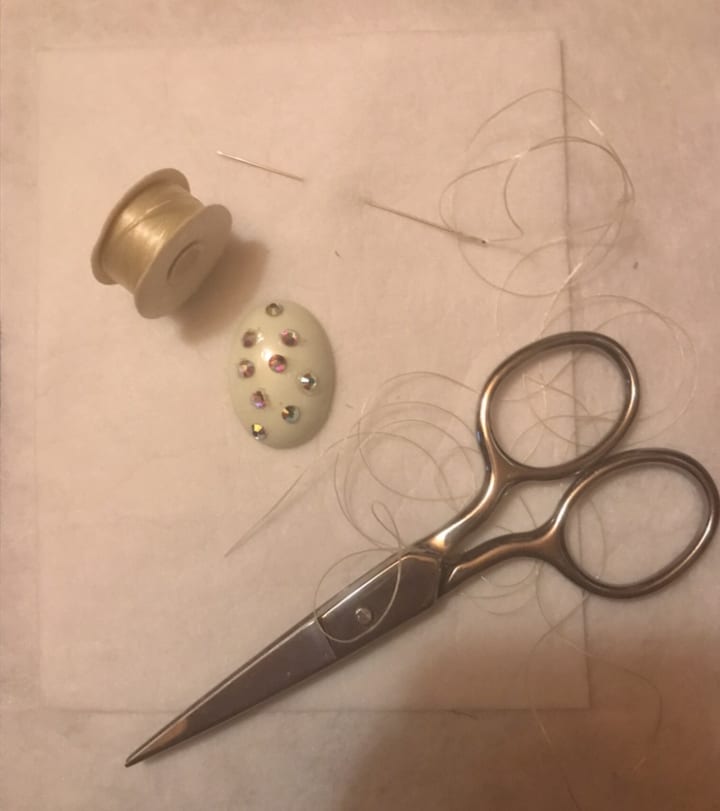
5. Scissors. Mine are embroidery scissor but any pair will do.
6. E6000 glue to affix the cabochon onto the beading foundation.
7. Ultra suede for backing the finished piece. Any faux suede fabric will do.
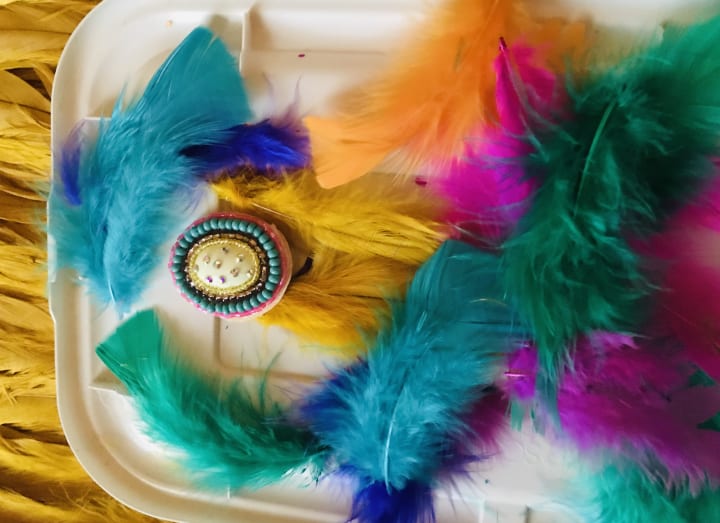
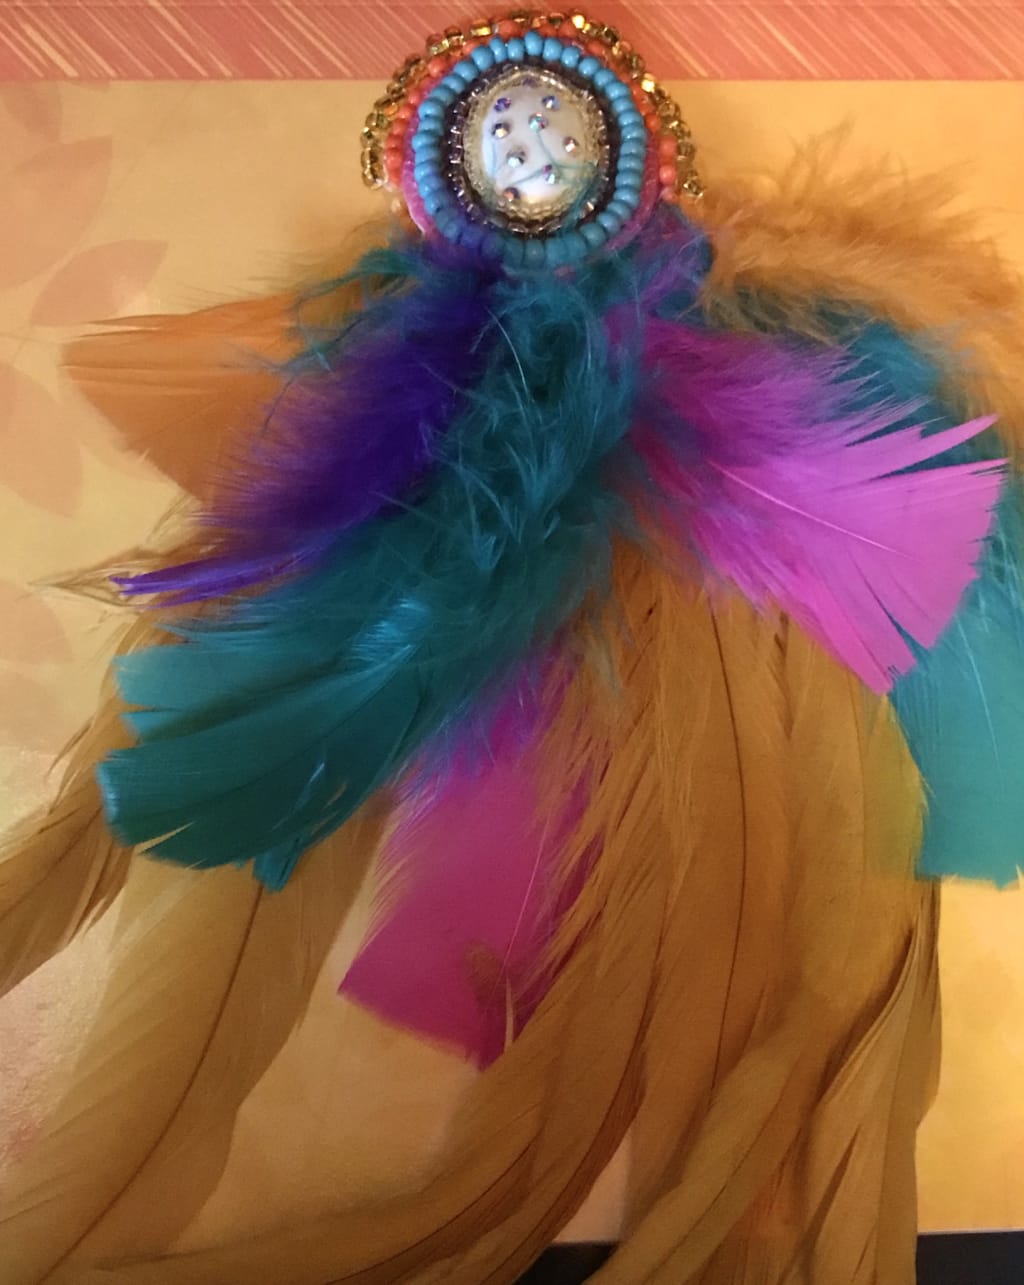
As you can see, I incorporated feathers. This is where your own personal flair and style can be added to your piece. I‘ve utilized feathers, dangling beads, suede strips, leather and other crafting elements to create one of a kind pieces. Feel free to explore your own talents and unique ideas. I have used these techniques to make pendants, necklaces, cocktail rings, earrings and cuff bracelets. I’m not a household name but I made a living designing jewelry and you can as well.
In the first photo, I used a gemstone cabochon called Lemon Chrysoprase for my centerpiece. I encourage you to educate yourself about gems. Knowledge in gemology allows you to find a unique job. You could be an expert in jewelry antiquities, gem appraiser, gem buyer and seller or an entrepreneur specializing in the healing and creative powers of gemstones. Each gem has a unique personality and the possibilities for their use become endless.
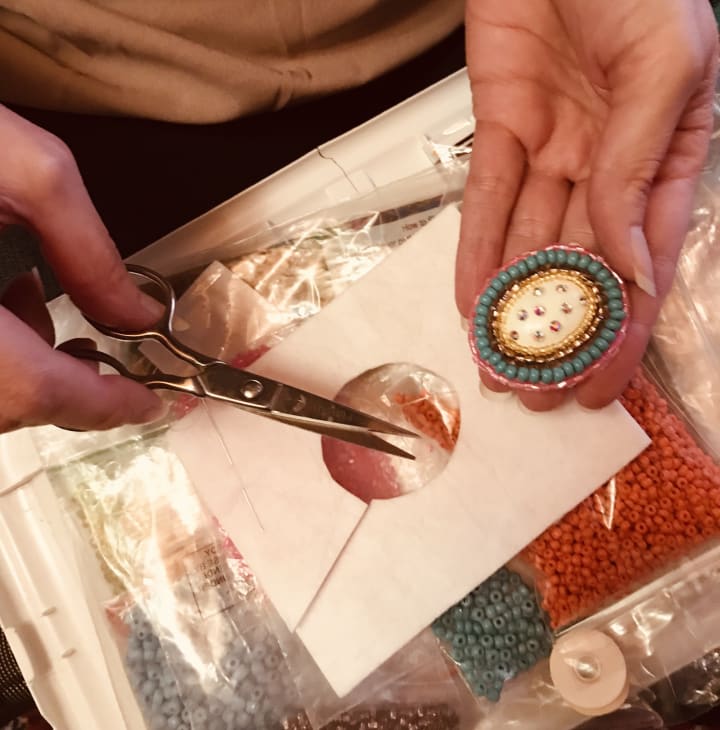
This is an oval gemstone cabochon. A cabochon has a flat back. I have used my Dollar Store acrylic cabochons, shell, Swarovski crystal and faux gemstones as centerpieces, all found on the internet. As a beginner, it’s easier to use round cabochons.
I used E6000 glue to affix the cabochon to the beading foundation. You can purchase any foundation backing you like. I use E6000 glue because it keeps the cabochon glued down.
As you can see, I got inspired and glued some left over tiny Swarovski crystal cabochons onto the Lemon Chrysoprase. This was new for me. Again, inspiration is everywhere even in random left over crystals.
I want you to visualize and see photo by photo how you can develop your own creativity and find joy in an unintimidating hobby. The colors and elements come into play throughout the whole piece. That’s the fun and it’s all yours. Plus, you get to wear it and guess what? You’ll be the only one wearing it. That’s a bonus.

Beading thread is imperative because you want thread that won’t break and will fit through your beads. A simple knot of the thread gets you started.
This photo shows the first beaded row sewn around the cabochon. This is where you’re in charge. You get to pick out the color scheme. Notice the beads. You can choose transparent, opaque, crystals and much more. You’re really diving into an exciting hobby. I’m hoping to inspire the budding designer in you.
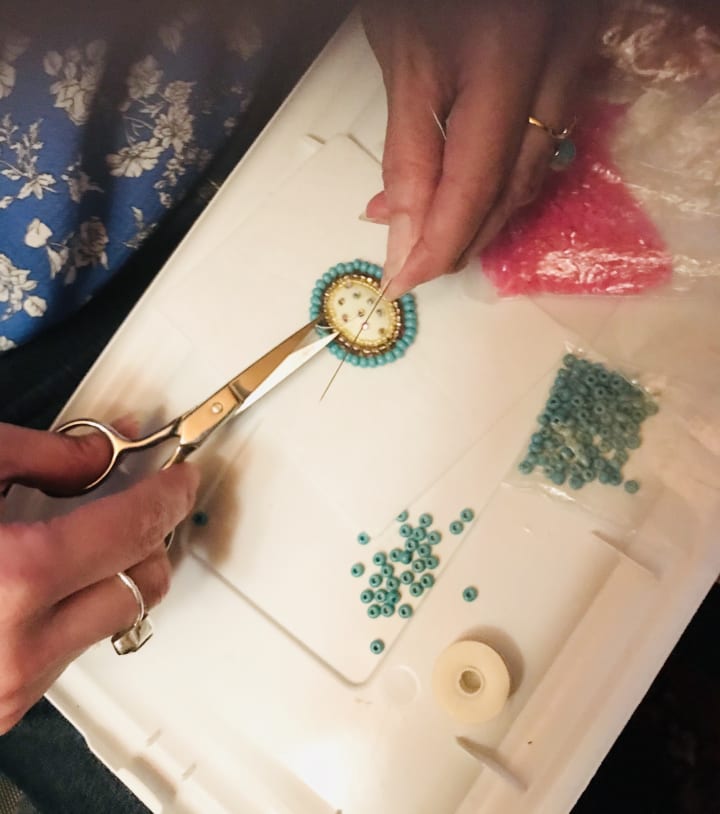
Educating yourself regarding different color palettes and combinations will assist you in any art endeavor. In my piece, I chose colors to compliment both the cabochon and the feathers. I wanted to create a bohemian Coachella inspired design. If you love going to music festivals, now you can create your own pieces of jewelry.
I used turquoise beads for the first row and lilac beads raised up beside the cabochon. I’ll explain the process for the first beaded row. Add two beads on the thread. Sew them down and then go back up through the first two beads and add another two until you form a beaded row. I would have to write a book to explain the edging of this piece which is why you should invest in a good seed bead embroidery book for jewelry as suggested.
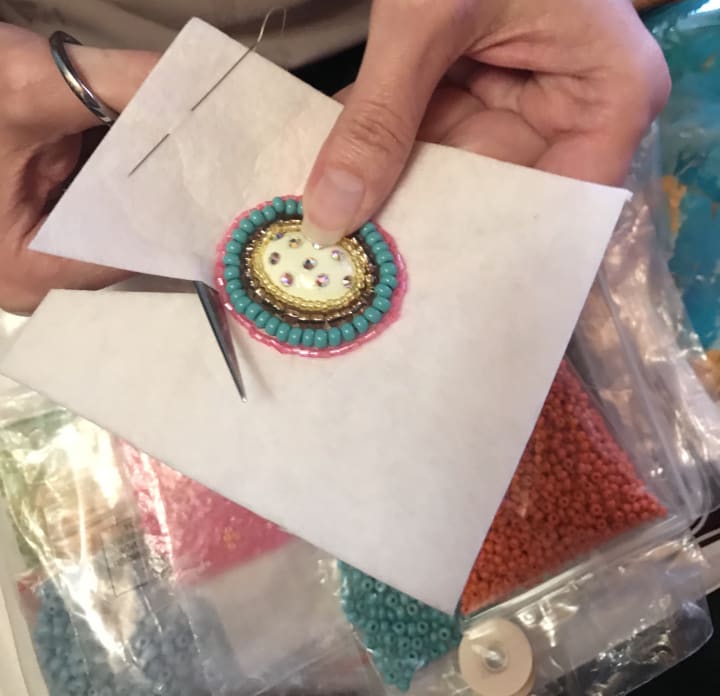
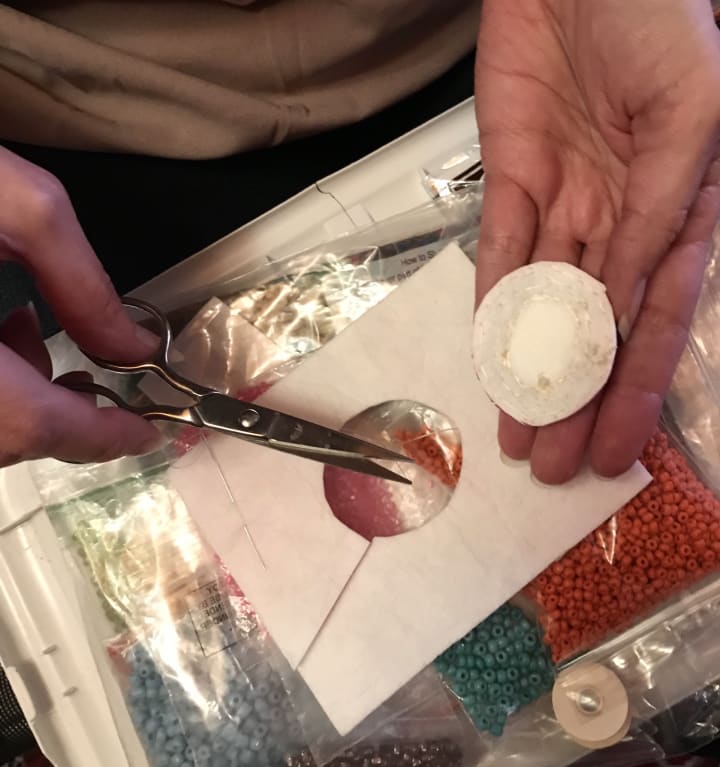
I added a final row of pink beads and now I’m ready to cut the beading foundation.
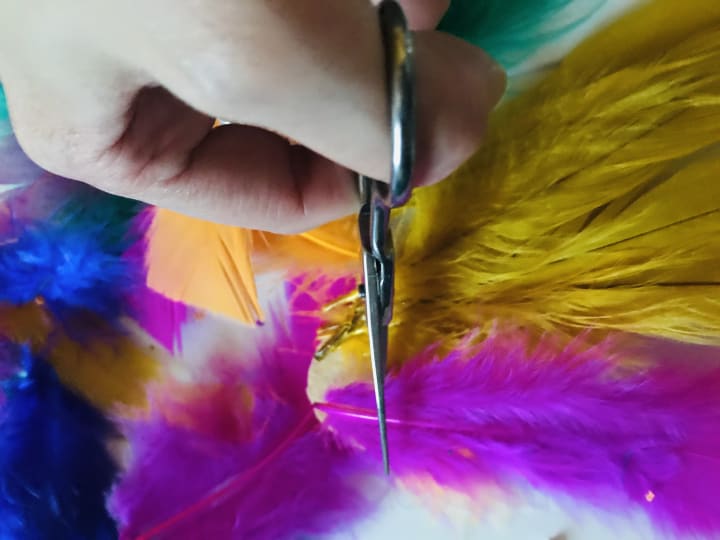
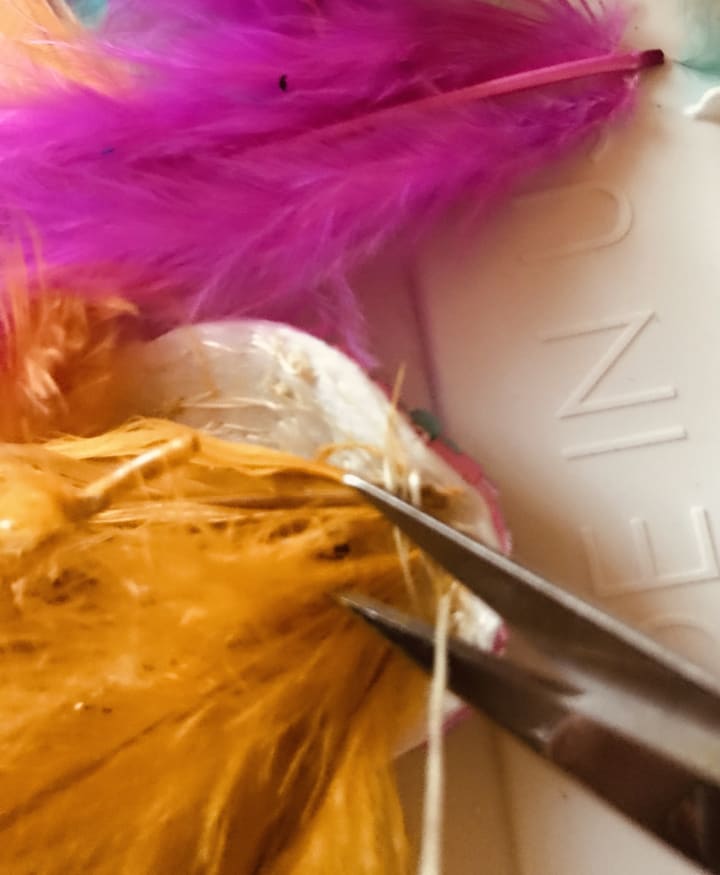
I’ve included pictures to show how I use my embroidery scissors to cut basically everything including the thread, backing, fabric and even the feather tips.
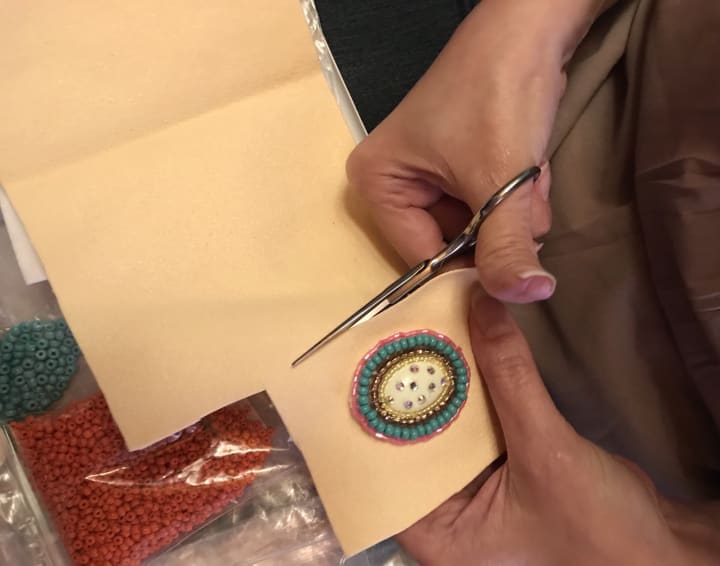
You’ll need to add your ultra suede fabric to the back of the beaded piece. As you can see, the fabric will cover up the thread.
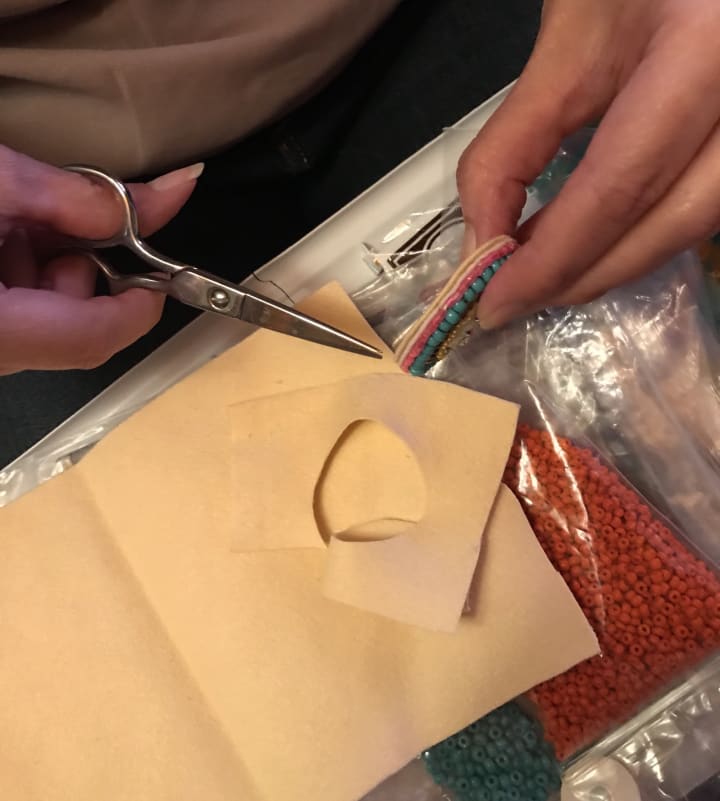
Once you’ve got the beading complete, you’ll have to cut the ultra suede fabric to glue down your piece.

You can easily add a fabric to the back with any craft glue and complete the side stitching for a great beaded cabochon.
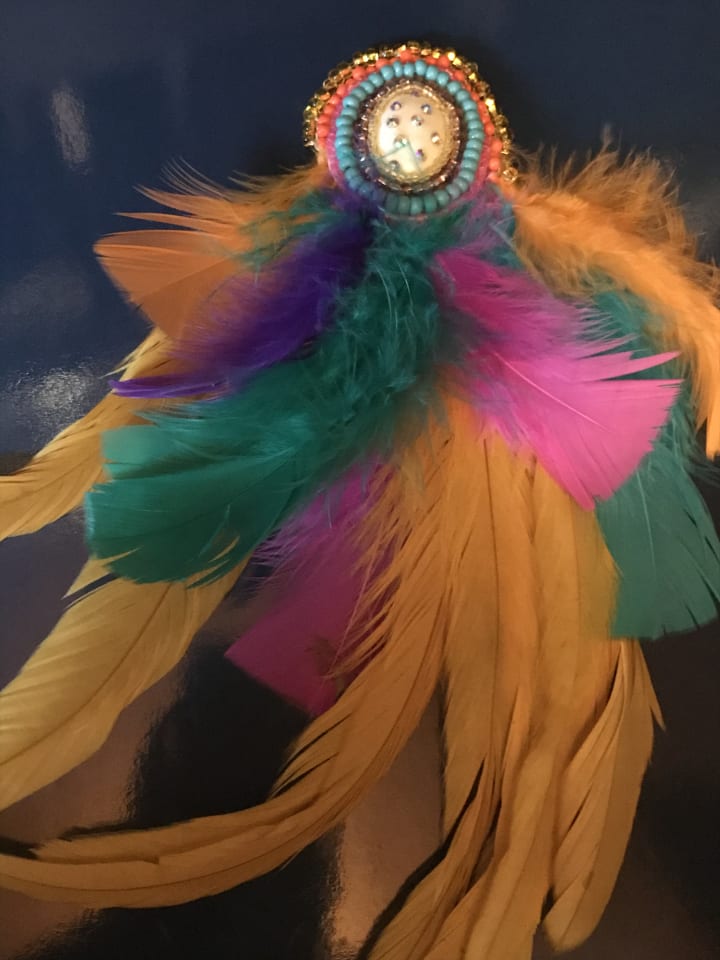
It’s a good start to learn the initial elements of design but you really want to explore your abilities. In my case, jewelry design is comprised of simple necessary items used for the craft but I like to add the unexpected. Check out the feathers. I love the colors and texture they add to the piece. I used the scissors to cut the ends to fit underneath the fabric. I affixed the backing with regular craft glue.
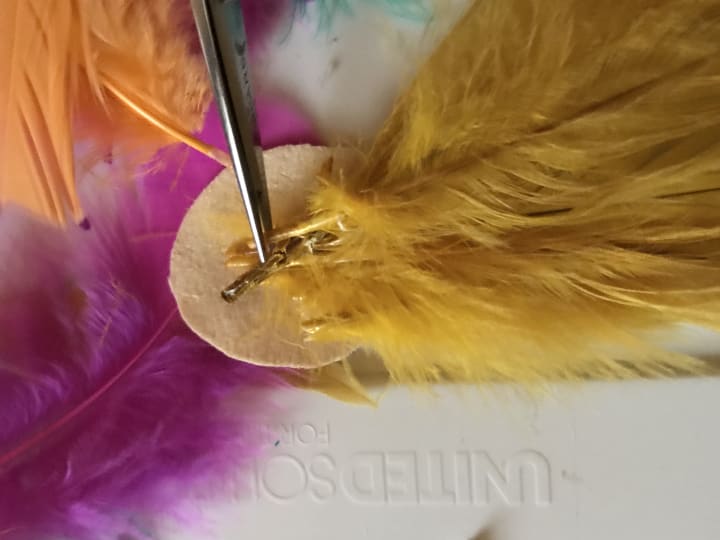
With any creative endeavor, you have to improvise. I call it funovise! I glued and sewed down the feathers to keep them in place.
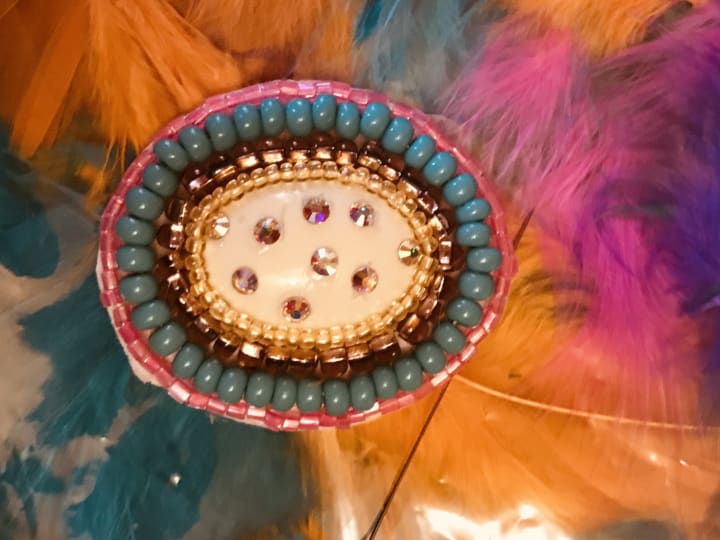
In the last photo, you’ll see the finished piece. I had to work around the feathers to complete the edging with orange beads. I added an extra edging of gold for a little glisten.
To complete this pendant I would add an extra bead and jump ring at the top or glue on a flat back bail. It’s simple.
I hope through these photos, I not only designed a beaded pendant but a potential beading enthusiast. Find a seed bead embroidery book and get started. I got inspired with a bead book and kit I bought at an airport store. Years later, I’m still beading and creating jewelry. In fact, this is one of the last techniques I discovered. I got hooked on this amazing hobby. I hope you do as well.
About the Creator
Diana Hayes
Thank you for reading. A ❤️is free. Tips are appreciated. From thoughts to words, I hope to inspire you.
Keep reading
More stories from Diana Hayes and writers in Lifehack and other communities.
Building Influence in a Remote Team
In traditional office environments, influence often developed naturally through proximity. People who spoke confidently in meetings, participated in hallway discussions, or regularly interacted with leadership often gained recognition and influence simply because they were visible.
By Bahati Mulishi5 days ago in Lifehack
How to Hire a Quality Painting Team in Sydney Without the Job Dragging On
A repaint is meant to be a tidy upgrade: cleaner lines, brighter rooms, a place that feels looked-after again. Yet plenty of paint projects in Sydney turn into a slow-motion inconvenience—rooms half usable, dates sliding, and that lingering sense the finish isn’t quite right.
By Evelyn Heard7 days ago in Lifehack
A Transparent Look at Vocal Challenges and Top Stories
Almost three years ago, we shared a resource article that served as a place for people to suggest new challenge prompts. We thought it would be a good idea to refresh that thread, and take the opportunity to answer a few common questions about top stories, how challenges are judged and how submissions are reviewed.
By Vocal Curation Team4 days ago in Resources


Comments
There are no comments for this story
Be the first to respond and start the conversation.