
LED Downlights Installation Guidelines
Installing LED downlights is easy and affordable! If you want to install recessed lighting in your home, all it takes are some tools.

Installing LED downlights is easy and affordable! If you want to install recessed lighting in your home, all it takes are some tools. First, find an area on the ceiling where you would like to place one of these lights, then cut out a hole big enough for both power connection and bracket installation. After that, use simple hand movements to connect everything into place.
Light position
1. Use of stud finder
First of all, use the stud finder and hold it flat before the ceiling. Then, slowly move the stud finder along the top until the device provides a beep or light indication. Mark the position where it gives a beep and mark it with a pencil.
Try to knock on the ceiling and hear a hollow sound. If you hear an open sound, then there is no joust behind the ceiling. If the sound is solid, then there is a joist behind it.
2. Try to check the ceiling and make sure it is clear
Hold the detector against the ceiling and choose the spot where you want to place the downlight. Then, move the sensor to the front and back and check if you get a beep. Mark the location where a pipe or wire is coming your way. If the ceiling is clear, then there is no issue with light installation.
3. Mark the locations where you want to install the downlights
Choose the spot between the joists present on the ceiling and draw a mark. Do not choose the area where pipes and wires are overlapping. Instead, leave 3 to 4 inches of space from the marked place so that you can install the downlight on your ceiling.
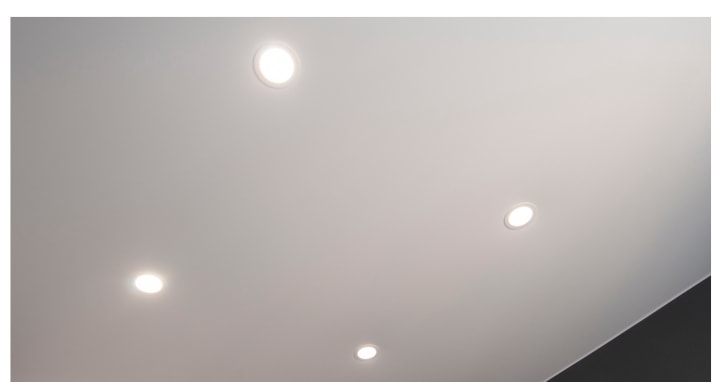
4. Additional lights
If you want to install multiple downlights in your given space, mark out the spots using a stud finder across the ceiling. Keep a distance of 4-5 feet from one another as per requirement.
Cutting holes
1. Choose a downlight that is compatible with your ceiling
The downlights are generally cylindrical and are recessed from the ceiling; depending on the age of your residence, select a downlight with 35W, which is bright enough.
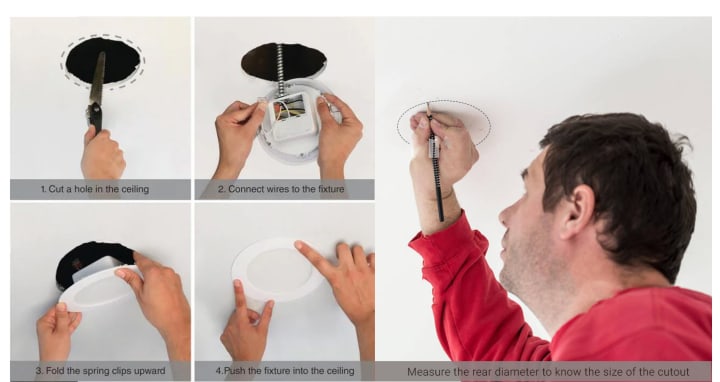
2. Measure the rear diameter to know the size of the cutout
Install the lights so that the bulb remains on the bottom and other parts on top of the ceiling. Use a tape to measure the diameter of the light to know the installation cut.
3. Use the help of a drill to prepare a cut-out.
The hole saw comes with a ring-shaped blade that comes connected to the end of the blade. Choose carbide or diamond grits to make the cleanest hole. Rotate the chuck to attach the bit and turn it clockwise to tighten the saw and anti-clockwise to loosen it.
4. Cut through the ceiling
Perpendicular to the ceiling, hold the saw and the middle bit to adjust to the mark when you want to drill. Then, pull the trigger to start the drill and apply tremendous pressure to make a precise hole in the ceiling.
5. Remove the ceiling piece
Pull the saw straight out from the ceiling and turn off the drill. Place the end of the screwdriver and the piece of the ceiling which is stuck on the ceiling. Pull the piece out of the hole.
Installing downlights
1. Turn off the power
Find the electricity box of your house. Locate the breakers that control the part of the room where you want to put the recessed downlights.
Cut the power and test the wires with a wire tester to ensure that the voltage is not running.
2. Put wires to ensure the installation
One can either attach the lights with existing switches or add a new one. Use a 14/2 cable through the wall using wire tape so that the line holds up. The 14/2 wire contains a single hot, neutral, and ground wire.
3. Strip the wire ends
Open the wire stripped and clamp the ½ inch of the 14/2 cable. Pull the stripper to the end of the wire and remove the insulation.
Repeat the process
4. Interlace the matching wires
Hold the two ends of the black wire and use the pliers to twist both ends.
Twist the wire cap clockwise for the connection and to cover the exposed ends of the wires.
Repeat the process with uninsulated and white wires.
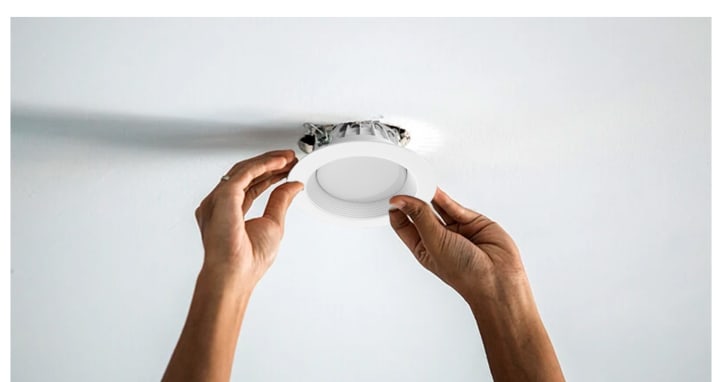
5. Hold the spring clips of the downlight
The base of the LED downlights comes with spring-loaded metal clips. These clips snap open when they are released.
Grab the spring clips from under and push them up. Keep holding the clips until you have finished installing the lights.
6. Push the light into the hole
Make sure all the wire part goes inside the hole before the light element. Then, continue to push the light fixture into the hole by holding the clips tightly.
Gently push the bottom of the light and hear a click sound. Then, slowly lower back down the light fixture to ensure that the clips support. Make sure that the clips help the fixture installation.
About the Creator
Keep reading
More stories from jason jensen and writers in Lifehack and other communities.
LED Vanity Mirror Is the Perfect Application for Makeup
Lighting plays a very significant role in applying makeup. Sometimes your makeup does not go accurately, but this is not because of your makeup skills but because of the lighting issue. If the lighting goes wrong, it affects your makeup routine. If you are applying makeup in fluorescent lighting, it can make you put a lot of makeup on, and if there is the presence of pink-tinted lights, you can miss the spots for applying makeup. Your makeup studio or dressing room deserves better illumination so that you can do faces perfectly.
By jason jensen5 years ago in Blush
The Essential Role of a Quantum Expert Witness in High-Tech Litigation
With the increasing speed in quantum technology, quantum computing, cryptography, telecommunications, and advanced materials, cases are increasingly pitting themselves against each other in courts. They are the cases when one has to deal with the concepts that are much higher, which is why the assistance of a professional specialist cannot be avoided. When the stakes involve intellectual property, algorithm performance, or the integrity of quantum systems, attorneys often rely on a quantum expert witness to clarify and validate the complex scientific issues at the heart of the dispute.
By Jane Smithh3 days ago in Lifehack
how do I choose the right concrete restoration service?
When it comes to maintaining the integrity and aesthetics of your concrete surfaces, the choice of a concrete restoration service is critical. Whether it's a driveway, patio, or commercial space, various factors can contribute to the deterioration of concrete, including weather exposure, heavy foot traffic, and improper installation.
By Neck Akila2 days ago in Lifehack


Comments
There are no comments for this story
Be the first to respond and start the conversation.