
How to Make a Hooded Cloak: A Step-by-Step Guide
How to Make a Hooded Cloak


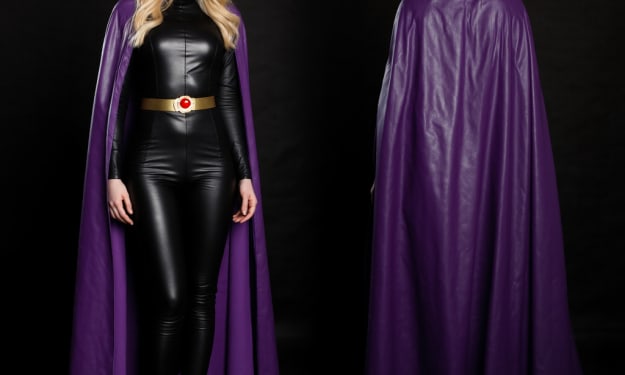
Creating a hooded cloak from pure cow leather can be a stunning and rewarding project. Leather adds a luxurious, medieval feel to any garment, making it perfect for cosplay, historical reenactments, or as a statement piece in your wardrobe. This guide will walk you through each step of the process, from choosing the right leather to sewing the final stitch.
Keywords: leather cloak, DIY leather cloak, sewing leather cloak, cosplay leather cloak, how to make a leather cloak, medieval leather cloak, handmade leather cloak
Materials You'll Need
Before you start, gather the following materials to ensure your project goes smoothly:
- Leather: Choose high-quality cow leather for a durable and stylish cloak. You may need approximately 3-4 yards, depending on the length of your cloak.
- Leather Thread: Use strong, durable thread specifically designed for leather sewing to ensure lasting seams.
- Sewing Machine: A heavy-duty sewing machine capable of sewing through leather is essential. Alternatively, you can sew by hand using leather needles.
- Scissors: Sharp leather shears are necessary for clean, precise cuts.
- Measuring Tape: Essential for ensuring accurate measurements.
- Leather Punch: For making holes, especially if you're adding closures like laces or clasps.
- Clips or Clamps: Regular pins won't work with leather, so use clips or clamps to hold pieces together while sewing.
- Chalk or Leather Marker: For marking measurements and cutting lines.
Step 1: Take Measurements
Start by taking accurate measurements. Measure from the nape of your neck to the desired length of your cloak. Leather cloaks often look best when they reach mid-calf, but you can adjust this based on your preference. Also, measure around your shoulders to ensure the cloak will drape comfortably.
Step 2: Cut the Leather
With your measurements in hand, lay out your leather on a large, flat surface. Cut a large semicircle for the main body of the cloak. The straight edge will be the top of your cloak, and the curved edge will be the hem. Remember to account for seam allowances.
To create a hood, cut a rectangle from the leather. The width should be twice the depth you want for your hood, and the length should be the measurement from the top of your head to your shoulders plus a few inches for seam allowances.
Step 3: Sew the Hood
Fold the leather rectangle in half with the right sides facing each other. Sew along one of the shorter edges to form the back seam of the hood. Given the thickness of leather, use a leather needle and heavy-duty thread. Once sewn, turn the hood right side out.
Step 4: Attach the Hood to the Cloak
Clip the hood to the neckline of the cloak, aligning the center seam of the hood with the center of the cloak's neckline. Make sure the right sides are facing each other. Sew the hood to the cloak, ensuring a neat, even seam. Use a leather punch to make holes for stitching if needed.
Step 5: Hem the Cloak
To give your cloak a polished look, hem the edges. Fold the raw edges under about half an inch and use clips to hold them in place. Sew a straight stitch along the hem. This step will prevent the leather from fraying and adds a professional finish to your cloak.
Step 6: Add a Closure
Choose a closure that complements the look of your leather cloak. You can use a decorative clasp, leather laces, or even a toggle. Sew or attach your chosen closure to the front edges of the cloak, just below the neckline. If you're using laces, use a leather punch to create evenly spaced holes.
Step 7: Final Touches
Try on your cloak to ensure it fits comfortably. Make any necessary adjustments to the hem or hood. For a more personalized touch, consider adding leather trim, studs, or other embellishments.
Tips for Success
Choosing High-Quality Leather: Opt for soft, pliable leather that's easy to work with but still offers the desired structure and durability.
Using the Right Tools: Leather requires special tools, including heavy-duty needles, threads, and a sewing machine that can handle thicker materials.
Practice First: If you're new to working with leather, practice on smaller pieces or scraps to get comfortable with sewing and handling leather.
FAQs
1. What is the best type of leather for a cloak?
Cow leather is a great choice for cloaks due to its durability and classic look. It's sturdy enough to provide warmth and protection while still being flexible enough to sew.
2. Can I hand-sew a leather cloak?
Yes, you can hand-sew a leather cloak using leather needles and strong, waxed thread. However, it will take more time and effort compared to using a sewing machine.
3. How do I care for a leather cloak?
Keep your leather cloak away from direct sunlight and moisture. Use a leather conditioner to keep it soft and supple. Store it properly on a hanger to avoid creases.
4. What closures work best for leather cloaks?
Decorative clasps, leather laces, and toggles are popular choices. Ensure the closure you choose is strong enough to handle the weight of the leather.
5. Can I add a lining to my leather cloak?
Yes, adding a lining can increase comfort and add a layer of warmth. Choose a soft fabric like cotton or silk for the lining and sew it in before hemming the edges.
Conclusion
Making a hooded cloak from pure cow leather is a rewarding project that combines skill and creativity. Follow these steps to create a beautiful, durable cloak that will last for years. Whether for cosplay, historical reenactment, or simply making a fashion statement, a handmade leather cloak is a timeless addition to any wardrobe.
About the Creator
Suzzane
Hello, I'm Suzzane! I'm passionate about leather products and the fascinating history of costumes across different cultures and nations. I explore the rich traditions and craftsmanship that have shaped iconic garments throughout history.
What to Expect From Mobile App Development Teams in Miami?
Miami’s tech ecosystem grew fast and unevenly. According to Statista, Florida’s digital economy expanded by over 17 percent between 2022 and 2025, pulling in agencies, freelancers, boutique firms, and offshore-linked teams at very different maturity levels.
By Mike Pichai2 days ago in Lifehack
The Guardian Geofence: Creating Dynamic Safe Zones for School, Sports, and Travel
The Guardian Geofence: Creating Dynamic Safe Zones Geofencing—creating virtual boundaries that trigger alerts—is one of the most powerful yet underutilized features of modern family safety. Moving beyond a single home alert, you can create a dynamic system of "safe zones" that automatically keeps you informed during daily routines and special trips.
By Olivia Martinezabout 5 hours ago in Lifehack


Comments
There are no comments for this story
Be the first to respond and start the conversation.