
How To Install An HVAC UV Light (5 Step Guide)
Are you curious about learning the way to install a sanitizing UV light inside your HVAC? You are within the right place because even

Are you curious about learning the way to install a sanitizing UV light inside your HVAC?
You are within the right place because even hospitals use UV-C light to disinfect medical equipment and operating rooms.
I created this step-by-step guide the way to install a UV light to stay your A/C system free from mold and mildew protecting your air quality.
In this article, you'll learn...
how to install UV light for HVAC
Why you ought to never allow a UV light to shine on your eyes or skin (a safety hazard)
How to determine the simplest location to put the UV light
How to use a hole saw to chop into the metal duct (and my top hole saw choice)
The best thanks to power a germicidal UV electromagnetic unit
Important things to try to do before installing a UV light (if there's already mold)
The Five Steps To An HVAC UV Light Installation
#1. Choose Where to put in The UV Light
Perhaps the foremost important step is to settle on where to put in the UV light. you would like it installed where it'll be best and kill the foremost mold and mildew.
#2. Drill The Hole(s) For The UV Light
The biggest physical step is drilling the holes within the metal HVAC cover in order that the UV light bulb is often inserted. Most holes are going to be 1-1/2" to 2-1/2" in diameter.
#3. Screw The Germicidal UV Light To The Furnace
In this step, you're taking screws and secure the UV light housing to the air conditioning. you do not want to tighten the screws an excessive amount of where you damage the plastic housing.
#4. Power The A/C UV Light System
After the UV light is secured, you'll want to feature power to the UV light. Usually (and the easiest) is to only plug the UV light into a daily 120-volt outlet.
#5. Change & Clean The UV Light Bulb
After it's installed, the sole real maintenance is to vary the bulb annually (or at the most every two years) and clean the sunshine bulbs seasonally.
#1. Choose Where to put in The UV Light
The first step in installing a UV furnace light is to work out the simplest location on your furnace or air handler. If the germicidal UV light is installed within the wrong place, it'll greatly reduce its effectiveness in preventing mold or mildew growth.
Usually, you would like to put in the A/C ultraviolet treatment system in order that the evaporator coil gets the foremost amount of sunshine. consistent with Lincoln Tech, it's the evaporator coil (and drip pan) that's usually the source of HVAC contaminants.
The evaporator coil is vulnerable to the expansion of biofilms which are communities of microorganisms that stay together on a surface. the quantity of area of an evaporator coil is around 5,000 square feet.
The evaporator or A-coil is that the a part of the air handler that has the copper (or aluminum) tubing where the refrigerant runs through. It frequently has the form of a tepee or "A" and regularly has the foremost dust buildup and mold growth.
However, if you've got already had mold growth in your HVAC and there's a specific corner or area of the air handler that's susceptible to mold ---- then you ought to install the UV light in order that it shines the foremost on the problematic mold area. there's no point in experimenting with locations if you already know that one spot of your A/C gets the foremost mold growth.
A-Shaped Evaporator Coil
The best location to put in a UV light if within the A-shape is above, center, and downstream of the coil. this enables the A/C ultraviolet to shine the foremost amount of sunshine on the coil, while killing a number of airborne microbes.
The runner-up location is below the evaporator coil (if there's room). If none of those locations are feasible, then you'll install the UV furnace light to either side of the coil.
N-Shaped Coils
The second commonest sort of A/C coil after the A-coil is that the diagonal N-coil --- it's within the shape of an N or Z (depending on orientation). If the evaporator coil is during this shape, then there are only two options. you'll either install the sunshine above the coil or below it. Preferably, you ought to install the UV light closer to the drip pan and where there'll be more moisture.
If you do not desire the air handler is getting enough UV light, you'll always install an additional UV light during a different location or on the opposite side of the coil.
#2. Drill The Hole(s) For The UV Light
The next step is to drill a hole (or two) into the indoor air handler in order that the UV light bulb can penetrate inside the unit.
Using A Hole Saw drilling bit
Some HVAC UV light systems accompany everything you'll get to install a UV light--- including the opening saw drill bit---except in fact an electrical drill. If you purchased a UV light without a hole saw, you'll get to buy one in order that you'll cut a circular hole through the metal HVAC cover (or ductwork).
Most UV lights will need either a hole within the range of 1.5" to 3" in diameter. I like to recommend buying a Lenox 2.5" Hole Saw because it already features a drilling bit as a part of the opening saw. The drilling bit goes in first, which helps grab the sheet (and guide the opening saw), then the opening saw cuts the particular 2.5-inch hole.
You can inspect the worth of the Lenox 2.5" Hole Saw on Amazon here. Lenox also has different sizes of an equivalent model.
Shut Off Power & Use Paper Template
It is important to first shutoff the facility to the HVAC system before installing a UV light---you don’t want to accidentally get shocked. Locate the breaker at the panel box, and flip the switch.
Most AC UV light products will accompany a paper template for the mounting. Tape the template to the world where you would like to put in the UV light. The template will assist you cut the holes at the right distance apart (if there are two bulbs).
Start slowly as you narrow into the sheet, and because the hole saw makes alittle groove, gradually push the saw into the ductwork to chop the opening. it's going to help to rock the drilling bit back and forth to urge a simpler cut.
#3. Screw The Germicidal UV Light To The Furnace
The third step is to screw the UV light in to the air handler. The UV product should of accompany a couple of screws for the install. Simply use a cordless drill or a Phillips screwdriver to secure the UV light to the metal.
Make sure to not install the screws too tightly where it's going to crack the plastic of the UV light. As a reminder, don't connect the UV light bulb before it's fully installed. The UV light can burn your skin and should damage your eyes.
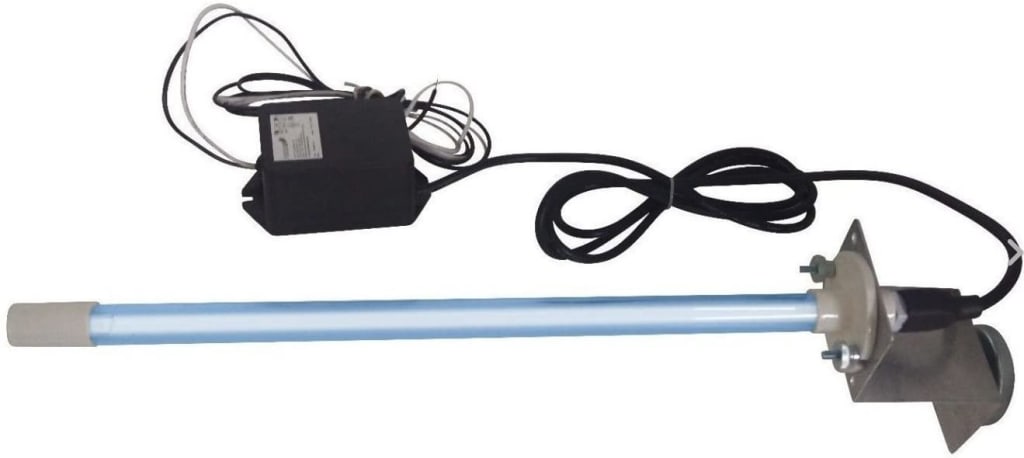
#4. Power The A/C UV Light System
With the UV light sanitizer secured to the furnace, now you would like to power the system. Most new UV lights will accompany 5′-7′ long extension power cords. All you'll get to do is plug the unit into an existing outlet. Most utility rooms will have already got an outlet.
Another option is to hardwire the UV light into the furnace. you'll even wire it in order that the UV light only activates when the furnace or A/C activates so it is not on 24 hours.
After you've got plugged within the UV light, simply flip the facility turn on the unit, and check the sight glass to form sure that the UV light is really on. There should be a bluish glow within the sight glass.
The Best HVAC UV Light
My favorite UV lights for HVAC systems are made by a corporation called OdorStop.
This OdorStop UV Light will only activate when your HVAC is on — which suggests it'll save energy and extend the lifetime of your bulb. it's also meant to be installed on the return duct side, which makes it less likely that the UV light will damage any critical HVAC wiring or other plastic parts. you'll view the worth of the OdorStop UV Light here on Amazon.
#5. Change & Clean The UV Light Bulb
Most UV light bulbs will last about one year. If there's blue light shining, this doesn’t mean that the bulb doesn’t need replacement. the particular UV-C frequency that kills mold is invisible to humans. There could also be blue light emanating from the unit, but it's not shining enough UV-C light frequency.
It is also recommended to wash the UV light bulb every few months or after every season. to wash the unit, you'll get to remove the bulb, and clean it with a soft lint-free cloth like a microfiber rag. you'll use regular glass cleaning solution to wash the bulb from dust and debris.
What's The Bottom Line On A UV Light Installation For The HVAC?
If you follow the steps during this guide, it should not be too difficult to put in a UV light to kill mold and mildew in your indoor air handler. the essential idea is to chop a hole within the best location, insert the bulb, use screws to secure the sunshine, and plug it in.
If you've got all of the supplies, you ought to be ready to install a UV Inner Light 15min to 30min. However, if you would like to hardwire the UV light to the facility of your furnace, it's going to take longer. aside from that option, using the opening saw to chop the hole(s) will likely be the foremost challenging aspect of a UV light install.
However, installing a UV light is often a pain if you do not have the equipment or the DIY skill. you'll want to see out my Contractor Search Tool which I created so my readers can get free quotes from local contractors who are pre-vetted.
Other Home Guides
Looking to find out more about home maintenance? inspect our other informative home product reviews and guides!
About the Creator
Nancy Thigpen
I am Nancy and welcome. I am an individual who is positive about every aspect of life. There are many things I prefer to try to do, to see, and to experience. I prefer to read, I prefer to write; I prefer to think, I prefer to concentrate.
Keep reading
More stories from Nancy Thigpen and writers in Lifehack and other communities.
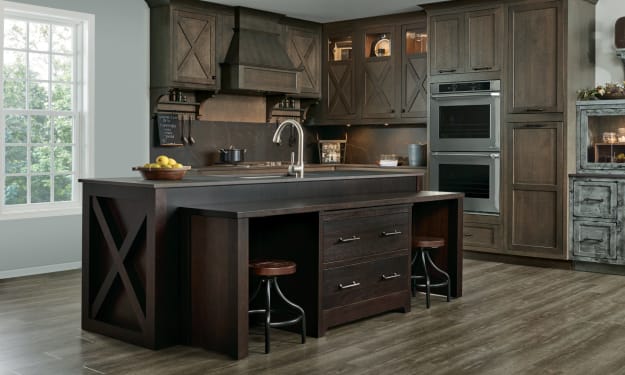
How To Build Cabinets
Learn how to create cabinets yourself to save lots of you money on your next remodel. Building cabinets for your kitchen, bath or built-ins seems like it should be hard, but it isn’t! Most cabinets are just easy boxes. and therefore the joining is often hidden on the surface of the cupboards that are then hidden when the cupboards are installed.
By Nancy Thigpen5 years ago in Lifehack
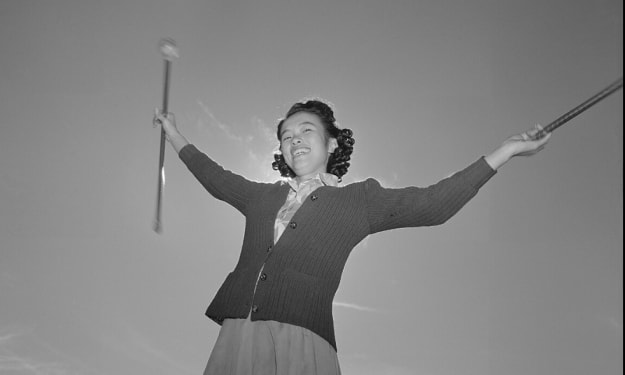
Baton Twirling has mental and physical health benefits for seniors
Baton twirling offers many benefits I had not thought about twirling a baton in many years until today. This morning, I was walking in my backyard when I noticed a small black metal pole. I had walked past this item for many days, but this time, I picked it up.
By Cheryl E Prestonabout 17 hours ago in Lifehack
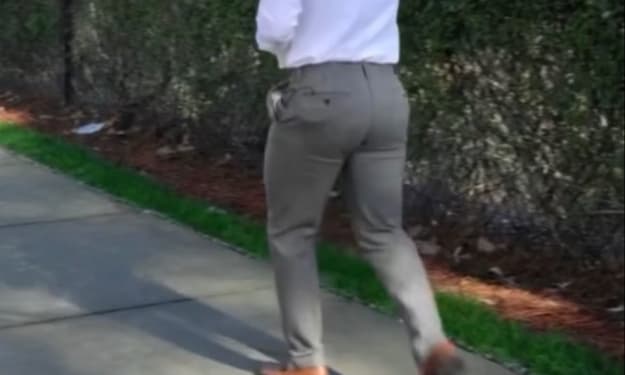
Hottest in the Office
Dear Rafi, You’re very distracting to work around. For the first second I saw you the other day, I thought you were some type of executive. It took a moment to realize no, you were just the new guy, dressed up for the job he wants. Be still, my heart.
By Gabriel Shamesabout 17 hours ago in Pride

Comments
There are no comments for this story
Be the first to respond and start the conversation.