
Fix Any Zipper Pull With a Zip Tie
Fix Any Zipper Pull With a Zip Tie

- How to Fix a Broken Zipper with a Zip Tie: A Simple and Effective Solution
Have you ever had a favorite suitcase, backpack, or winter jacket that suddenly had a zipper malfunction? It’s frustrating when your trusty gear lets you down, but before you toss it out and spend money on a replacement, there's a simple and cost-effective fix you should know about. With just a zip tie, you can repair a broken zipper and extend the life of your belongings. Here’s a step-by-step guide on how to fix a broken zipper using a zip tie.
- Step 1: Identify the Problem
The first step is to identify what’s wrong with your zipper. A zipper can break in various ways: it might be stuck, the slider might be damaged, or the teeth might be misaligned. If your zipper is beyond repair in its usual sense, don’t worry—this zip tie trick is a great workaround for many zipper issues.
- Step 2: Remove the Broken Zipper Slider
Once you’ve pinpointed the issue, it’s time to remove the damaged slider. This step is crucial because you need to create space for the zip tie to work effectively. Use pliers to carefully remove the slider from the zipper teeth. Be gentle to avoid damaging the fabric or the zipper teeth themselves.
- Prepare the Hole for the Zip Tie
Now that the broken slider is removed, check the size of the hole where the slider was attached. You need to make sure this hole is large enough to fit the zip tie through it. If the hole is too small, you might need to adjust the zipper teeth slightly to make room.
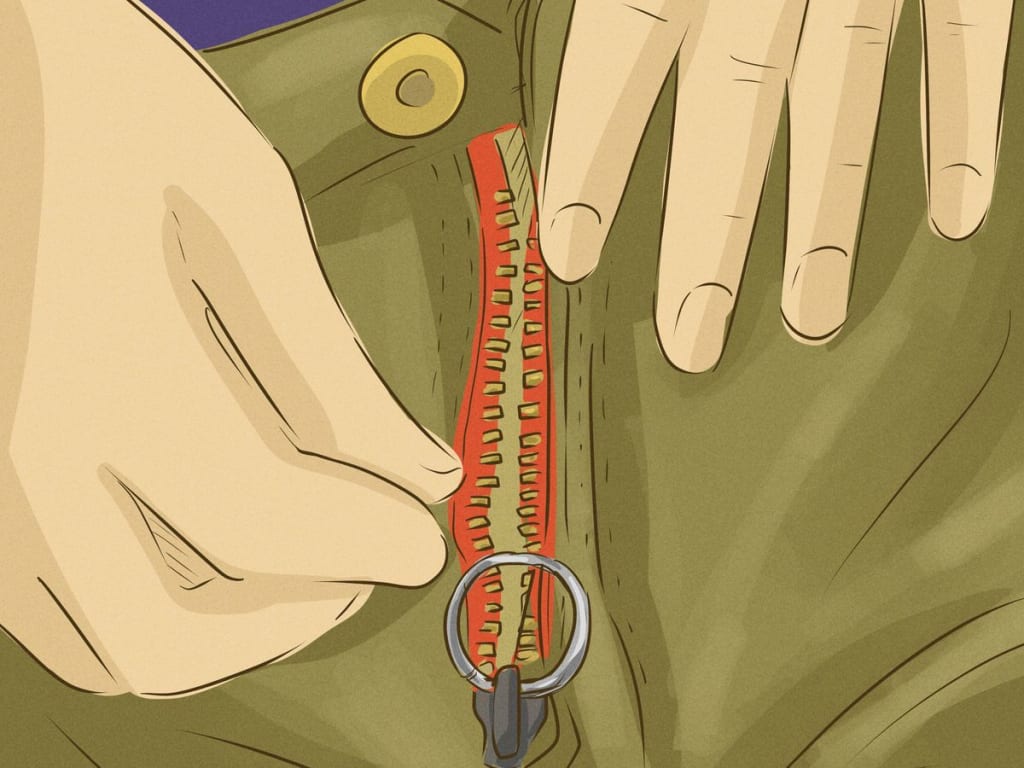
- Insert the Zip Tie
Next, take a zip tie—these are small, flexible plastic strips with a locking mechanism. Insert the zip tie through the hole where the slider was. The zip tie will act as a temporary slider, so make sure it goes through easily. It should fit snugly around the zipper teeth to hold them together.
- Secure the Zip Tie
With the zip tie in place, pull it tight to secure the zipper teeth. You want the zip tie to be fully around the zipper teeth, mimicking the function of the original slider. Make sure the zip tie is snug but not too tight; it should allow the zipper to move smoothly.
- Trim and Smooth the Zip Tie
Once the zip tie is securely in place, trim any excess length. Use scissors or wire cutters to cut the zip tie close to the locking mechanism. After trimming, you might notice sharp edges on the cut ends. To avoid getting scratched, smooth these edges with sandpaper or a file.
- Test Your Makeshift Zipper
Finally, test your makeshift zipper to ensure it works correctly. Zip and unzip a few times to check that everything is functioning smoothly. If the zipper moves freely and holds together, you’ve successfully repaired it with a zip tie!
- Tips and Tricks
Choose the Right Size Zip Tie For the best results, use a zip tie that’s strong enough to hold the zipper teeth but not too bulky. A standard zip tie works well for most zippers.
Be Patient: If your zipper is particularly stiff or difficult to manipulate, take your time adjusting the zip tie and aligning the teeth.
Consider Your Options This zip tie fix is a great temporary solution. For a more permanent fix, consider taking your item to a tailor or a repair shop.
By using this simple zip tie method, you can save money and keep your favorite items in use for longer. Next time you encounter a broken zipper, remember this easy fix and avoid the hassle of replacing your gear.
About the Creator
SK
Sajawal is an 18-year-old student in Class 13, known for his curiosity and determination. With his fair complexion and thoughtful demeanor, Sajawal stands out among his peers. He is dedicated to his studies and has a passion for storytellin
The Gym Left Me Empty. This Is the Connected, Joyful Future of Fitness
My Wellness Was a Mess. Here’s How I Discovered 2025’s Life-Changing Trends (And Actually Stuck With Them). Let me be brutally honest for a second. Two years ago, my idea of “wellness” was a chaotic, guilt-driven scramble. It was kale smoothies I hated, a gym membership I used as a $70/month guilt-trip, and a phone filled with meditation apps I opened once. I was chasing trends, not results. I felt overwhelmed, disconnected from my own body, and honestly, a bit like a failure. The noise was deafening: “Biohack this!” “Detox that!” “Crush your workout!” I was trying to follow all the rules, but my energy was in the gutter, my sleep was a mess, and that feeling of vibrant health felt like a myth sold to other people.
By John Arthor7 days ago in Lifehack
Blackhead & Whitehead Treatment Tips That Work
Blackheads and whiteheads are among the most common skin concerns, yet they’re also the most misunderstood. To target them, many people rely on harsh scrubs, which is not always the best idea. And if treated improperly, they can keep coming back.
By Amelia Jack7 days ago in Lifehack


Comments
There are no comments for this story
Be the first to respond and start the conversation.