
Five Steps To Installing Electrical Wire In Your House
DIY electrical work!

Whether you are building a new house or adding a room inside your current one, you will need to run electricity through the walls so that you can light the area and have electronic devices plugged in and working. If you have experience in electrical work, you can save time and money by doing the labor yourself. Here are the steps you can follow to set up the room.
Gather Your Materials
Before you can begin your job, you need to gather the materials you must have to get started. This is a project you should do only if you have experience with it. You will need the panel to connect to if one will be installed in this room, circuit breakers, wire strippers, electrical tape, conduit to run the wire through, a hammer, and a screwdriver. A drill would also be helpful especially if you are running wire through a new construction home. Arrange these items in the approximate order you will need them so you can begin your task.
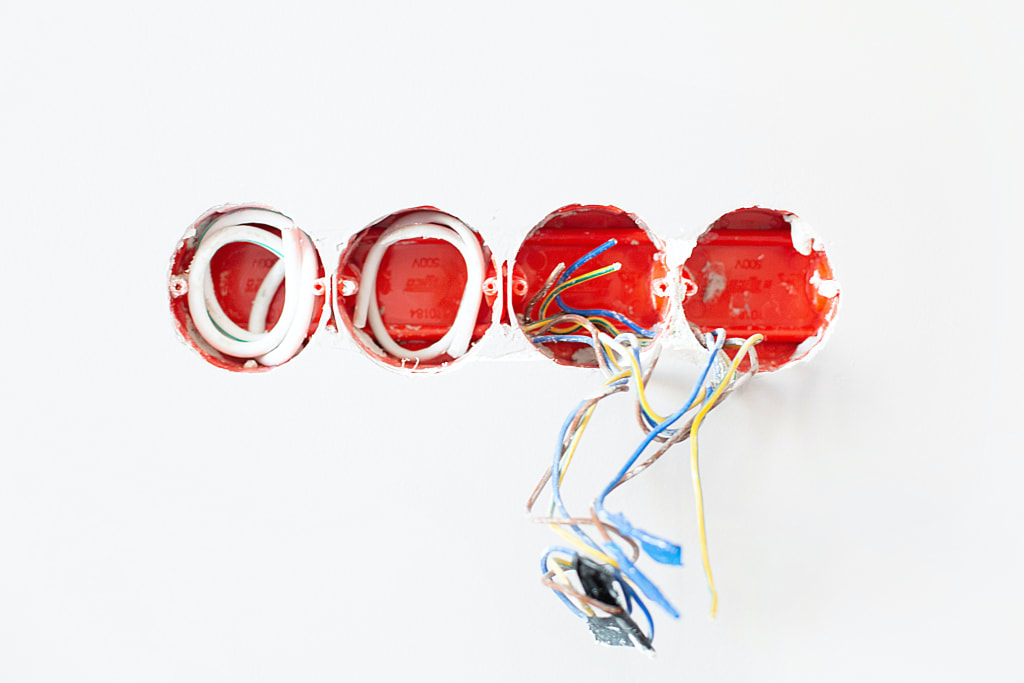
Set Up Your Boxes
Take a look around the room and decide where you want to place your boxes. This includes the circuit board if it will go into this room and any switchboards that are required. Mark on the wall where you want to mount the box and what type of outlet it will be. Hold the box where it should be and carefully hammer or screw it into place. Do this with every outlet and light switch that you need to put in. Be sure that it matches up with where the drywall will fit in once the plate has been put on.
Prepare For the Conduit
Once you have your boxes set up where you want them, you will need to attach the ¾” bit to your drill. Measure at least eight inches from the top of the box and mark that spot on the stud. Plan where you are going to drill very carefully. It must be in the exact center of the wood when you do this so that nails or screws will be unable to hit the wires when you are hanging a picture or other item on the wall later in the future. Set the bit against the wood and use your body weight to drill through it until you have a hole to the other side. Repeat this process with every box that you installed.
Attaching the Wiring
Unspool approximately a foot of wire so that it is easier to work with. If you are attaching them to a circuit breaker in another room, you will want to make a path to that then prepare to fix any holes in existing walls that you might make. Begin threading the wire through the holes that you drilled into the studs towards the first box you want to connect to. When you reach it, use the wire stripper to scrape away the protective layer from the wire. Push the exposed wiring and about a fourth of an inch of the cable into the box. Staple this down with an industrial stapler to keep it in place. Continue on until each box and light switch are done. To keep the wiring running straight along the wall, you need to staple it there as well. Only one wire should be held down by a staple. You need to attach it within twelve inches of a ceiling joist or hole, four to six inches against the stud or on the wall, or eight inches to the box itself.
Connect the Wires
Attach wire connectors to the ends that are threaded into the boxes then add piggyback pieces of wire to them. Leave one copper wire longer than the rest as the ground wire. From here you will connect the wiring to the outlet or light switch. If you are unsure how to proceed, you should reach out to a licensed electrician for help. When you have a new construction project, you should look for ways to save money and time. Running the wires in your new room or house can help you get a jump on this and let you enjoy your new space sooner.
About the Creator
Keep reading
More stories from Robert Cordray and writers in Lifehack and other communities.
Tips for Finding the Best Insurance
If you want to make sure your family is financially secure no matter what happens to you, life insurance is the way to go. However, making sure you have the right policy for your needs can be a lot of work. Before you choose a life insurance policy, it's important to research your options. If you need help picking the best life insurance for your needs, here's what you should be looking for.
By Robert Cordray6 years ago in Lifehack
Rustic Country Farmhouse Cottage Living Room Furniture Guide
Rustic Country Farmhouse Cottage Furniture is a popular interior trend that delivers a traditional aesthetic to a collection of furniture that is rich in history, as it provides the appearance that the furniture has been passed down through generations rather than recently purchased and manufactured. One of the most favourable factors of country farmhouse furniture is its large, rugged format, as it makes it highly durable and therefore long-lasting. Solid woods like oak and pine are typically used for construction; however, not only do they provide a strong and resilient structure, but they also celebrate the natural details in the wood, like knots, textured grains and cracks, all adding interest and character to each individual piece of furniture. Rustic Country farmhouse cottage living room furniture is an excellent choice for many living rooms, as it is known for its weathered finish that delivers layers of texture alongside uneven live edges and rough peeled paint finishes. This unique design trend is renowned for displaying a warm and welcoming aesthetic that instantly creates a relaxed and homely feel.
By Picture Perfect Home6 days ago in Lifehack
productivity principles
I’m going to show you the habits that will either make you angry or set you free. The choice is yours. Because honestly, most of you already know how to study a lot or work hard. Hardcore studying is not the reason you’re not where you want to be in life. The real reason is that you don’t understand how to take control of your time and squeeze everything possible out of it.
By Mahboubeh Fallahi6 days ago in Lifehack
Review of 'Man on the Run'
My wife and I saw Man on the Run, a nearly 2-hour documentary on Amazon Prime, about Wings, Paul McCartney's group that flew around the world from shortly after The Beatles broke up in early 1970 to shortly after John Lennon was murdered at the end of 1980, making a Beatles reunion forever impossible.
By Paul Levinsona day ago in Beat


Comments
There are no comments for this story
Be the first to respond and start the conversation.