
Essential Lighting Techniques for Beginner Photographers
Lighting is one of the most powerful tools in photography.

Essential Lighting Techniques for Beginner Photographers
Lighting is one of the most powerful tools in photography. It can transform a dull image into something truly captivating, set the mood, highlight details, and create depth. For beginners, understanding and mastering the basics of lighting is essential for developing a strong foundation in photography. Here, we’ll explore the fundamental lighting techniques that can elevate your photography skills and help you capture stunning images with confidence.
1. Natural vs. Artificial Lighting
Before diving into specific techniques, it's crucial to understand the difference between natural and artificial lighting. Natural light comes from the sun, providing a wide range of effects depending on the time of day, weather, and your location. Artificial lighting, on the other hand, includes any man-made sources like LED lights, flash, and studio lights.
• Natural Light: Ideal for capturing warm and soft images, especially during the “golden hour” (just after sunrise and before sunset). It’s free, accessible, and can create beautifully lit photos with minimal equipment.
• Artificial Light: Offers greater control over the intensity, color, and angle of light, making it suitable for indoor settings and low-light conditions. It’s perfect for situations where you want consistent lighting.
2. The Importance of Directional Lighting
The direction of light can drastically change how a subject appears in a photograph. The main types of directional lighting are:
• Front Lighting: The light source is directly in front of the subject. It reduces shadows, creating a soft and even look, which is ideal for portraits but can sometimes result in flat images with less depth.
• Side Lighting: The light source hits the subject from the side, creating shadows on one side. This technique adds texture and depth, making it perfect for black-and-white photography, portraits, and images where you want to emphasize form and texture.
• Backlighting: The light is positioned behind the subject, often creating a halo or silhouette effect. This is excellent for dramatic compositions, where the subject appears almost ethereal, especially if there's a strong contrast between the subject and background.
• Top Lighting: Light is placed directly above the subject, often resulting in deep shadows and high contrast. This can be used effectively to create moody or mysterious images, although it may not be flattering for portraits.
3. Mastering the “Golden Hour” and “Blue Hour”
The golden hour and blue hour are two natural lighting periods that can produce breathtaking results.
• Golden Hour: Occurs just after sunrise and just before sunset. The sunlight is softer, warmer, and diffused, reducing harsh shadows. This lighting is ideal for outdoor portraits, landscapes, and creating a warm, romantic feel in your photos.
• Blue Hour: Happens just before sunrise or after sunset when the sun is below the horizon, casting a soft, cool, bluish light. It creates a serene and moody atmosphere, perfect for cityscapes, landscapes, and silhouette shots.
4. Using Reflectors for Balanced Lighting
Reflectors are a simple, affordable tool that can make a significant difference in your photos. They bounce light back onto your subject, filling in shadows without adding harshness. Reflectors come in various colors:
• White Reflector: Creates a soft, natural fill light without changing the color tone of your image.
• Silver Reflector: Provides a stronger, cooler light, ideal for brightening shadows in a way that still maintains contrast.
• Gold Reflector: Adds warmth to your photo, simulating golden hour lighting, which is especially flattering for portraits.
Using a reflector is simple; position it on the opposite side of your main light source to fill in shadows and create a balanced, well-lit image.
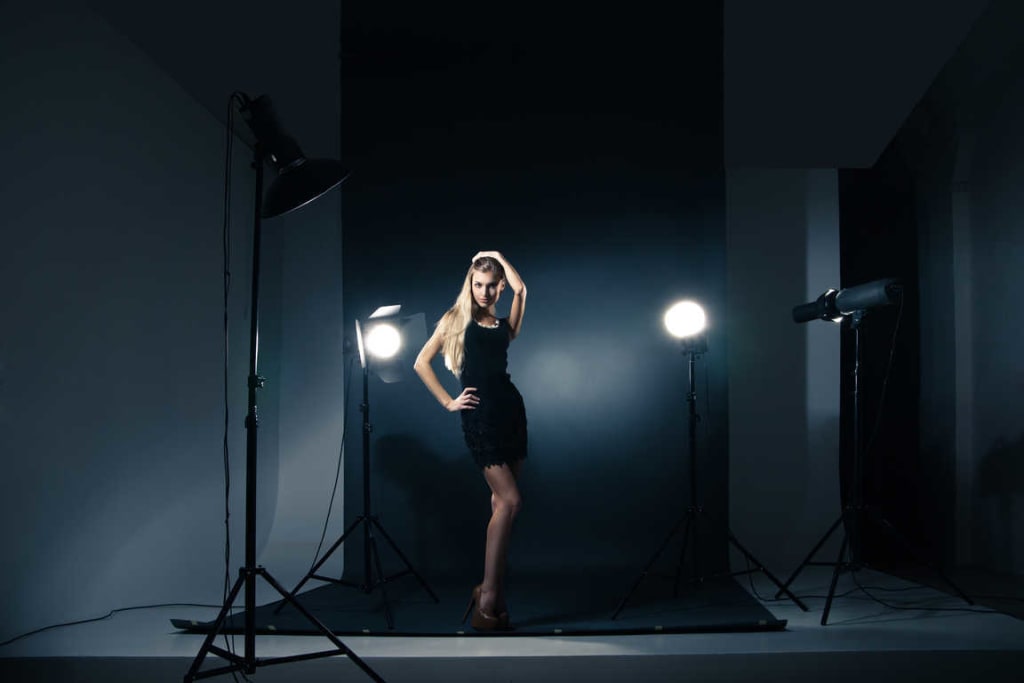
5. Three-Point Lighting Setup
For beginners looking to experiment with studio lighting, the three-point lighting setup is foundational. This setup consists of:
• Key Light: The primary light source, usually placed at a 45-degree angle to the subject, creating depth with shadows.
• Fill Light: Positioned opposite the key light, it reduces shadows without overpowering the key light. It’s generally softer and less intense.
• Backlight (or Rim Light): Placed behind the subject to separate them from the background, adding dimension and preventing a “flat” look.
The three-point lighting setup provides control over shadow intensity and light direction, giving beginners a versatile framework for various styles and moods.
6. Experimenting with Diffusers for Softer Light
Diffusers are essential for softening harsh light, particularly when working with artificial light or shooting in midday sun. They scatter light, making it softer and more flattering for portraits.
To use a diffuser, position it between your light source and the subject. You can use professional diffusers or DIY solutions like sheer fabric or translucent umbrellas. Diffusers are particularly helpful when taking portraits outdoors during bright sunlight, as they minimize hard shadows and bring out the subject’s natural features.
7. Light and Shadow: Chiaroscuro Technique
The chiaroscuro technique, known for its use in Renaissance paintings, focuses on the dramatic contrast between light and shadow. To achieve this in photography:
• Use a single light source (often from the side) to emphasize part of the subject, leaving the rest in shadow.
• Keep the background dark to create separation and draw attention to the illuminated area.
• Adjust exposure and experiment with high-contrast settings to enhance the intensity of shadows.
Chiaroscuro adds drama and depth, making it ideal for portrait and still-life photography.
8. Understanding Color Temperature
Color temperature, measured in Kelvin (K), affects the mood and feel of your photos:
• Warm Light: Lower color temperatures (2,500K–3,500K) create a yellow-orange tone, ideal for cozy, inviting images.
• Cool Light: Higher color temperatures (5,500K–6,500K) produce a bluish tone, which can give a fresh, clean look.
Experimenting with color temperature is especially helpful when adjusting your white balance settings in-camera. Adjusting this setting can make a snowy scene look warmer or give a sunset scene an even more intense, golden hue.
Conclusion
Lighting is a transformative element in photography. By mastering these photographic lighting techniques, beginner photographers can unlock a world of creative possibilities. Practice with natural light, experiment with reflectors and diffusers, and don’t be afraid to try out various lighting angles and intensities to discover the styles that best suit your vision. Remember, photography is about experimenting, learning, and growing. The more you understand and work with light, the more expressive and dynamic your photos will become.
About the Creator
Janet Bernier
Travelling is my hobby and I love to travel.
Keep reading
More stories from Janet Bernier and writers in Lifehack and other communities.
Expert Safety Advice: Do’s and Don’ts of Traveling
Traveling is an enriching experience that broadens horizons and offers a refreshing break from the daily grind. However, safety is paramount, whether you're a seasoned traveler or embarking on your first adventure. From health precautions to safeguarding belongings, knowing what to do (and what not to do) can make all the difference. Here are some expert safety tips for your travels, alongside smart packing tips that will make your journey both safe and convenient.
By Janet Bernierabout a year ago in Lifehack


Comments
There are no comments for this story
Be the first to respond and start the conversation.