
Drawing Hands
Techniques For Drawing Hands With Soft Pastels

“When you put your hand in a flowing stream, you touch the last that has gone before and the first of what is still to come.” – Leonardo da Vinci
I’ve had a passion for drawing and painting hands for over twenty-five years.

When I teach pastel drawing, one of the most requested subjects I’m asked is how to draw hands. For most people, drawing and painting hands is a difficult subject. I always say, don’t look at any subject matter as a symbol you can’t draw, look at it as it is. Draw what you see, not what you think you know. If you don’t draw what you see, you will end up drawing a symbol and you will continue to convince yourself you can’t draw it.
This is an article written to share some of the techniques I use to create my hand drawings with soft pastels. Soft pastels are the powder-like kind of pastels. They are not the same as oil pastels.
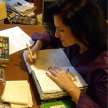
I first start with a good, well-posed, nicely lit photograph. There are times when I draw from life, but because most of my pastel drawings require many hours of work, it’s more convenient to use a photograph.
One of the most important decisions when drawing with pastels is to choose a well-textured surface to draw on. Pastels require a surface that has a “tooth”. There are a variety of surfaces to choose from. For this drawing, I am using UART Pastel Paper. UART Pastel Paper is one of my favorite papers to use because it is an archival paper, it can be purchased easily online, you can use many different mediums, not just pastels, on it, it comes in many different sizes, I usually purchase a roll, and UART Pastel Paper comes in different grits. For this drawing, I’m using UART Pastel Paper Grit 280.
I first attach my paper to a Masonite drawing board with clips and freezer tape. I usually work on pastel drawings vertically. You want the pastel's dust to fall downward. Try not to blow on the pastels while working with them. Pastel dust for obvious reasons is unhealthy and a few of the colors can cause cancer. Please read the pastel stick labels. I then draw out my picture with graphite. Normally, I would say not to do the underdrawing with graphite because pastels will not stick to graphite. This is called block out. But because the grit or tooth of the paper I’m using is fairly rough, there is no need to worry. If I need to erase, I use a kneaded eraser. Kneaded erasers don’t break down the tooth of the paper and they don’t produce eraser dust.

Once I’m satisfied with the underdrawing, I begin to use the pastels. I start with choosing the basic, predominant colors to outline the basic design. I also use this time to adjust any drawing errors. I then use a blending stick the smooth out the pastel lines and also to work the pastel into the tooth of the paper.
Next, I draw in the lightest colors. I do this because darker colors will fall into the tooth of the paper and will have to be removed. If the darker colors are not removed, they will smear in with the lighter colors. I like to use a cross-hatching stroke. Mary Cassatt used this technique a lot as well. It allows for a gradual build of the pastel layers. This is particularly useful to catch the subtleties of skin.

I then draw in the darkest and mid-tone colors.

At this point in the drawing, there is a good amount of pastel on the surface. I use this time to blend the colors with either my fingers or a blending stick. I don’t recommend using your fingers to blend a lot the first time you use UART paper. The surface is very abrasive and your fingertips may need time to build up callouses.

For the knuckles, I used a small oil painting brush and 50% rubbing alcohol. Sometimes I need to use this technique for a more painterly effect and for tight areas. I do this by shaving off pastel with a single edge razor blade onto a palette and adding a little rubbing alcohol to liquefy the pastel dust. I then paint it on the surface. I don’t recommend using 50% rubbing alcohol on any other paper other than UART Pastel Paper. I also don’t recommend using a good oil painting brush. I use less expensive brushes. Again, the paper surface is very abrasive and will ruin the brush.


With this drawing, I chose to leave the background slightly blurry. I did this because I wanted the focus to be on the model's hand. I also changed the background on the right side of the drawing because it was distracting. I added flesh colors that I used for the model's hand and arms in the clothing and I used the blue colors in the clothing with the flesh colors I used on the model's hand and arms. This helps keep the drawing together. What I mean by that, is that it keeps the viewers' eyes recognizing the familiarity of the colors used in the background and the main subject.
At this point, the drawing is nearly completed. I usually take a break and work on something else so that when I come back to complete the drawing, I’ve got a fresh pair of eyes looking at it and I can identify any changes that need to be made.
When I’m satisfied the drawing is completed, I spray a fine mist of fixative on it. I use Spectra Fix Degas Fixative. I like this brand because it isn’t as harmful to the environment and it doesn’t darken the pastel drawing as much as some of the other brands. This brand of fixative can also be used as a workable fixative and a final fixative.
I left this drawing in a more rough state. I didn’t blend or smooth out the drawing because I wanted to convey the sometimes roughness of the models, he is a mechanic, work.

Enjoy the process of drawing. It can bring you a lot of peace.
To view more of my hand drawings, go here: https://www.deviantart.com/camlettehampton/gallery/70676565/hands
Materials used for this drawing:
UART Pastel Paper 280 grit
Graphite pencil
Spectra Fix Degas Fixative
50% rubbing alcohol
Blending stick
Small Bristol oil painting brush
Kneaded eraser
Pastel brands:
Sennelier
Terry Ludwig
Paul de Marrais
Unison
Richeson
Art Spectrum
Great American
Mungyo
Rembrandt
Diane Townsend
Loew-Cornell
About the Creator
Cameron Hampton
Cameron Hampton is a painter, photographer, illustrator, cinematographer, animator and writer.
She now works in Georgia, London and NYC.
Keep reading
More stories from Cameron Hampton and writers in Lifehack and other communities.
Federated AI Discovery Engine
The Federated AI Discovery Engine is a computational framework designed to support biomarker discovery, evaluation, and validation in distributed data settings, where patient-level data are housed across multiple Trusted Research Environments (TREs) and cannot be centralised. The system enables consistent analytical workflows to be executed across institutions and geographies while preserving local data governance, security, and regulatory constraints.
By James @ Kode4 days ago in Lifehack


Comments
There are no comments for this story
Be the first to respond and start the conversation.