
Do's And Don'ts For Vinyl Flooring?
Essential Tips to Maintain, Protect, and Prolong the Life of Your Vinyl Floors
Like any large endeavour, there are some things you should do and some you should avoid doing. To ensure the greatest results, be aware of these before beginning your job.
One form of floor that is resilient is Floor Vinyls. Its widespread popularity in both residential and commercial settings can be attributed to this. However, there are still several situations that could harm the material and lower the installation's quality. The secret is to remember these throughout your project to avoid inadvertently making expensive blunders. If you want to buy vinyl flooring, hallway flooring, etc, check out Vinyl Flooring UK.

Vinyl Flooring Installation: Do's:
1. Make sure the subfloor is dry before installing by laying a scrap piece of vinyl. Lay out a single piece of leftover vinyl, then use duct tape to firmly seal all of the edges. Give it a three-day rest. You can tell if your floor is too wet to install vinyl flooring if the adhesive comes up easily. When it comes to concrete subfloors, this is crucial.
2. Please adjust to your new floor and room. Before installation is scheduled to start, keep the space at a comfortable temperature for at least 48 hours to allow the vinyl to become acclimated to this temperature.
3. When placing on concrete, make sure to apply a vapour barrier. Installing click-and-lock vinyl on concrete requires the use of a vapour barrier. Adhesives for glue-down vinyls should also have a water-resistant barrier.
4. A margin for expansion should be left for click-lock vinyl. For Click-Lock vinyls to expand and contract like a floating floor, they require an expansion gap. Along the outer walls, use spacers or shims.
5. Use a level to inspect your subfloor. It is difficult to discern lumps and dips with the unaided eye. For best outcomes, look for any little bumps or dips that can be fixed before installation.
6. Read the instructions provided by the manufacturer. Regarding how to maintain the flooring and what to use to seal it, each manufacturer offers their own suggestions. Before utilizing any chemicals or treatments, read these.
7. Use doormats that don't stain. You run the risk of bringing dust, grime, and debris into your workspace if you don't use a doormat. In order to avoid bringing potentially dangerous debris into your house and onto your vinyl flooring once your flooring has been laid, this is also a helpful suggestion. "Non-staining" should be the label on mats. Mats with latex, rubber, or chocolate backings may cause vinyl floors to become stained.
Vinyl Flooring Installation: Don'ts:
1. Remember that floor heights vary. There may be a space between your door jamb and the floor if you're removing old flooring, like tile or hardwood. This is because vinyl tends to be a little bit taller than most floors. Consult a flooring specialist regarding transitions between rooms.
2. Avoid hammering boards. To get the boards as near to the surrounding vinyl as possible, some installers hammer them in. The vinyl may be harmed by this. Use a pull bar and hammer that in its place. This will do the same thing without causing any damage to the floor.
3. Following installation, give your vinyl flooring at least 48 hours before walking on it. While glue-down planks need time to solidify, click-lock vinyls can be walked on right away.
4. Avoid using a beater bar when vacuuming vinyl records. Your flooring may get scratches and other damage as a result of this. For any abrasive cleaning, the same holds true.
5. Avoid putting large furniture on top of your vinyl. To move furniture more conveniently and damage-free, use furniture coasters.
6. Avoid using glue that isn't meant for installing vinyl or LVT tiles. Refer to the manufacturer's directions to determine the appropriate type of glue.
Vinyl Flooring Maintenance: Do's:
1. Frequent cleaning is necessary to avoid the accumulation of dust and debris, which can dull and scrape surfaces. This is particularly important for luxury vinyl because it tends to reveal wear more readily. Maintaining cleanliness requires daily sweeping. It's crucial to utilize a soft brush attachment when vacuuming. This tactful method helps keep the surface's original gloss and prevents scratches.
2. Spills should be cleaned up right after to avoid water damage, especially on waterproof floors. Maintaining vinyl plank floors in perfect condition requires prompt cleaning to remove stains and stop liquids from seeping through the flooring.
3. To prevent scratches and dents on your floors, particularly the plank varieties, place protection mats beneath furniture legs.
4. Sunlight exposure might cause issues with vinyl floor upkeep. Over time, it may cause luxury vinyl floors to fade.
5. To get rid of any remaining cleaning solution, it's crucial to rinse the floor after cleaning. This prevents further filth from accumulating and ensures that no cleaning solution residue is left on newly installed plank floors. This entails scrubbing the surface and making sure all cleaning products are gone by using a clean, moist mop.
Vinyl Flooring Maintenance: Don'ts:
1. Luxury flooring can be harmed by the use of abrasive cleansers or harsh chemicals like bleach. pH-neutral solutions that are gentler are preferable for cleaning without damaging or discolouring surfaces.
2. Even waterproof flooring can be harmed by excessive moisture. It could result in the bending or deterioration of the adhesive. To avoid water-related issues, mop with a slightly damp cloth, especially on newly installed flooring.
3. When moving furniture, keep in mind to raise it rather than drag it across the floor. This lessens the chance of damage and scrapes. Lifting preserves the excellent condition and appearance of your vinyl.
4. Be cautious with sharp objects, such as long pet nails or high heels. They may damage or scratch your floors, particularly in crowded locations. To save your floors, use caution when handling such things.
5. These surfaces don't need further care like waxing or polishing because they naturally retain a shine. To preserve their original shine, use the cleaning techniques that are suggested.
About the Creator
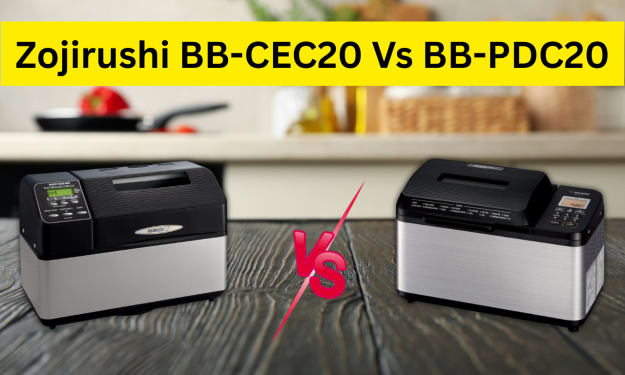
Zojirushi BB-CEC20 Vs BB-PDC20: Which One Should You Buy?
Choosing between the Zojirushi BB-CEC20 Vs BB-PDC20 can feel tricky when both promise great homemade bread. I like how each model focuses on ease and consistent results, but I notice small differences that matter for everyday baking in a typical U.S. kitchen. Here’s how the Zojirushi BB-CEC20 vs BB-PDC20 compares so you can quickly decide which one fits your routine best.
By Mohammed mamuna day ago in Lifehack
The Metrics That Actually Get You Promoted Remotely
Many remote professionals assume promotions are based on how hard they work. They believe that if they work longer hours, respond to messages quickly, and stay busy throughout the day, eventually someone will notice their effort.
By Bahati Mulishiabout 17 hours ago in Lifehack


Comments
There are no comments for this story
Be the first to respond and start the conversation.