
Complete Guide – How to Build a Timber Pergola
If you’re eager to complete a DIY project, then understanding the basics of the build is critical! In this guide, we take a look at the steps you’ll need to undertake.
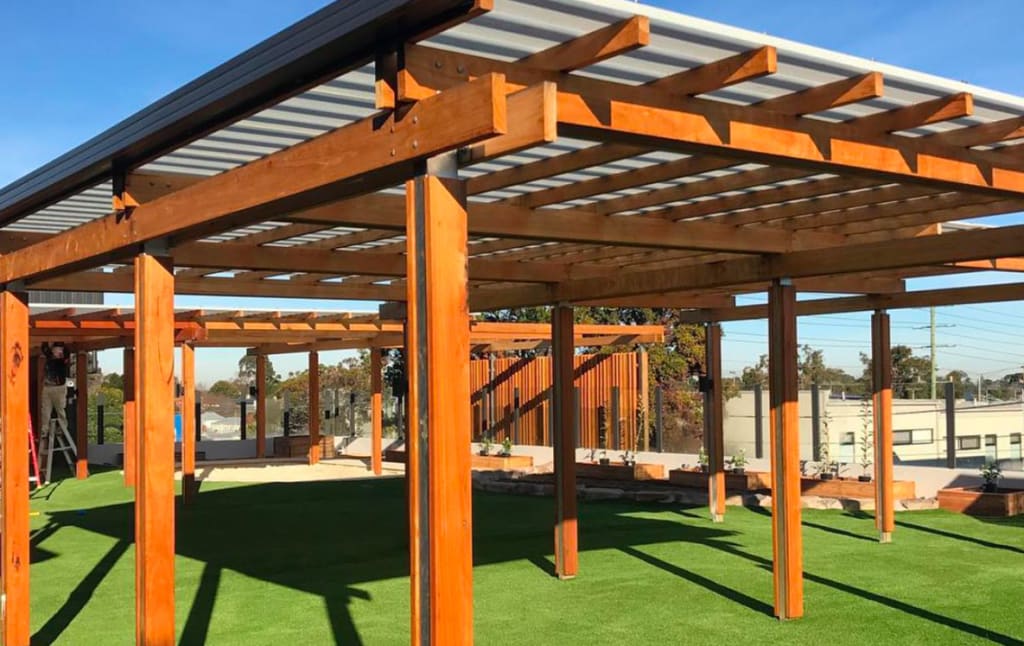
If you’re looking to extend your outdoor living space, then a timber pergola is the ideal option. Not only do they provide a space to entertain friends and family, but this elegant al fresco area can be an excellent way to add architectural elements to your property. With a huge range of styles and materials to choose from, you can be confident that no two pergolas are the same, allowing you to enjoy a finish that is completely unique to your tastes and landscape.
However, if you’re eager to complete a DIY project, then understanding the basics of the build is critical! In this guide, we take a look at the steps you’ll need to undertake.
Speak with your local council
The first step is to liaise with your local council—different regions have different rules when it comes to building structures on your property, and getting approval before you start your project is a must! That way you can be confident you won’t be faced with hefty fines or need to take down the timber pergola completely!
Invest in materials
Before you can begin your project, you will need to invest in the materials needed to get the job done. This includes the hardwood itself, as well as the hardware like nails and screws. We suggest purchasing an attractive and durable timber that is a feature piece in itself.
Decide on the location
Where will you be placing the timber pergola? Will it be next to or on top of your existing patio or deck, or would you prefer to locate it further from your home as a ‘destination’ within your property?
Prepare your pole holes
Now that you’re ready to build your timber pergola, you should begin by digging the holes that the main poles will be inserted into. As a general rule, these holes should have a depth at least one-third of the height of the pole. Once the holes have been dug, fill them with concrete, stopping 50-60mm below ground level.
Install the posts
Add the posts to the holes before the concrete begins to set. Use a spirit level to make sure they are standing vertically—you may need to use a support to keep them in place.
Attach cross beams
Once the posts have set in the concrete, you can attach the crossbeams to the top of the timber pergola. Again, use a spirit level to make sure they are sitting horizontally with the ground (or to make sure they are all at the same angle if that is the finish you’re hoping to achieve).
Lay rafters and lattice panels
Rafters can now be added to connect the two sides of the pergola. For added privacy, light control, and sun protection, some people choose to add lattice panels at the same time as the rafters.
Apply a finish
Your timber pergola is almost finished! You can now choose to apply a finish, such as a paint or stain, to ensure the pergola complements your home. Alternatively, depending on the hardwood you’ve chosen, the structure can be left to weather naturally.
Landscape the area
Now that your pergola is complete, you can landscape the area as you wish! Consider laying a timber deck or natural paver under the pergola, or plant creeping foliage such as passionfruit or wisteria to eventually grow up and hang down from the ‘rafters.
As you can see, building a timber pergola doesn’t have to be difficult. Once you understand the basics, you can build a design of your own, or you can use your know-how to find a landscaper who can meet your needs. One top tip—using high-quality hardwoods ensures the finished product will look visually stunning and stand the test of time! You want your pergola to be as attractive as it is functional, so don’t sacrifice on materials!
About the Creator
Keep reading
More stories from writers in Lifehack and other communities.
Forgotten Packing Items That Make Port A Rentals Guest-Friendly
Stepping into a vacation rental should feel like a home away from home, with a clean space, cozy beds, and, perhaps, a great view to unwind. But sometimes, even the best-planned trips can be disrupted by an unexpected challenge when guests forget to pack a few essentials.
By The Mayan Princess3 days ago in Lifehack
Cooking Up Connection: Romantic Recipes to Enjoy as a Couple
Turning your kitchen into a romantic space doesn’t require extravagant effort. Start with lighting—switch off the overhead lights and let candles or warm lamps create a cozy atmosphere. Add soft music that you both enjoy and clear the counters to give yourselves space to move freely. These thoughtful touches can transform even a modest kitchen into a place of intimacy and fun.
By Micah Love-Allotey2 days ago in Lifehack


Comments
There are no comments for this story
Be the first to respond and start the conversation.