
Can You Replace Parts Of Vinyl Flooring?
Replacing Parts of Vinyl Flooring: What You Need to Know

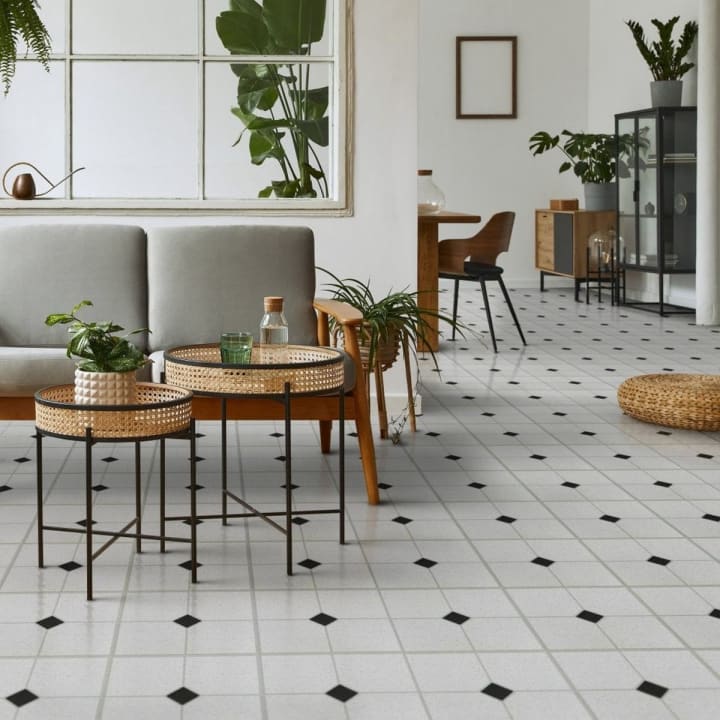
Despite its reputation for longevity and ease of upkeep, vinyl flooring, including options like Waterproof Bathroom Flooring, can sustain localized damage from wear or accidents. It's not always necessary to replace your vinyl floors if a portion of it is scuffed, ripped, or discoloured. Whether you have glued-down pieces or individual tiles or planks in a floating vinyl configuration, you can often repair the damaged areas. This economical option can help restore the appearance of your floor, especially in spaces like bathrooms where waterproof properties are essential. Whether you're considering Vinyl Flooring UK for your home or need to fix existing floors, you can save on both work and costs while ensuring a smooth and polished surface. In this article, we'll go over when and how to replace vinyl flooring components to maintain a flawless finish.
Plan Ahead Before Purchasing:
It's possible that you've heard that customers frequently purchase more flooring than they require for installation and have questioned why. This is due in part to the fact that a cutting or waste allowance typically requires an additional 10%. In the event that you ever need to fix damage to your flooring, it's also very helpful to have a few extra, spare planks on hand. There is no assurance that you will be able to locate the same flooring again if you ever require it because vinyl flooring is durable and the range of colours and styles available is always changing. You won't have to worry about what to do if you end up damaging your floor because you bought extra at the beginning.
How to Repair Vinyl Floors:
Depending on the type of vinyl you have, there are many ways to fix damaged vinyl floors. If you have damaged vinyl plank or tile, you can replace it with a new one by lifting it out. However, sheet vinyl will need a patch that is specially cut.
Although they can be challenging to operate, there are kits for things like repairing scratches on vinyl floors. To match your flooring, the kits frequently ask you to mix putties and make your own colours, which can be difficult for some floors.
Fixing Sheet Vinyl:
A little replacement patch makes it simple to repair damaged sheet vinyl. Installers will occasionally leave you usable offcuts after the flooring is laid. Look for a less obvious location, like beneath an appliance or in your wardrobe, where you may take a patch from your current flooring if you don't have access to offcuts.
With a glue-and-roll and vinyl floor repair adhesive, you may fix a cut and smooth out curved edges in sheet vinyl. You must take immediate action when there are tears and rips. The edges may deteriorate or become jagged if you leave them in place for an extended period of time, which will cause your restored flooring to have holes in it.
How Vinyl Flooring Can Be Replaced:
1. Replacing Peel-and-stick or Glue-down Flooring:
Start by using an electric heat gun to replace glue-down or peel-and-stick vinyl flooring. This will warm up the damaged plank and make the adhesive underneath softer. Use a wood chisel or a putty knife to lift the plank pieces off the floor after the adhesive and plank are simpler to remove. Make sure to remove all of the adhesive after removing the broken plank. Remove the protective paper carefully and firmly insert the replacement plank onto the ground if it has adhesive already applied.
You can use glue as an adhesive if you're using a plank that you took out somewhere else. The floor will usually be ready for use as soon as the adhesive, such as pressure-sensitive or peel-and-stick glue, grabs. Put a substantial weight on the plank to keep it in place if you're using a wet set adhesive. In this instance, wait a full day before beginning the repair.
2. Click-lock Flooring Replacement:
The fact that click-lock flooring isn't nailed or glued to the subfloor is one advantage. Although it still takes some skill, this makes replacing broken planks easier. Locate the closest wall parallel to the damaged plank and repair that part of click-lock flooring. The first flooring plank should then be carefully un-clicked by lifting the exposed side after removing the baseboard, if one exists. Click out after continuing to remove the planks in this manner until you reach the one you wish to replace. Reinstall the boards you took out after replacing the damaged area. Just be sure you rebuild the baseboard and provide a quarter-inch expansion space adjacent to the wall.
If the tile or plank you're replacing is too far from a wall for the above to work, you'll need to use a circular saw or multitool set to the plank's depth to remove the damaged area. It might be necessary to "relief-cut" to the corners before gently disengaging the remaining plank. After that, you'll need to adjust your new plank's locking mechanism so that you can drop it into position and angle it. The bottom portion of the groove on the long and short sides may need to be removed in order to do this. Before making any cuts, we advise dry-fitting the board to test the seal. After you're certain that the fit is secure, carefully take the plank off and glue the locking edges together. Reinstall the plank as soon as possible, making sure the edges are flush, and take out any extra glue right away.
Advice for Preventing Damage and Maintaining It:
1. Regularly clean your vinyl flooring:
Regular cleaning and upkeep are essential to minimizing damage to any kind of flooring. Weekly dusting, vacuuming, and mopping is ideal for vinyl flooring. The possibility of scrapes and scratches is eliminated by clearing away dirt and debris.
2. Warping and seam damage can be mitigated via expansion gaps:
Not leaving enough space for expansion between the final row of tiles and the wall is a common installation error. This is essential since the tiles may expand and shrink in response to temperature changes over time. When there is no expansion space, the tiles have nowhere to go, which can lead to bulges and bowing.
3. Your vinyl floor should only be lightly mopped:
The majority of vinyl flooring is waterproof or water-resistant. These things do have limitations, though. Therefore, it is recommended that you use as little water as possible when mopping your floor. Avoid sopping the floor. This lessens the chance of warping and water damage.
About the Creator
How AI-Native Browsers are Redefining Digital Freedom and Productivity in 2026
The Evolution of the Modern Browser By 2026, the concept of a web browser has expanded far beyond its original purpose of simply loading web pages. Over the past decade, the internet has evolved into a highly dynamic environment where users manage businesses, automate workflows, and interact with complex digital ecosystems directly from their browsers.
By Shahid Sipra6 days ago in Lifehack
Becca
"Everything is so... flat." Denille said stupidly as she looked around her new neighborhood. She looked around at the muted desert where even the smallest sign of life seemed to have given up. The plant life was shrubs that were half cooked by the heat and where there should have been a lawn, a mess of white rocks laid glistening in the sun. Even the sky looked stretched thin, like the sun had ironed it smooth. She’d moved from Riverside, where at least there were hills, but here in Barstow, everything felt baked and brittle.
By Sara Wilson8 days ago in Fiction


Comments
There are no comments for this story
Be the first to respond and start the conversation.