
There’s something quite special about the creative process. You can create something beautiful using simple tools, ever moment a feeling of happiness and accomplishment. For me, it’s how I relax, like a form of mindfulness, I can leave the stresses of the world behind and delve into my imagination – realising my visions.
Book Art is a project close to my heart, it’s the project that reunited me with my creativity, and has brought such joy to myself and those I love. Below shows how I got into the art of folding books, with a guide on how to make your own.
Inspiration
Creativity is a part of me, of who I am. Since I was a little girl, you'd find me covered in glitter, working with felt, or creating intricate Hama-Beads designs (from coasters to puppets), or upcycling my handbags with beads and feathers. One of my biggest regrets is that I stopped when I went to university, poorly informed that I needed to grow up, that crafting was for kids, and that I should stifle my creativity to be more "productive" with my time.
It wasn't until my partner encouraged me to get back into it that I realised the impact it had on my life. I'd felt lost, stuck in the mundane routine of life with no outlet for my artistic side. But the prospect of a new project was tantalising, and outside of the reach of those who had discouraged me, I wanted to do something unique, different to my previous projects, and something personal that I could make for my partner Josef - to thank him for his support.
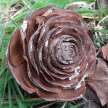
I'd been looking for inspiration online, when I found "Book Art", folding the pages of books into patterns to decorate your home (see top image for one of my designs). As an avid reader, I had my reservations about damaging books, but realised that actually the books could still be read after folding, and that I could use preloved books from charity shops and give them a second life!
I fell in love with the idea, it was something intricate and detailed that I could challenge myself with. I found the first book that Joe and I had ever read together - Cosmic by Frank Cottrell Boyce, and used Paint software (I know, I'm no photoshop expert) to create a few design ideas.
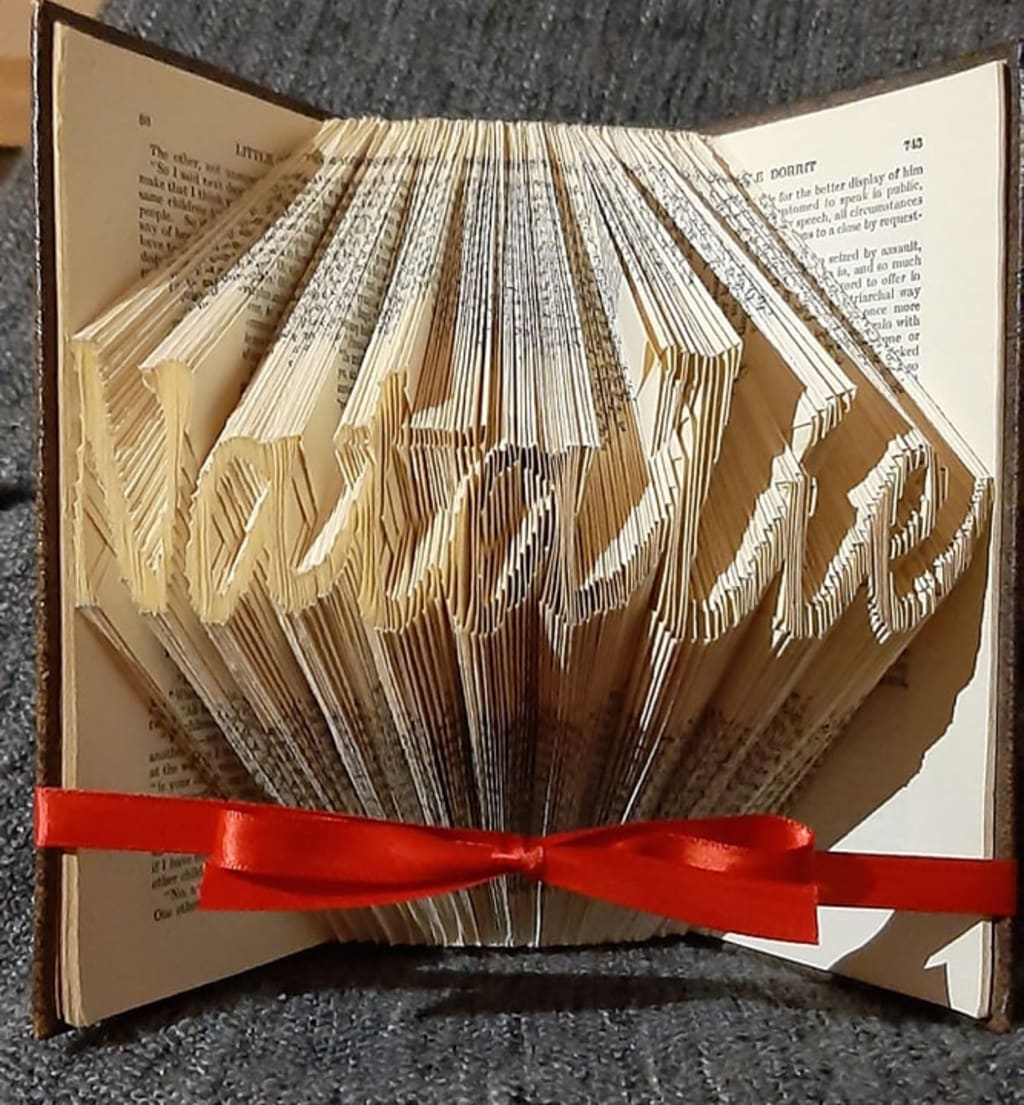
Not a lot of people did book folding (this has changed dramatically since), and so the few designs I found after hours of searching online were hearts or baby feet (for new parents). These seemed too vague; they could be made for anyone and I wanted this gift to be unique and personal to Joe. I also wanted to put my own spin on it, so decided to keep it simple and spell out his name with the pages, that way he'd know it was specially made for him.

After a few days spent folding over 300 pages (Full instructions in "The How-To Guide" below) I was impressed with my final piece. I also felt like I had found myself again, reunited with a part of me that had been missing. I enjoyed the challenge, and was eager to perfect my newfound craft.
Like the start of most new endeavours, I found a few areas that needed improving. I've detailed below my finalised instructions on how to create your own, which have been edited as I improved my technique and found better ways to create the final pieces.
The How-To Guide
You will need:
- Hard back book
- Ruler
- sharp pencil
- scissors
- ribbon
- "BookAmi" and "Paint" software OR a purchased design [see Oby's Booktique to purchase personalised designs: https://www.instagram.com/obys.booktique/]
- Choose a book that's either got a beautiful cover (lots of charity shops will have these for a fraction of the price of a new book), or is personal to the recipient of your gift. Always use hard-back, as this will allow the book to stand without assistance, displaying your design.
- Either purchase a software to create your designs, or purchase designs through Etsy. If you plan on making multiple designs I would recommend purchasing the software for around $30, but if you only want to make a couple, the designs can be as little as $5 each.
- You will need to measure the height of the book's pages, and count how many pages the book. This can be input into your software or sent to a someone to create the design for you. [IMPORTANT: Check first page number, many books often start at page 6. If your book starts at page 6 but has 300 pages, it really has 294 pages. Take the first page away from the last page number to get the correct number of pages to fold].
- Use "Paint" on your computer to create your design - a picture, or type in words. Keep the image all in black, so the software can read where you want to fold the pages. This can be put into BookAmi software or sent to a seller for a personalised design.
- You will receive (from a seller or Book Ami) a pdf, which will have two measurements for each page of your book. Using a ruler, measure from the top of the page down and mark with a pencil at the edge of the page. Do this for the whole book
- Go back the the first page and fold the book from these two marked points to the spine of the book. Repeat for the whole book.
- Once you have completed your design, use the scissors to cut a ribbon, and wrap it round the book tightly, tying a bow under your design to keep your book rigid and give it a finished look.

Post Project Euphoria
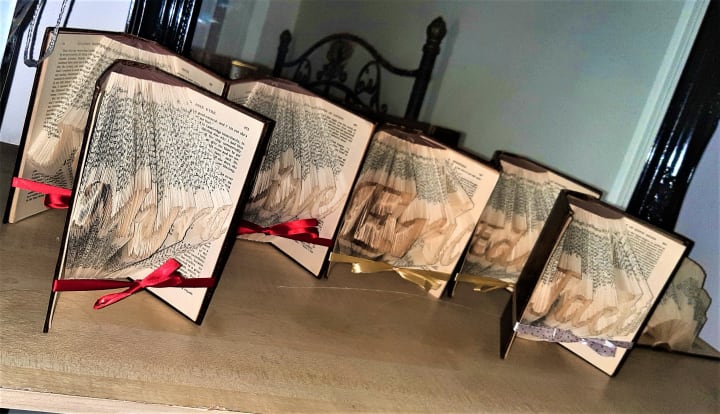
I cannot describe the happiness that book-folding brought me. I regained that feeling of achievement when completing something. They say giving is better than receiving, and there is nothing better than giving a home-made gift, knowing how much time, creativity and love you put into it. I set myself the challenge of making personalised book folds for friends and family members that Christmas (2019), which would involve making a further 26 books. I found a beautiful collection of hard-back Charles Dicken's prints in my local charity shop, so that I could give my grandparents matching sets. I was over the moon with the final presents, as were my family on receiving them as gifts.
I'm at my happiest when I'm making something, and this project got me back into crafting, which I am forever grateful for. I've started a few different projects since then, but am working on further developing book folding so display intricate little pictures and scenes to evoke emotion. My dream is to be able to turn my passion into a viable business, so that my work will be doing what makes me happiest. Scrimping and saving to get a start up fund, I'm currently creating unique designs for sale on Instagram [https://www.instagram.com/obys.booktique/]. Might take me a few years to get there, but watch this space! In the mean time, happy folding! - I know I will be.
About the Creator
Oby
Writing from the heart, for fun. Thank you to anyone reading my work.
How to Improve the Immune System During Pregnancy?
Immunity is your body’s capacity to defect against infections and harmful health effects caused from viruses, bacteria, pathogens, and other complications. During a pregnancy, your immune system is focused on supporting your wellness. Thus, it can become vulnerable to illnesses from all the overactivity. In this blog, we will discuss how to improve immune system during pregnancy and why strong immunity is needed when you are expecting.
By Alice Perry6 days ago in Lifehack


Comments
There are no comments for this story
Be the first to respond and start the conversation.