
Are You the Next Joanna Gaines?
Simple Farmhouse DIYs.


Did someone say shiplap? The Farmhouse look has recently come back into style, and like most avid Pinterest junkies, I jumped on the band-wagon. I wanted the coveted look without having to spend the moo-lah at my local Hobby Lobby, so I put together this list of some DIYs that I made around my house. Take a look, and give some of them a try.
1. Buffalo-Checked Throw Pillows.

Recently I have been completely obsessed with anything that has to do with Buffalo check! It just screams farmhouse to me, and I was trying to think of a good DIY to add some of the pattern to my living room... without going overboard. So, a couple of days ago, I was strolling through the craft section when I came across the perfect fabric! I ended up buying the ENTIRE roll, which was about eight yards. More than enough to make a couple of pillows, but I'm sure I will put it all to good use in due time. To start, all I did was roll out the cloth upside down, (you'll see why soon) to my desired length. In this case, I just cut around the shape of some pillows I already had, but if you don't have any just cut a square. Then I sewed up three of the sides. Next turn the fabric right side out, and stuff the pillow with stuffing through the loose end (PSA Walmart also has pillow stuffing! Who Knew?). Then just sew the last side, making sure to hide your starting knot. This would also be a lot easier with a sewing machine, but I had to take the hard route. I ended up making six pillows all together, four big and two small, but of course you could do more or less.
2. Three-Tier Centerpiece.

For this DIY, you will need a couple of things from the Dollar Tree, or your closest Dollar Store. I picked up three plain white plates (two big and one small), two candle holders (any color is fine, mine were gold!), some E6000 glue (which I already had, but can be found in the craft section of Walmart), and some spray paint in white. First off, I laid out all of my plates, and stacked them up in the three layers with the candle holders in between, just to see what we were working with. Next, I took my candle holders outside to paint, (if you are lucky enough to find white ones, just go ahead and skip this step). Paint them, and let them dry according to your paint's directions. Once they are dry, you can take your E6000 glue, and put a small amount on the candle holder's top and bottom, and pinpoint the middle of your plate, (use a tape measure if you need to, and mark it). Then place it in the middle, and then put your second plate on top, and press down firmly. Repeat this process with your next, and smallest plate, and then let it dry for 24 hours.
3. Farmhouse Bakery Sign for your kitchen.

This is one of the easiest DIYs I have ever tried to do. The only supplies you need is a 2X4 cut in half, ( if you go to Home Depot or Lowes, they will cut it for you for free!), some acrylic paint in black and white (50 cents, at Walmart), a sponge brush, and some letter stencils. To put it all together, start by painting the sides, and top, and bottom, black. then paint the middle white. You could outline the sides like I did, or just leave them white. Next, spell out "bakery" with your stencils, (I highly suggest using the stencils for a cleaner look, even though I did not), and stipple over them with your sponge brush, and your black paint. Let it completely dry overnight, AND WALAH! There are many ways you could hang this up, but I got one of the backings from Walmart that you hammer in, and it worked great!
4. Cheese Grater Vase, and Towel Holder.
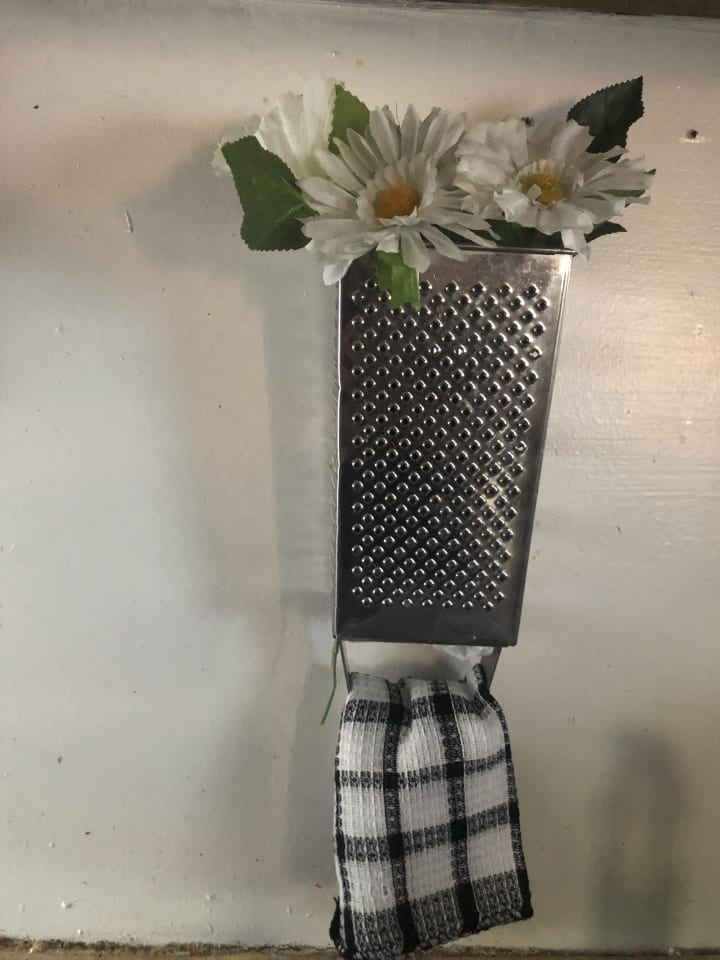
Honestly, this isn't much of a DIY, but I thought I would include it anyways! You literally just flip a large cheese grater upside down, and, with the largest side, screw it into the wall. I filled the top of mine with artificial Daisies from the Dollar Store, but you could do any kind of flower or plant. Then on the bottom it also doubles as a towel holder, which is ADORABLE!
5. Oven Mitt Display/Holder.
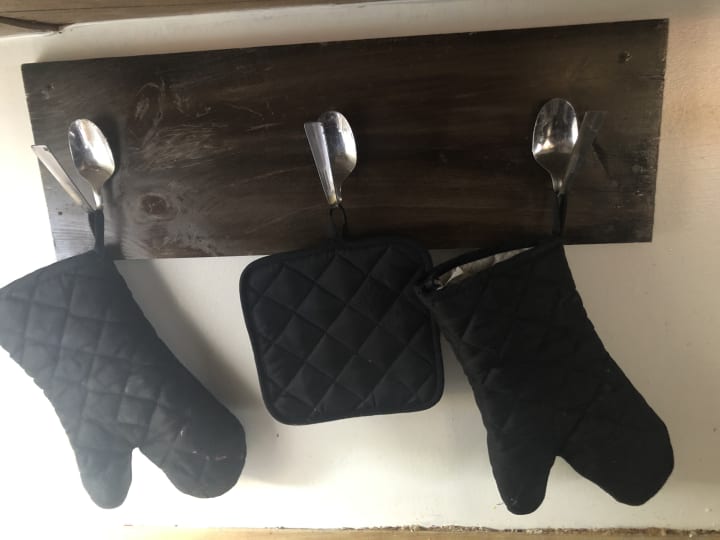
I can not remeber where I came across this idea, but it is very cool nonetheless! I just took a square piece of wood that I had, and stained it with the Miniwax Wood Finish in "Jacobean" from Walmart. Once it dried overnight, I took three old spoons, and bent them inwards. I then took my tape measure, and measured the board to see where each would need to go (you could also just eyeball this). Next I glued each spoon on with my handy dandy E6000 glue. No drills needed! Hang dish towels, oven mitts, potholders etc.
6. Bottles with twine!

Another simple little DIY that you could do would be this. Simply grab some twine, and a couple of old bottles, and wrap the twine around the top. Very simple, but very farmhouse chic! PS don't tell anyone, but could that be a Starbucks coffee bottle in disguise?? I believe so!
7. Mason Jar Wall Planter.

This is a cute way to add some real greenery into your home! I have a two year old son, so right now that isn't very realistic. I just settled for some artificial daisies, but this could be used in many ways. To get started, all you need is a piece of planked wood, (I found mine at my local Walmart for five dollars on clearance), a mason jar with the lid, a drill, and of course, your choice of flowers. Start by drilling a small hole through the back of the lid, after you take out the top of the lid and discard it; this is going to be what holds your jar in place. Grab a screw, and go ahead and screw it a little bit above the middle of your wood. You want the actual jar in the middle, so that is the reasoning behind that. Screw in your jar like normal, and then fill it with your flowers, and/or plants. If you find the planked wood at Walmart, it already has a wall hanger, so that's one less thing for you to do!
8. Faux Wood window and shudders!

This was the biggest, and most time-consuming of all of the projects, but it is definitely my favorite! All of my Pinterest junkies can validate that if you are doing a farmhouse theme in your home, you must include an old window off some kind!. Luckily for me, we recently redid our bathroom, so we had an excess of wood around the house! Recycling time! I came up with this faux window, and shudders DIY. Now don't worry it only looks scary, but it is fairly easy. Believe me, I'm not the greatest DIY carpenter, but I made it work, and so can you! To start I got four sides about an inch and a half thick, and made the outline of the "window." I then screw all of the sides together, and repeated the process on the inside with a piece of wood going up and down, and a piece cut in half to fit inside for the side-to-side piece, mimicking a window frame. I then finished it with a gray "stain" (one part gray acrylic paint mixed with three parts water), and, after it dried, I went back over that using the dry brush method, and white paint for the "white washed" effect.
For the shudders: These were actually two pieces of pallet board that happened to be the same size. I used the one-and-a-half-inch-thick wood to make a "Z" on both pieces, and I nailed them in place. I then did the exact same with the "stain," and white paint. To finish the look, I took a pencil and drew three straight lines going down the wood, so it looked like it was made from pallet wood! Hang a wreath in the middle of the "window," and hang your "shudders" on each side, and YOU ARE DONE!
Thank you guys for reading, and please go and check out my other stories!
About the Creator
Chelsea Winona
Go check out my stories!
Keep reading
More stories from Chelsea Winona and writers in Lifehack and other communities.
DIY Relaxing Spa Day at Home!
Everyone deserves a relaxing day! As a mom, you need at least one hour to revive yourself after the days fiascoes. Luckily, I have some mom friends, so I invite the girls over and we put the babies down for a nap. Here are a few things we do to pamper ourselves at home.
By Chelsea Winona8 years ago in Lifehack


Comments
There are no comments for this story
Be the first to respond and start the conversation.