
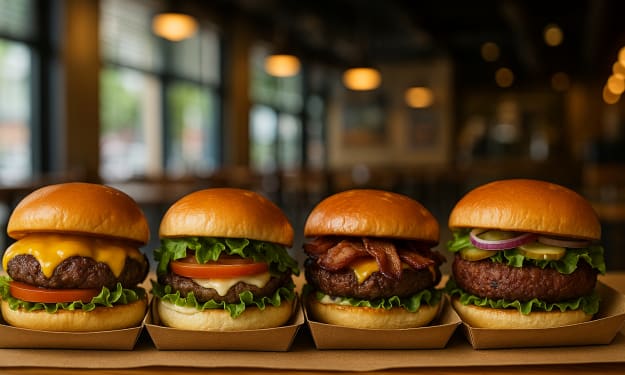
How to Make Gift Boxes: A Step-by-Step Guide
How to Make Gift Boxes


In a world filled with digital messages and fast shipping, there's something uniquely special about a thoughtfully made gift box. Whether you're crafting one for a friend, a holiday celebration, or even for your business, knowing how to make gift boxes by hand adds a personal touch that elevates any present. In this guide, we’ll walk through the complete process from materials and design tips to wrapping secrets so your gift box stands out before it's even opened.
Why Make Gift Boxes Yourself?
Making gift boxes yourself gives you complete control over the look and feel of your presentation. It also allows for customization based on the occasion or the recipient's personality. Whether you're gifting artisanal candles, skincare products, snacks, or a handmade item, a self-made box shows extra thought and effort.
Plus, creating gift boxes at home can be cost-effective, environmentally conscious, and, honestly, a lot of fun.
Step 1: Choose Your Box Type
Before diving into decoration, start by selecting the type of box you want to use. There are several popular options:
- Folding Paper Box: Great for lightweight items. Easy to DIY using cardstock or kraft paper.
- Rigid Gift Box: Best for premium items. Requires thicker materials like chipboard or cardboard.
- Drawer-Style Box: A box with a sliding drawer, adding a luxury unboxing experience.
- Magnetic Closure Box: Popular for corporate or high-end gifting.
Pro Tip: Recycle old packaging or shoeboxes if you're on a budget. With the right design, even simple materials can look luxurious.
Step 2: Gather Materials
Here’s what you’ll typically need to get started:
- Cardstock, corrugated cardboard, or recycled kraft paper
- Ruler and pencil
- Scissors or craft knife
- Hot glue gun or double-sided tape
- Wrapping paper or decorative fabric
- Ribbons, stickers, stamps, or dried flowers for decor
- Optional: printable templates (many free versions available online)
For those using their boxes for small business purposes, consider investing in branding materials like printed tissue, labels, and even wax seals.
Step 3: Build the Box Base and Lid
For a standard square box:
- Measure & Cut: Cut a square piece of cardstock or cardboard for the base. Score each side to create walls, typically 2-3 inches tall.
- Fold: Use a bone folder or ruler edge to get crisp lines. Fold up the walls.
- Secure: Use glue or tape on the flaps to hold the sides together.
- Repeat for the Lid: Make the lid slightly larger (about 1/8 inch wider) so it fits over the base easily.
This process works for rectangular boxes, too—just adjust your measurements accordingly.
Step 4: Decorate the Box
This is where your creativity comes in. Think about the recipient’s personality and the occasion.
Here are some decoration ideas:
- Wrap in Decorative Paper: Use floral prints for spring birthdays or red-and-gold paper for holidays.
- Add Ribbons and Bows: Satin or velvet ribbons elevate the elegance.
- Use Stamps or Calligraphy: Handwritten notes or stamped messages make it more personal.
- Layer with Fabric: Wrapping the box with burlap or silk adds texture and depth.
- Top with Accents: Try dried lavender, miniature pinecones, or tiny bells for a tactile, aesthetic finish.
Step 5: Line the Inside and Arrange the Items
A beautiful exterior is just the start. Open your box to reveal a neat, cushioned interior that holds everything securely.
- Add Fillers: Crinkle paper, shredded Kraft, or fabric scraps work well to pad items.
- Use Compartments: Cardboard dividers or small boxes inside the main box help organize different elements.
- Include a Note: A heartfelt, handwritten message adds an emotional layer to your gift.
Arrange the items with the largest or flattest pieces at the bottom and smaller items on top, so nothing gets crushed.
Step 6: Seal and Final Touches
Once everything is in place:
- Close the box carefully.
- Secure it with a ribbon, string, or a branded sticker.
- Add a name tag or gift label.
If you’re mailing the box, choose a sturdy outer box for protection and seal it well with packing tape.
Use for Branding
If you're running a small business—whether it's artisan goods, handmade jewelry, or organic treats—your packaging matters. Branded gift boxes can boost your perceived value and build customer loyalty.
Including custom gift boxes with logo in your packaging strategy creates a memorable brand experience. These boxes can carry your story, convey quality, and encourage social sharing—especially when the unboxing is Instagram-worthy.
Sustainable Gifting Options
Many gift-givers and businesses are embracing sustainability. To create eco-friendly boxes:
- Use recycled or biodegradable materials
- Avoid plastic tape—go for paper tape instead
- Decorate with reusable or compostable items
- Encourage the recipient to reuse the box
Sustainability adds purpose to your present, aligning your gift with conscious living trends.
Final Thoughts
Making your own gift boxes may take time, but it’s a fulfilling process that turns any gift into something truly memorable. Whether you're surprising a loved one or impressing a customer, the presentation speaks volumes about your care and creativity.
In a fast-paced world, slowing down to create something beautiful by hand is an art—and your gift box can be part of that story.
About the Creator
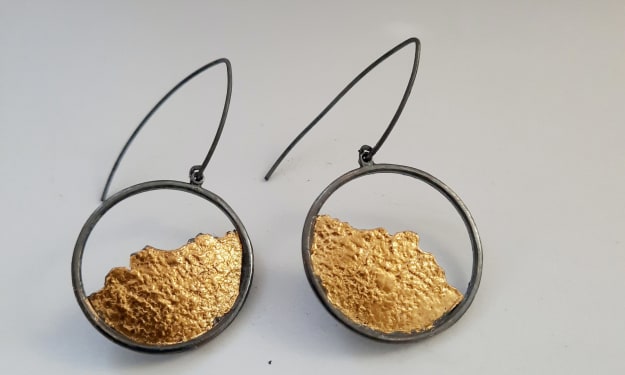
Keum-boo: The Ancient Korean Gold-Bonding Technique That Makes Silver Glow
If you’ve ever seen a piece of silver jewelry that seems to “catch fire” in certain spots, warm gold flashing against cool gray metal, you may have been looking at keum-boo. Keum-boo is an old Korean technique where ultra-thin, high-purity gold is bonded to silver using heat and pressure, creating a permanent two-tone surface without solder or adhesives. Instead of “sticking” metal on top, you’re encouraging a microscopic bond at the boundary where gold and silver meet, which is why well-done keum-boo can look clean, intentional, and remarkably durable.
By Md Mehedi Hasan Rifad4 days ago in Journal
When the Shelter Closes
Across the street from my house, a man slept under a tree, his dog by his side. My first, naive thought: he must be traveling through. But he kept coming back, often sleeping there during the day. Then it hit me—that person might not have a home.
By Bride of Sound4 days ago in Humans


Comments
There are no comments for this story
Be the first to respond and start the conversation.