
How to Use the Garrett ACE 300 Metal Detector?
Learn how to use the Garrett ACE 300 metal detector with this complete guide covering setup, features, sweeping, and tips from the official manual.

Introduction
The Garrett ACE 300 Metal Detector is a solid choice for anyone ready to dive into the exciting world of treasure hunting. Whether you're exploring the beach, your backyard, or an old homestead, the ACE 300 offers reliable performance with simple controls that make it perfect for beginners. It strikes a balance between ease of use and feature-rich capabilities, offering everything from target ID numbers to preset search modes.
This guide will walk you through every step, from unboxing to real-world detecting tips, using insights directly from the Garrett ACE 300 metal detector manual and user experience. You'll gain a clear understanding of how to get started, use each function efficiently, and make the most of your time in the field. If you're holding a Garrett ACE 300 metal detector in your hands and wondering where to begin, you're in the right place.
1. Unboxing and Assembling the Garrett ACE 300
Opening the box of your Garrett ACE 300 Metal Detector feels like the start of a new adventure. Inside, you’ll typically find the control box, the stem (which comes in multiple sections), the armrest, the search coil, a coil cover, and a set of mounting hardware. Some packages might also include headphones or a protective cover for the control box, depending on the retailer.
Assembly is quick and straightforward. Start by connecting the lower and upper stem. Slide them together and adjust the length to suit your height, then lock it in place with the cam locks. Attach the search coil to the lower stem using the bolt and nut provided. Secure it snugly, but don’t overtighten.
Next, connect the coil wire to the control box by wrapping it gently around the stem and plugging it into the connector. Be sure it’s firm but not forced. Finally, attach the armrest to the upper stem, making sure it aligns properly. With everything in place, you’re almost ready to start detecting. The Garrett ACE 300 metal detector manual offers clear illustrations if you want a visual reference while assembling.
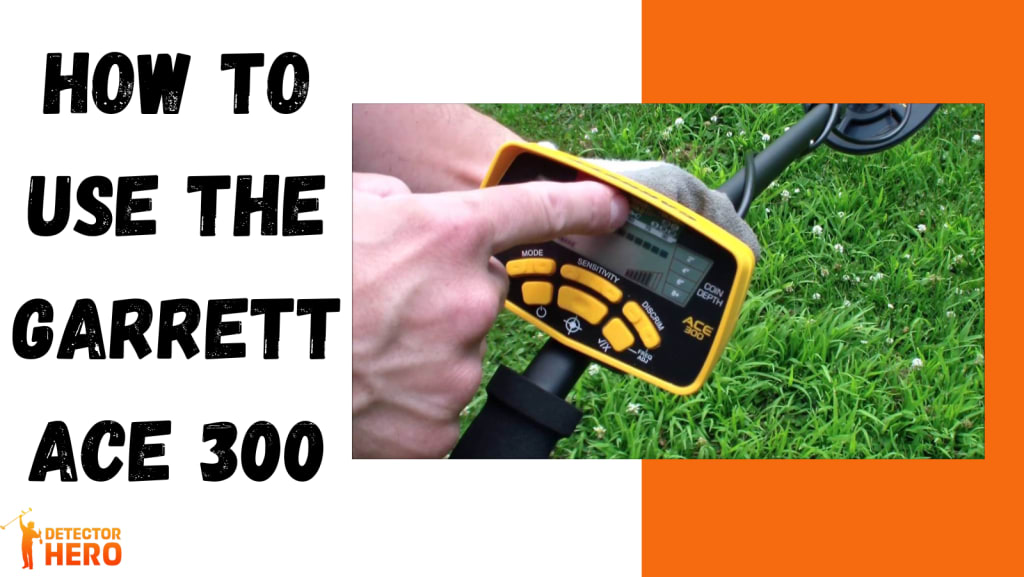
2. Understanding the Control Panel and Settings
The controlpanel of the Garrett ACE 300 metal detector is designed to be user-friendly, but it still packs plenty of functionality. The LCD screen shows key details like Target ID, sensitivity level, battery life, and depth indicators. Beneath the screen, you’ll find buttons for adjusting settings and choosing your search modes.
One of the first features you'll notice is the digital Target ID system, which displays a number between 0 and 99 to help you identify what’s beneath the surface. For example, iron items might register low (around 10–20), while coins and jewelry land higher (60–90).
There are five preset search modes: Zero-Disc, Jewelry, Custom, Relics, and Coins. Each mode changes the discrimination pattern to suit the kind of targets you’re searching for. The sensitivity button lets you adjust how deeply the detector scans, and the discrimination buttons allow you to filter out unwanted signals, like bottle caps or nails. These options give you the flexibility to adapt the Garrett ACE 300 to different ground conditions and target types, helping you become a more efficient detectorist.
3. Powering On and Initial Setup
Getting started with the Garrett ACE 300 metal detector is as easy as installing the batteries and pressing the power button. The device runs on four AA batteries, and it's a good idea to use high-quality ones for optimal performance. Once inserted, press the power button located on the front panel. You’ll hear a beep and see the screen come to life.
Begin by selecting a search mode. If you’re just starting out, try the "Coins" mode—it’s perfect for familiar environments like parks or schoolyards. Then, adjust the sensitivity using the plus or minus buttons. A higher sensitivity setting can help detect deeper items, but it may also pick up more ground noise.
Don’t forget to check the discrimination settings. This feature helps the detector ignore junk metals. Once these steps are done, your Garrett ACE 300 is ready to hit the field. Keep the Garrett ACE 300 metal detector manual close by for a quick reference while you're learning each setting.
4. Ground Balancing and Environmental Prep
Unlike higher-end models, the Garrett ACE 300 metal detector comes with a fixed ground balance setting. That means you don’t have to adjust it manually, which simplifies things for beginners. However, it also means you might need to adapt your approach based on the type of soil you're detecting in.
In highly mineralized soil or areas with a lot of iron deposits, consider lowering the sensitivity slightly to reduce false signals. It’s also helpful to research your location beforehand. Parks and backyards are usually safe bets, while saltwater beaches can cause chatter due to the fixed ground balance.
Before you begin swinging, take a few moments to walk around the area and look for obvious trash or metal debris. Doing a quick surface clean can save time and reduce distractions. And if you're in a public place, always follow local laws and etiquette—leave the site cleaner than you found it.
5. How to Sweep Properly
Once your Garrett ACE 300 is powered on and set up, it’s time to learn the proper sweeping technique. Swinging the detector correctly plays a huge role in its effectiveness. Start by holding the coil about an inch above the ground and sweep from side to side in a slow, overlapping motion. Picture the coil as a broom—if you swing it too fast or too high, you’ll miss potential finds.
Keep your sweeps level and consistent. Allow the detector to process what’s beneath the surface by moving at a controlled pace. Quick swings or lifting the coil at the ends can result in missed targets or inconsistent signals.
Overlap each sweep by about 50% to make sure no ground is missed. It’s tempting to rush, especially if you get a few signals early on, but patience pays off. Consistency and control are key. As you practice, you’ll start recognizing good signals versus erratic ones more clearly.
6. Interpreting Signals and Target ID
Understanding the signals and Target ID system is where the Garrett ACE 300 really shines. When you pass over a target, the detector emits one of three audio tones—low, medium, or high—depending on the conductivity of the object. High tones usually mean silver or copper coins, while low tones are often associated with iron objects.
Along with the tone, the digital Target ID will display a number. Getting familiar with these numbers can help you decide whether to dig. For example, a U.S. penny might show a number around 82, while a nail could be closer to 15.
Another handy tool is the coin depth indicator, which helps estimate how deep the object is buried. This allows you to dig more efficiently, reducing unnecessary digging. With a little experience, you’ll get a feel for which signals are worth your time and which ones you can skip.
7. Digging and Recovering Targets
So you’ve found a solid signal—now it’s time to dig. A good recovery technique ensures you find your target without damaging it or the surrounding area. Start by pinpointing the object. The Garrett ACE 300 has a built-in pinpoint function you can activate by pressing and holding the designated button. Move the coil over the signal area slowly until you find the strongest tone.
Once pinpointed, use a digging tool or trowel to cut a U-shaped plug around the target. Gently lift the plug and flip it over, keeping the grass intact. Check the hole and the plug with your detector or a handheld pinpointer to locate the target.
After retrieving the item, carefully replace the plug and press it back into place. This method helps preserve the environment and leaves minimal trace. Always carry a small pouch for storing your finds and any trash you dig up—responsible detecting is part of the fun.
8. Maintenance and Storage Tips
Taking care of your Garrett ACE 300 metal detector ensures it stays in top shape for years. Start by wiping down the detector after each outing using a soft cloth. Pay special attention to the coil, which may collect mud or sand. Avoid using harsh chemicals—clean, damp cloths are usually enough.
If you’ve been near saltwater or wet environments, remove the coil cover and rinse it separately to prevent corrosion. Store the detector indoors in a dry place, away from extreme temperatures. Always remove the batteries if you don’t plan on using it for a while to prevent battery leakage.
Coil cables should be loosely wrapped, not tightly wound, to avoid stress on the wires. Check the hardware occasionally and tighten any loose connections. Keeping your detector clean and properly stored not only extends its life but also ensures consistent performance every time you head out.
Conclusion
The Garrett ACE 300 is more than just a starter detector—it’s a powerful tool that can uncover exciting finds when used correctly. From setting up and understanding the control panel to interpreting signals and recovering targets, each step contributes to your success in the field.
By following this guide and keeping the Garrett ACE 300 metal detector manual handy, you can build confidence and skill with every outing. Treasure hunting is about more than what you find—it’s about the experience, the places you explore, and the knowledge you gain. So get out there, swing with purpose, and see what treasures await beneath your feet.
FAQs
Is the Garrett ACE 300 waterproof?
The control box of the Garrett ACE 300 is not waterproof, but the search coil is. This means you can detect in shallow water or wet grass without worry, but avoid full submersion or heavy rain. For wet environments, consider adding a control box cover for extra protection.
How deep can the Garrett ACE 300 detect?
The detection depth depends on the size and type of target, soil conditions, and sensitivity settings. On average, it can detect coins up to 8 inches deep and larger objects up to 2 feet. Using the pinpoint mode can help you identify the exact location and depth more accurately.
Can it be used on saltwater beaches?
The Garrett ACE 300 can be used on dry sand at saltwater beaches, but it may produce false signals in wet, salty sand due to its fixed ground balance. Reducing sensitivity and using discrimination settings can help minimize interference in these conditions.
What’s the difference between ACE 300 and ACE 400?
The ACE 400 offers more advanced features, such as higher frequency (10 kHz vs. 8 kHz), Iron Audio, and a slightly larger coil. However, the ACE 300 remains a great value and is easier to use for beginners.
Do I need headphones with the ACE 300?
While not required, using headphones can help you hear faint signals more clearly, especially in noisy environments. Some ACE 300 bundles come with Garrett ClearSound headphones, but any standard 1/4-inch jack headphones will work.
About the Creator
SEO HUB
I’m a professional Content & SEO Specialist with 3+ years of experience. I provide placements on top-tier USA publications, sites like USAToday.com, ensuring real exposure and SEO value.
WhatsApp: +92 311 6772455
About Binding Prometheus
I want to start actively advocating on behalf of my own work, and the most valuable part of my canon is, without a doubt, Binding Prometheus, the play I have been working on since 2019 and only finished in 2023 as part of my MA. The play itself is an amalgamation of a million different inspirations. On one end, it evokes the Ancient Greek myth-play, deriving its own title from the earliest extant work of Western drama we have, Aeschylus’s Prometheus Bound. On the other end, it borrows significantly from the sci-fi bulwarks from over the years, namely Mary Shelley’s Frankenstein and Karel Capek’s Rossum’s Universal Robots. The play could be an episode of Black Mirror, I fear. I don’t know. I’ve only ever seen one episode of Black Mirror.
By Steven Christopher McKnight15 days ago in Futurism
DIY Furniture Market Size and Forecast 2025–2033
Introduction: The Rise of Hands-On Home Design Furniture is no longer just something we buy—it is increasingly something we build, customize, and take pride in creating. Across the world, consumers are embracing a hands-on approach to home décor, driven by a desire for personalization, affordability, and sustainable living. This shift has given rise to the fast-growing DIY (Do-It-Yourself) furniture market, where flat-pack kits, modular designs, and ready-to-assemble products empower individuals to become co-creators of their living spaces.
By Janine Root a day ago in Futurism
Getting Serious About Comedy (Part I)
If I were asked to remark on my life and the childhood that paved some road leading me to this point, I would have to say something about all the funny people who surrounded me for the last 26,872 days (and counting). Somewhere along that road, I became a big fan of laughter and the comedy that spawns it – and, I mean not only my own laughter, but the laughter of others, some of which I have actually been responsible for inducing.
By John Oliver Smith7 days ago in Humor


Comments
There are no comments for this story
Be the first to respond and start the conversation.