
How to Repair Carpet Burns from Hot Tools
Learn how to fix carpet burns caused by hot tools with our easy-to-follow guide. Discover effective methods and tips for Carpet Repairs

Accidents happen, and sometimes we’re left with carpet burns caused by hot tools such as curling irons, straighteners, or even hairdryers. If you’ve ever had this problem, you know how frustrating it can be to see that burnt mark on your carpet. But don’t worry, fixing carpet burns is not as difficult as it sounds, and you don’t need to hire professionals right away. In this guide, we will show you step-by-step how to repair carpet burns yourself. Whether you find carpet repair in Cranbourne West or another area, these tips will help restore your carpet to its former glory.
Understanding Carpet Burns
Carpet burns occur when a hot tool comes in direct contact with the carpet fibres. The heat causes the fibres to melt, leaving a visible mark. These burns are more common in areas where people style their hair, like bedrooms or bathrooms, but they can happen anywhere. Understanding the cause of the burn is crucial because it will determine the best way to repair it.
Carpet Repair Services vs DIY Fixes
Before we dive into DIY fixes, it's important to understand the difference between DIY repairs and professional Carpet Repair Geelong Services. Professional carpet repair experts have the right tools and experience to restore your carpet to its original condition. However, if the burn is small, or you are on a tight budget, DIY repair methods can often be just as effective, saving you time and money.
Materials You’ll Need
To repair a carpet burn, you’ll need a few basic materials that you might already have at home. Here's a list of things to gather before you start:
- Scissors or a craft knife
- Carpet glue or adhesive
- Carpet patch (from a leftover piece or from a hidden area of the carpet)
- Tweezers (optional)
- A clean cloth
- Iron and damp towel (for steaming)
Step-by-Step Guide to Fix Carpet Burns
Now that you have everything you need, let’s walk through the repair process. It’s best to address the burn as soon as possible, but even if some time has passed, these steps should still help.
Step 1: Assess the Damage
Before starting the repair, assess the size and depth of the burn. If the burn has only affected the top layer of the carpet, it’s easier to fix. However, if the burn has melted through the fibres or created a hole, you may need to patch the carpet.
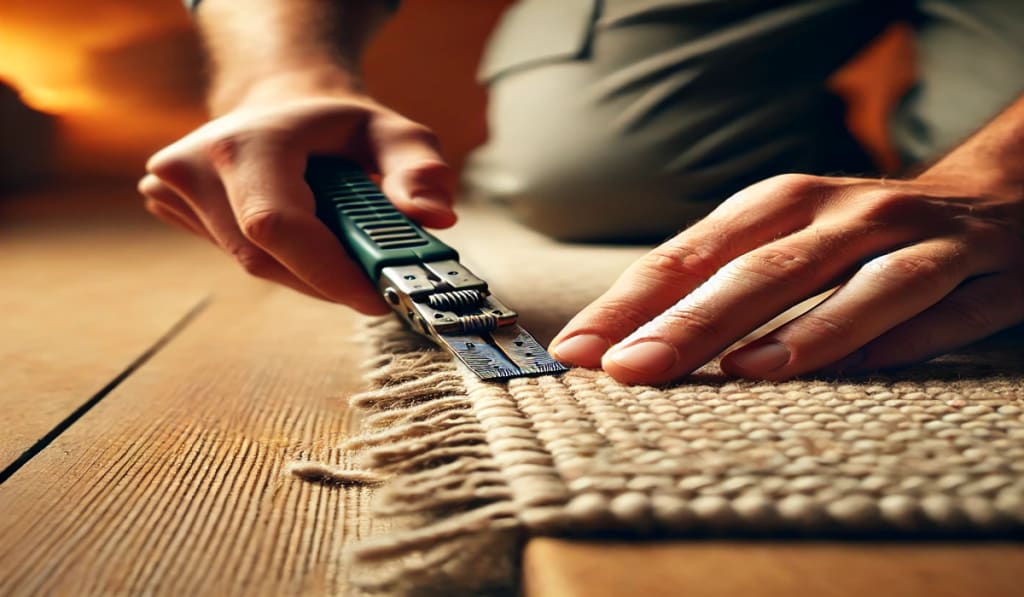
Step 2: Trim the Burnt Fibres
Using a pair of scissors or a craft knife, carefully trim the burnt fibres. Be sure to cut only the affected area and leave the surrounding fibres intact. This step will ensure that the burn doesn’t spread further when you begin the repair.
Step 3: Create a Carpet Patch
If the burn has created a hole in the carpet, you will need a carpet patch. You can use a piece of carpet from a hidden area, like underneath a piece of furniture or from leftover scraps if you have any. If you don’t have any spare carpet, you can also buy a carpet patch kit from most hardware stores.
Cut the patch to fit the size of the damaged area, making sure the edges are straight for a clean finish. If you use an old piece of carpet, try to match the texture and colour as closely as possible.
Step 4: Attach the Patch
Apply a small amount of carpet glue or adhesive to the edges of the patch. Press it firmly into place, ensuring that the new patch is level with the surrounding carpet. If the patch has any excess glue, wipe it away with a clean cloth.
If you're working with a very small burn mark, a patch might not be necessary. You can simply glue the edges of the remaining carpet fibres down to prevent them from fraying.
Step 5: Blend the Patch
After the glue has dried, use your fingers or a pair of tweezers to blend the patch’s fibres with the existing carpet fibres. Gently pull the fibres over the edges of the patch to hide the seams. If necessary, you can even steam the patch to soften the fibres, making it easier to blend them into the surrounding carpet.
Step 6: Steam the Carpet
Once the patch is in place, you may need to steam the area to help the fibres blend together more naturally. To do this, place a damp towel over the repaired area, then apply heat with an iron (on a low setting). Hold the iron about an inch above the towel for a few seconds, letting the steam soften the fibres. This will help them settle and blend into the rest of the carpet.
Step 7: Allow the Carpet to Dry
Finally, allow the carpet to dry completely before walking on it. This will give the glue time to set and ensure that the patch remains securely in place. Depending on the humidity in your home, this may take a few hours to a full day.
Tips for Preventing Carpet Burns in the Future
While carpet burns are sometimes unavoidable, there are a few steps you can take to minimise the risk of them happening again:
- Always use a heat-resistant mat when styling your hair or using hot tools near the carpet.
- Avoid placing hot tools directly on the carpet or leaving them on the floor.
- If possible, keep hot tools on a hard surface like a table or countertop.
- If you spill something hot on your carpet, clean it up immediately to prevent burns.
Conclusion
Repairing carpet burns from hot tools doesn’t have to be a daunting task. With a few simple tools and a bit of patience, you can restore your carpet to its former state. Whether you're dealing with a small burn or a larger hole, following these steps will help you fix the damage effectively. If you're in need of more extensive repairs, don’t hesitate to consider professional Carpet Repair Services. However, for most minor burns, DIY methods can be a quick and easy solution. Happy repairing!
About the Creator
James Smith
I am a dedicated writer with a passion for sharing expert knowledge about carpet repair. With years of experience in the industry, I provide practical tips and in-depth guides to help homeowners maintain their carpets to their beauty.
Keep reading
More stories from James Smith and writers in Families and other communities.
How to Clean a Carpet with Rubbing Alcohol
Carpets can be a beautiful addition to any home, but they often take the brunt of daily wear and tear. Stains from spills, dirt, and dust can easily build up, making your carpet look old and dirty. If you're looking for a quick and easy way to clean your carpet at home, rubbing alcohol can be a great solution. Not only is it effective, but it’s also a simple option for those who prefer to avoid harsh chemicals. If you're in Cranbourne North and need professional assistance, Carpet Repair Cranbourne North can help with deep cleaning and more. For now, let's focus on how to clean your carpet with rubbing alcohol.
By James Smithabout a year ago in Families
Becca
"Everything is so... flat." Denille said stupidly as she looked around her new neighborhood. She looked around at the muted desert where even the smallest sign of life seemed to have given up. The plant life was shrubs that were half cooked by the heat and where there should have been a lawn, a mess of white rocks laid glistening in the sun. Even the sky looked stretched thin, like the sun had ironed it smooth. She’d moved from Riverside, where at least there were hills, but here in Barstow, everything felt baked and brittle.
By Sara Wilson8 days ago in Fiction


Comments
There are no comments for this story
Be the first to respond and start the conversation.