
Step by Step guide to Performing Aseptic Catheterisation Techniques
Learn the correct techniques for catheterisation in this concise guide for healthcare professionals, improve your skills and ensure patient safety.
Aseptic catheterisation is a core procedure within healthcare that requires precision, adherence to infection control guidelines, and patient-centred care. This guide breaks down the aseptic catheterisation technique into key steps, suitable for nurses and healthcare professionals aiming to refine their skills. Whether you're gaining initial training or enhancing expertise through catheterisation courses for nurses, mastering this procedure is essential.
Understanding Aseptic Catheterisation
Aseptic catheterisation involves the sterile insertion of a catheter into a patient’s bladder to drain urine while minimising infection risks. This commonly performed procedure serves various medical purposes, such as managing urinary retention, incontinence, or post-operative care.
Pre-Procedure Preparation
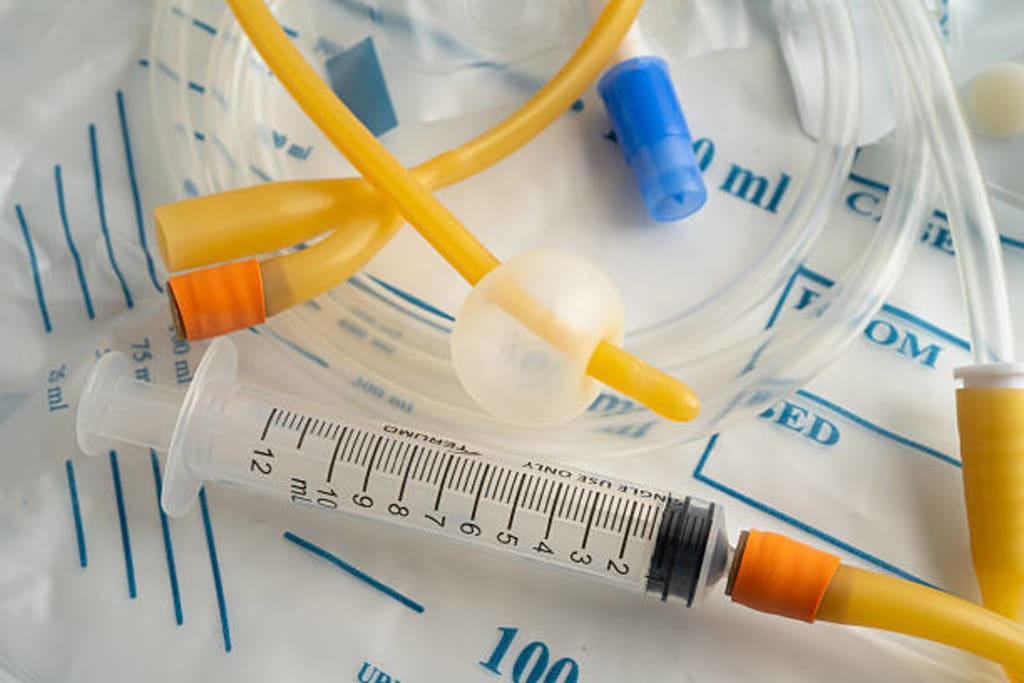
1. Assemble Your Equipment
Organising all necessary supplies before beginning the procedure is critical for maintaining sterility and efficiency. You'll need:
a. A sterile catheterisation kit
b. A Foley or Nelaton catheter
c. Sterile lubricating gel
d. Antiseptic solution
e. Sterile gloves
f. A suitably sized drainage bag
g. A syringe with sterile water (for indwelling catheters)
h. Disposable apron and waste bag
Having everything ready ensures smooth workflow and helps to safeguard the aseptic field.
2. Prepare the Environment
Select a clean, well-lit location. Position the patient comfortably while protecting their dignity using drapes. A calm, prepared environment contributes to both procedural success and patient reassurance.
3. Explain and Gain Consent
Before you proceed, explain the steps clearly to the patient, addressing any questions or concerns. Obtaining informed consent is a crucial part of ethical practice and builds trust with the patient.
4. Perform Hand Hygiene
Hand hygiene is fundamental to infection control. Wash your hands thoroughly with soap and water or use an alcohol-based hand rub before proceeding. This should be done both before and after coming into contact with the patient or equipment.
Step-by-Step Procedure
Prepare Yourself and the Patient
Put on a disposable apron and sterile gloves. Position the patient appropriately, usually lying on their back with legs slightly apart. Adjust positioning as needed, based on the patient’s mobility or health conditions.
Clean the Urethral Area
Cleanse the insertion site using an antiseptic solution:
For male patients – Retract the foreskin if applicable and clean the glans in circular motions, starting from the urethral meatus outward.
For female patients – Separate the labia and clean from the urethral opening outward in a single downward stroke. Avoid backward motions to prevent contamination.
Create a Sterile Field
Set up the sterile field by opening the catheterisation pack and laying out tools to prevent cross-contamination. Put on sterile gloves while maintaining aseptic technique.
Lubricate the Catheter
Apply a liberal amount of sterile lubricating gel to the catheter tip. This reduces discomfort and minimises the risk of urethral trauma.
Insert the Catheter
Insert the catheter gently:
For male patients – Hold the penis perpendicular to the body and introduce the catheter slowly until urine is observed in the catheter tube.
For female patients – Separate the labia to maintain a clear view and carefully insert the catheter until urine flow begins.
Avoid using force during insertion. If resistance is encountered, consider re-evaluating positioning or seeking additional support from colleagues.
Inflate the Balloon (If Applicable)
For indwelling catheters, once urine is observed, advance the catheter slightly further before inflating the balloon with sterile water as per the manufacturer's guidelines. This confirms its secure placement within the bladder.
Attach the Drainage Bag
Connect the catheter to the drainage bag, ensuring all connections are handled aseptically. Position the bag below the bladder level to facilitate proper drainage by gravity.
Dispose of Equipment
Remove gloves and apron carefully to avoid contamination. Dispose of all waste in the designated clinical bins and perform hand hygiene thoroughly.
Document the Procedure
Record key details, including the type and size of the catheter, the amount of water used for balloon inflation, the patient’s response, and any observations during the procedure.
Aftercare and Monitoring
a. Regular Monitoring
Post-procedure, monitor the catheter site for redness, swelling, or other signs of infection. Check that the system is functioning correctly and educate the patient on care techniques and what to report.
b. Drainage Bag Management
Regularly empty the drainage bag and ensure it remains below bladder level. Replace it following infection control protocols.
c. Evaluate Duration of Use
Catheters should be used only as long as clinically necessary, as prolonged use increases the risk of urinary tract infections. Discuss removal planning when appropriate.
d. Troubleshooting Common Challenges
Resistance During Catheterisation – Gently adjust the angle or use anatomical guidance tools if necessary. Seek assistance for complex cases.
No Urine Flow – Check for kinks or obstructions in the tubing. Use a portable bladder scanner if available.
Patient Discomfort – Ensure proper placement and confirm that the balloon is correctly inflated. Administer prescribed pain relief as appropriate.
Final Thoughts
Aseptic catheterisation is a critical procedure in healthcare that prioritises both infection control and patient well-being. Following these steps ensures a safe, effective experience for both practitioners and patients. Continuous professional development, such as catheterisation courses for nurses, can further refine skills and improve clinical outcomes.
About the Creator
Answering the Call: Building a Purpose-Driven Real Estate Career Through Commitment and Service
Many individuals enter real estate seeking opportunity, yet those who truly thrive see it as something deeper. Because housing shapes stability, security, and community, the role carries significant responsibility. Therefore, professionals who treat real estate as a calling approach each client interaction with intention and care. They recognize that their guidance influences not only financial outcomes but also life transitions.
By Stacey Yim5 days ago in Education


Comments
There are no comments for this story
Be the first to respond and start the conversation.