
Leonardo AI - A Comprehensive Beginner's Guide
Discover the power of Leonardo AI in this step-by-step tutorial designed for beginners. You'll learn how to navigate the platform and create stunning images using advanced AI technology.
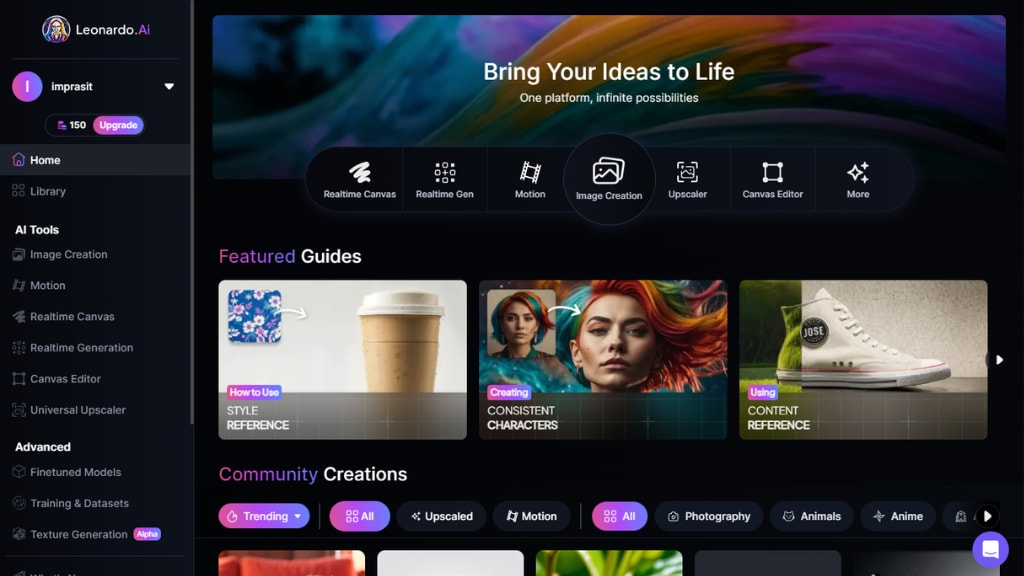
Table of Contents
Step 1: Introduction
Step 2: Main Dashboard
Step 3: Image Editing
Step 4: Canvas Editor
Step 5: Prompt Editing
Step 6: Export Image
Step 7: Canvas Modes
FAQ
Step 1: Introduction
Leonardo AI is designed for those who want to create stunning images using advanced AI technology.
Whether you are a beginner or looking to improve your skills, this guide will take you through the essentials.
Step 2: Main Dashboard
Upon logging in, you'll be greeted by the main dashboard of Leonardo AI.
Here, you will see the featured AI models for image generation at the top, alongside the most recent images created by the Leonardo community.
This space is not just a hub for your creations; it’s also a gallery of inspiration.
To the left, you can access the community feed, which provides a complete library of images generated with Leonardo AI.
This feature allows you to explore, copy prompts, or download images for your projects.
All public images are royalty-free and can be used commercially.
Your personal feed is where you can retrieve your own generated images, while the Fine Tuned Models section showcases a variety of AI algorithms available for image generation, including specific styles crafted by the Leonardo team and its community.
AI Image Generation: Create images from scratch using textual prompts.
AI Realtime Canvas: Edit and manipulate existing images.
Texture Generation: Generate textures for 3D objects (not covered in this guide).
Now, let’s dive into generating images using the AI image generation feature of this platform.
Step 3: Image Editing
Image editing is a crucial aspect of using Leonardo AI. This feature allows you to refine and enhance your generated images, ensuring they meet your creative vision.
With various tools at your disposal, you can manipulate images in ways that were previously time-consuming or complex.
Getting Started with Image Editing
To begin editing an image, select one from your personal feed or upload a new one.
Once you have your image ready, you can use the AI Canvas to make adjustments.
This canvas serves as your workspace, where you can apply various editing techniques.
Essential Editing Tools
Select Tool: Use this to choose any image on the canvas. You can move, scale, or rotate images as needed.
Sketch Tool: Brush color onto your image, allowing for freeform adjustments and enhancements.
Text Tool: Add textual elements to your images, adjusting font styles and sizes for the desired effect.
Generation Frame: This defines the area where the AI will apply modifications. Position it carefully for the best results.
Draw Mask: Specify areas for modification while preserving others, giving you control over the editing process.
Applying Edits
After selecting your tools, you can apply edits by setting your prompt and hitting generate.
If the results are not what you expected, use the Erase tool to remove unwanted regions and try again.
This iterative process allows for precise control over your image’s final look.
Step 4: Canvas Editor
The Real-time Canvas Editor is a powerful feature that enhances your image editing capabilities.
Within this environment, you can work with multiple images, allowing for complex compositions and creative designs.
Utilising the Canvas Editor
To access the Canvas Editor, navigate from the main dashboard.
Here, you can upload images or select from your generated gallery.
The editor provides a blank slate where you can layer images and apply various effects.
Advanced Editing Techniques
Layering Images: Overlap multiple images to create unique compositions. Adjust the opacity and blending modes for interesting effects.
Image Guidance: Use existing images as a base for new creations. Upload up to four images for more detailed guidance.
Masking Techniques: Create complex shapes and designs by masking areas of your images. This can lead to stunning results that are tailored to your vision.
Step 5: Prompt Editing
Prompt editing is key to generating images that align closely with your creative intentions.
Crafting the right prompt can make a significant difference in the quality and relevance of the generated output.
Tips for Effective Prompting
Be Specific: Clearly define the main subject, background, and desired elements in your prompt.
Use Descriptive Language: Incorporate adjectives that convey mood, colour, and atmosphere.
Negative Prompts: Specify what you do not want to appear, helping the AI to focus on your desired output.
Step 6: Export Image
Once you are satisfied with your image, exporting it is the final step.
Leonardo AI allows you to download your creations in various formats, ensuring versatility for your needs.
Export Options
You can choose to export your images in PNG or JPG formats.
PNG files are ideal for maintaining transparency, while JPGs are suitable for standard image use.
After clicking on the export button, follow the prompts to save your image to your device.
Step 7: Canvas Modes
Understanding the different canvas modes is essential for effective image manipulation.
Leonardo AI offers several modes tailored to different editing needs.
Canvas Modes Explained
Inpaint/Outpaint Mode: Use this mode for minor edits and enhancements to existing images.
Image to Image Mode: Best for making significant alterations while keeping the original image intact.
Sketch to Image Mode: Ideal for creating images based on drawn sketches, allowing for unique artistic expressions.
FAQ
As you embark on your journey with Leonardo AI, you may have questions. Below are some frequently asked questions to assist you.
Common Questions
What types of images can I create?
You can create anything from realistic portraits to abstract art, depending on your prompts and model selections.
Can I use generated images commercially?
Yes, all public images are royalty-free and can be used for commercial purposes.
How can I improve my prompts?
Experiment with different descriptions and use the prompt generation feature for inspiration.
If you want a more detailed tutorial on Leonardo AI then read this -
About the Creator
PRASIT
I love to explore SaaS at https://digitalgrowthtools.com
Becca
"Everything is so... flat." Denille said stupidly as she looked around her new neighborhood. She looked around at the muted desert where even the smallest sign of life seemed to have given up. The plant life was shrubs that were half cooked by the heat and where there should have been a lawn, a mess of white rocks laid glistening in the sun. Even the sky looked stretched thin, like the sun had ironed it smooth. She’d moved from Riverside, where at least there were hills, but here in Barstow, everything felt baked and brittle.
By Sara Wilson8 days ago in Fiction

Comments
There are no comments for this story
Be the first to respond and start the conversation.