
How to Use a Breadboard for Basic Circuit Building
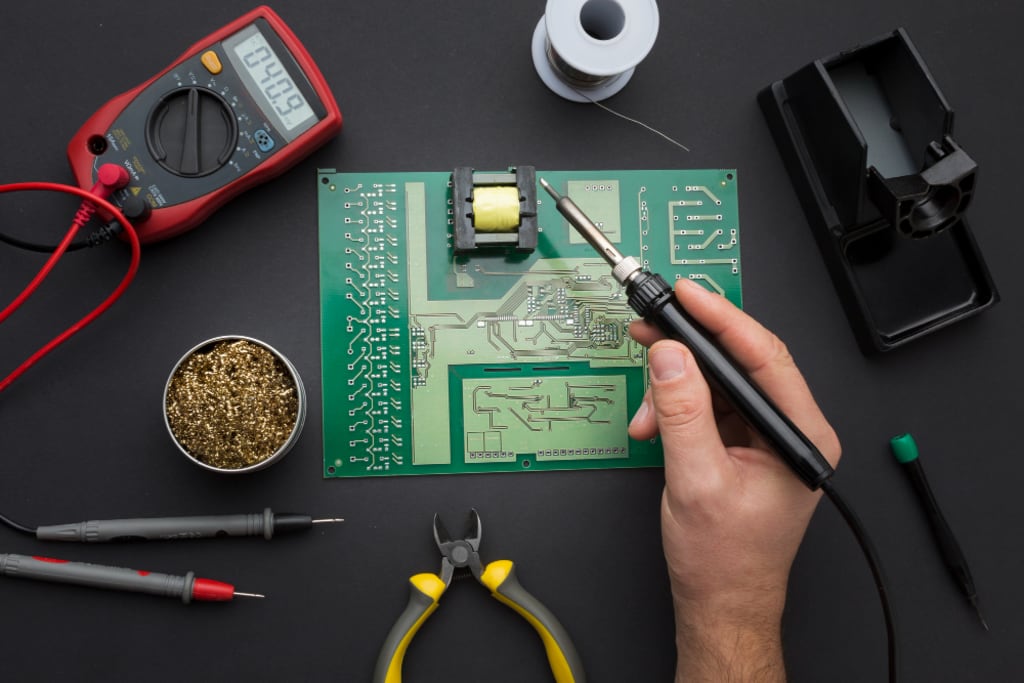
Breadboard

If you're new to electronics or circuit building, a breadboard is an essential tool that can help you bring your projects to life without the need for soldering. Whether you're a hobbyist, a student, or an aspiring engineer, understanding how to use a breadboard properly is crucial for creating and testing basic circuits. In this article, we'll guide you through the process of using a breadboard step by step, providing you with the knowledge and confidence to start building your circuits.
Introduction
What is a breadboard?
A breadboard is a device used to create and test electronic circuits. It allows you to prototype circuits without the need for soldering, making it an ideal tool for beginners and for rapidly testing circuit ideas. Breadboards typically consist of a plastic board with multiple rows and columns of interconnected holes, where you can insert various electronic components.
Importance of breadboards in circuit building
Breadboards serve as a platform for circuit experimentation, enabling you to quickly iterate and modify your designs. They provide a convenient way to connect components together without the permanence of soldering, making them highly versatile and reusable. Additionally, breadboards are excellent for learning circuit theory and understanding the fundamentals of electronics.
Understanding the Breadboard
To effectively use a breadboard, it's important to familiarize yourself with its structure and how it works.
Anatomy of a breadboard
A typical breadboard consists of multiple sections, including the terminal strips, the power rails, and the component placement area. The terminal strips run vertically on the sides of the breadboard, while the component placement area occupies the central region.
Different sections of a breadboard
Breadboards usually have two power rails, one running along the top and another along the bottom. These power rails are typically connected horizontally, providing a common power supply for the components on the breadboard.
The concept of rows and columns
The interconnected holes on a breadboard are arranged in rows and columns. Each row typically consists of five interconnected holes, while columns usually contain ten interconnected holes. The interconnected holes within a row are electrically connected, allowing you to easily connect components together within the same row. The columns, on the other hand, are not electrically connected, providing a way to isolate different parts of the circuit.
Components and Tools Required
Before you start using a breadboard, you'll need a few essential components and tools. Here's a list of items you'll need:
Breadboard: Choose a breadboard with a suitable size for your projects. They come in various sizes, ranging from small ones for simple circuits to larger ones for more complex designs.
Jumper wires: These wires are used to make connections between components on the breadboard. They come in different lengths and colors, allowing you to easily identify and organize your circuit.
Resistors: Resistors are essential components in most circuits. They regulate the flow of current and protect other components from damage. Have a variety of resistors with different resistance values.
LEDs: Light-emitting diodes (LEDs) are commonly used to indicate the status of a circuit or as a light source. Make sure to have different colored LEDs for visual variety.
Power supply: Depending on your circuit requirements, you may need a power supply. This can be a battery or an external power source, such as a DC power supply.
Now that you have the necessary components and tools, let's dive into the step-by-step process of using a breadboard for basic circuit building.
Step-by-Step Guide to Using a Breadboard
- Placing the breadboard correctly: Start by placing the breadboard on a flat and stable surface. Ensure that it is positioned horizontally, with the power rails on the top and bottom.
- Understanding the power rails: Take a look at the power rails on the breadboard. The top rail is typically labeled with a red line or a plus symbol (+), indicating the positive terminal, while the bottom rail is labeled with a blue line or a minus symbol (-), indicating the negative or ground terminal.
- Inserting components into the breadboard: Begin by inserting your components into the breadboard. For example, if you're using an LED, insert its longer leg (the positive terminal) into a hole in the same row as the red power rail. Insert the shorter leg (the negative terminal) into a hole in a different row.
- Connecting components with jumper wires: To establish connections between components, use jumper wires. For instance, to connect the positive terminal of the LED to the power rail, insert one end of a jumper wire into a hole in the same row as the positive terminal and connect the other end to the power rail.
- Building a basic LED circuit: Now that you have the LED connected to the power supply, connect a resistor to the other leg of the LED. Insert one end of the resistor into a hole in the same row as the negative terminal of the LED and connect the other end to a hole in a different row.
- Troubleshooting common issues: If the LED doesn't light up, double-check your connections and make sure the components are inserted correctly. Check the polarity of the LED and ensure that the positive and negative terminals are connected appropriately.
Conclusion
Using a breadboard for basic circuit building is a valuable skill for electronics enthusiasts and beginners alike. It provides a flexible and convenient way to prototype and test circuits without the need for soldering. By understanding the anatomy of a breadboard, learning how to connect components, and following best practices, you can successfully bring your circuit ideas to life and gain a deeper understanding of electronics.
Remember, practice is key. Start with simple circuits and gradually increase the complexity as you become more comfortable with the breadboard. Enjoy the process of exploring and experimenting, and don't hesitate to seek additional resources and guidance to expand your knowledge.
About the Creator
Rehana Atar
SEO Expert and content writer
Keep reading
More stories from Rehana Atar and writers in Education and other communities.
Basics of Signal Processing in Electronics
Signal processing plays a vital role in the field of electronics by manipulating and analyzing electrical signals to extract meaningful information. It is a fundamental part of various electronic devices and systems, enabling them to transmit, receive, and process signals effectively. In this article, we will explore the basics of signal processing in electronics, its importance, concepts, techniques, applications, challenges, and future trends.
By Rehana Atar3 years ago in Education
Sofa Bed Sizes Explained
Buying a sofa bed sounds simple until you’re standing in a showroom (or scrolling online) thinking, Wait… what actually counts as a queen in a sofa bed? Some are wide but short. Some feel like a proper bed but take up half the lounge when opened. Others look compact and tidy, then surprise you with a sleeping surface that’s bigger than you expected.
By Your NZ Local5 days ago in Education
The Victorian Aristocrat Who Became First British Muslim Lord
In a remarkable chapter of British history, a Victorian-era aristocrat emerged as the first British Muslim to take a seat in the House of Lords, bridging the worlds of tradition, religion, and politics. Lord Rowland Hill, born into an elite family with deep roots in the British peerage, converted to Islam during a period of personal exploration, leaving a lasting legacy on the cultural and political landscape of the United Kingdom. A Life of Privilege and Curiosity Lord Rowland Hill grew up in the late 19th century surrounded by wealth, influence, and the privileges of the British aristocracy. Educated at prestigious institutions, he was expected to follow a conventional path of military service, estate management, and parliamentary involvement. However, Hill’s curiosity about world cultures and religions set him apart from his peers. During his travels across the Middle East and South Asia, Hill became fascinated by Islamic philosophy, ethics, and scholarship. His exposure to Muslim societies, combined with personal study, led him to embrace Islam, a decision that shocked many in Victorian high society, where religious conformity and social convention were strictly observed. Conversion and Social Reaction Hill’s conversion to Islam was a highly unusual step for a member of the British aristocracy. In Victorian society, where Christianity dominated public life and social identity, religious conversion—particularly to a minority faith—was met with skepticism and, at times, outright hostility. Despite this, Hill remained committed to his faith while maintaining his public duties, demonstrating that spiritual conviction could coexist with civic responsibility. Contemporary newspapers documented Hill’s conversion with a mixture of curiosity and critique, often framing it as an eccentric but intriguing development in the aristocratic world. Scholars note that Hill’s embrace of Islam coincided with broader Victorian interests in Orientalism and cross-cultural exchange, although few of his contemporaries made such a profound personal commitment. Political and Cultural Impact Hill’s ascension to the House of Lords as a Muslim represented a groundbreaking moment in British history. While the role of the peerage was traditionally linked to inherited privilege and Christian identity, Hill’s presence signaled a shift toward inclusivity and the recognition of religious diversity. He participated in debates on education, foreign policy, and social welfare, often drawing on his understanding of Islamic principles to inform his contributions. Hill became a bridge between British institutions and the growing interest in Muslim cultures within Europe. His writings and speeches emphasized tolerance, ethical governance, and the importance of understanding other societies, laying a foundation for future engagement between British lawmakers and Muslim communities. Legacy and Recognition The legacy of Lord Rowland Hill extends beyond his parliamentary contributions. As the first British Muslim lord, he challenged stereotypes about aristocracy, religion, and governance, showing that faith and civic duty could intersect in meaningful ways. Modern historians cite his example when discussing the early presence of Islam within British political structures and the gradual recognition of religious diversity in public life. Hill’s life also inspired literary and cultural accounts, portraying him as a visionary figure who navigated complex social hierarchies while adhering to personal convictions. Exhibitions, academic studies, and museum collections occasionally highlight his life as an emblem of cross-cultural dialogue in Victorian Britain. Lessons from a Pioneering Life Hill’s story illustrates the power of individual agency in shaping societal norms. At a time when conformity was expected, he pursued both personal faith and public service, demonstrating courage, integrity, and intellectual openness. His journey offers insights into the ways minority religions could find a voice in British governance, paving the way for future generations of lawmakers from diverse backgrounds. As Britain continues to engage with questions of religious pluralism and multiculturalism, Lord Rowland Hill’s pioneering path serves as a reminder of the enduring potential for individuals to transform institutions from within, balancing tradition with innovation, and personal conviction with public responsibility.
By Fiaz Ahmed 5 days ago in Education


Comments
There are no comments for this story
Be the first to respond and start the conversation.