
How to make soap with grass?
A beginner friendly guide

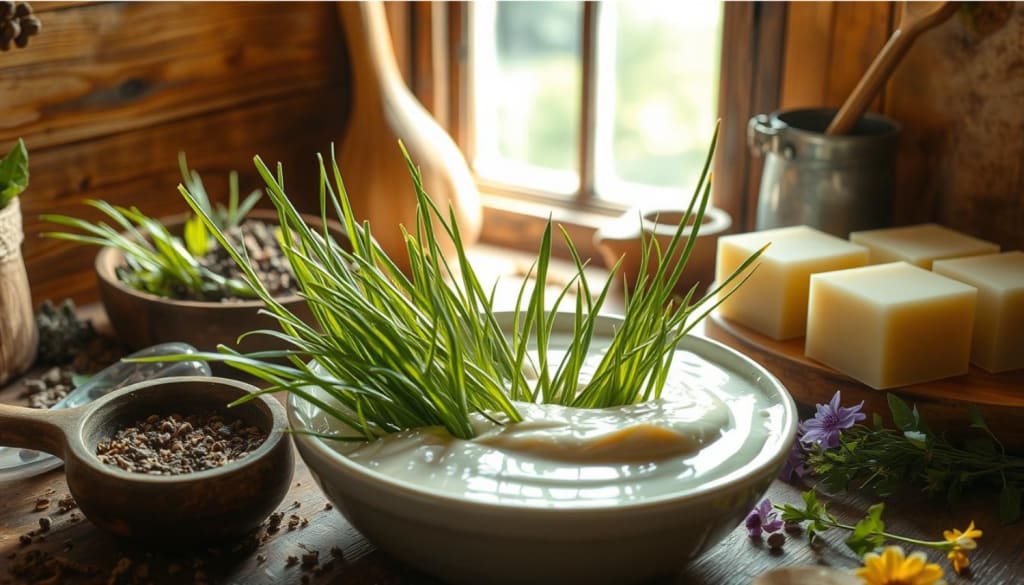
Let's learn how to make natural, nourishing soap with grass. This guide will show you how to make homemade soap with lemongrass and coconut milk. You'll discover how to use these ingredients to make luxurious soap that refreshes and rejuvenates your skin.
This guide is for both seasoned soap makers and beginners. You'll learn how to make unique, grass-infused soap. You'll find out about the equipment, safety, and the saponification process. Plus, you'll learn about the benefits of grass in soap and the best types to use.
Understanding the Basics of Natural Soap Making
If you're new to making homemade soap, learning the basics is key. You'll discover how to make high-quality, organic soap. This guide covers the essential tools, safety tips, the saponification process, and basic ingredients. It's your first step on the soap-making journey.
Essential Equipment and Safety Precautions
To make homemade soap, you need a few tools. These include a digital scale, heat-safe containers, a sturdy spoon or whisk, and a soap mold. Working with lye requires safety. Always wear gloves and eye protection.
Understanding the Saponification Process
The saponification process is at the heart of soap making. It's when fats and oils mix with lye to create soap. This mix gives soap its cleansing and skin-nourishing qualities. Knowing this process is crucial for making top-notch, natural homemade soap.
Basic Ingredients Overview
- Oils and butters (e.g., olive oil, coconut oil, shea butter)
- Lye (sodium hydroxide or potassium hydroxide)
- Water or other liquid (e.g., herbal infusions, goat milk)
- Natural additives (e.g., essential oils, botanicals, clays)
These ingredients combine to create soap that cleans, moisturizes, and nourishes the skin. They're the foundation of organic soap and natural soap making at home.
Benefits of Using Grass in Homemade Soap
Adding grass to homemade soap can greatly benefit your skin and the soap's quality. Lemongrass is a favorite for its scent and antibacterial properties. It adds a refreshing smell and nourishes the skin when used in soap.
Other grass types can also make unique and beneficial soaps. These herbal soaps can exfoliate gently and moisturize deeply. They are great for soothing and calming sensitive skin.
Grass soaps are also good for the environment. They use locally sourced grass, which is renewable. This makes them a green choice for those who care about the planet.
Using grass in your soap can be a rewarding experience. It lets you create a unique, skin-loving soap. This sets your handmade products apart from others.
Types of Grass Suitable for Soap Making
Creating homemade soap with a natural touch is exciting. The type of grass used is key. Lemongrass is a top choice for soap making.
Lemongrass Varieties
Lemongrass has a citrus scent and soothing effects. It's great for making grass soap. There are two main types used in soapmaking:
- East Indian Lemongrass (Cymbopogon flexuosus)
- West Indian Lemongrass (Cymbopogon citratus)
Fresh vs. Dried Grass Options
Both fresh and dried lemon grass are used in soap. Fresh lemongrass has a strong scent. Dried lemongrass has a milder, earthier smell. Your choice depends on the scent you want in your herbal soap.
Seasonal Grass Selection Guide
Lemongrass is available at different times of the year. In summer, fresh lemongrass is easy to find. It's perfect for summer soaps. In winter, dried lemongrass is better. It ensures you can make grass soap all year.
Preparing Grass for Soap Making
Creating your own grass soap requires careful grass preparation. This is true whether you're making herbal soap or homemade soap. There are a few key steps to follow.
Start by cleaning the grass well. Rinse the fresh grass under cool water to remove dirt and debris. This makes sure your grass soap is clean and free of contaminants.
Then, dry the grass to get rid of extra moisture. You can lay it out to dry or use a dehydrator on a low setting. Drying the grass properly is important for the soap-making process and quality.
After drying, prepare the grass for your soap. You can chop it into small pieces or keep it longer. This choice will change the soap's texture and look.
Success in grass soap making comes from paying attention to detail. By following these steps, you'll make a unique and natural herbal soap. It will highlight the grass's benefits.
Essential Ingredients for make soap, with grass, coconut milk soap, coconut milk soap recipe
Making natural soap at home needs the right ingredients. Whether it's a grass-based soap or a rich coconut milk soap, knowing the key ingredients is crucial. This knowledge helps you get the soap you want.
Base oils and Butters
The base of homemade soap comes from base oils and butters. You can use olive oil, coconut oil, shea butter, and sustainable palm oil. These give the soap its cleaning power, lather, and moisturizing qualities.
Lye Solution Requirements
Lye, or sodium hydroxide, is vital in soap-making. It mixes with the oils' fatty acids, starting the saponification process. This turns the ingredients into a soft, gentle natural soap.
Natural Additives and Preservatives
To make your coconut milk soap or coconut milk soap recipe better, add natural things like essential oils, herbs, or botanicals. They add health benefits, scents, and looks. You might also need preservatives to keep your natural soap fresh longer.
Knowing the basic ingredients and their roles lets you make great grass-based or coconut milk soaps. These soaps will nourish and please your senses.
Step-by-Step Grass Soap Making Process
Making grass soap is a fun and natural way to create your own bath products. It's easy to turn simple ingredients into a luxurious make soap that feels like nature. Let's explore how to make handmade soap with grass step by step.
Measure and Prepare Ingredients: First, measure out the base oils like olive or coconut oil. Also, get your grass ready. Then, mix the lye solution as the recipe says.
- Blend the Batter: Slowly add the lye solution to the oils and start mixing. Keep going until the batter is thick and creamy, like a light trace.
- Incorporate the Grass: Fold the grass into the soap batter gently. Make sure it's spread out evenly.
- Pour and Mold: Pour the batter into your molds carefully. Try to make the surface smooth and even.
- Cure and Cut: Let the soap cure for 4-6 weeks. Then, unmold and cut it into bars of your choice.
Step Description Measure and Prepare Ingredients Measure the base oils, lye, and grass needed for your grass soap recipe. Blend the Batter Mix the lye solution into the oils until it's thick and creamy. Incorporate the Grass Fold the grass into the soap batter gently. Pour and Mold Pour the batter into molds and smooth the surface. Cure and CutLet the soap cure for 4-6 weeks, then unmold and cut it.
By following these steps, you can make beautiful grass soap that's good for your skin. Enjoy making your own handmade soap with grass.
Adding Coconut Milk to Your Grass Soap
Make your homemade grass soap even better with coconut milk. Coconut milk comes from mature coconuts and adds moisture and lather. It makes your soap creamy and softens your skin.
Benefits of Coconut Milk in Soap
Coconut milk is packed with good stuff for your skin. It has fatty acids, vitamins, and minerals. Adding it to soap gives you:
- More moisture and hydration
- A stronger skin barrier
- Richer lather and creaminess
- Softer and calmer skin
- Protection against germs
Proper Mixing Techniques
To mix coconut milk into your soap, do this:
Get the coconut milk ready: Use full-fat, unsweetened coconut milk. Chill it in the fridge before using.
- Replace some liquid: Use up to 25% of the water or other liquid with chilled coconut milk.
- Mix well: Blend the coconut milk into the soap batter evenly.
- Adjust the recipe: You might need a bit more lye, but don't overdo it.
By mixing it right, you'll get a coconut milk soap that's both unique and pampering. It combines the best of grass soap with coconut milk's nourishment.
Curing and Storing Your Handmade Grass Soap
Making your own handmade soap is very rewarding. But, it doesn't stop after you've made it. The curing process is key to making sure your artisanal soap is top-notch.
After pouring your homemade soap into molds, let it cure for 4-6 weeks. This time lets the soap get harder and last longer. It also makes the lather richer and more luxurious.
To cure your grass-infused soap right, follow these steps:
Unmold the soap and cut it into desired sizes or shapes.
- Place the soap bars on a well-ventilated, slatted surface, ensuring they don't touch each other.
- Allow the soap to cure in a cool, dry place, out of direct sunlight, for 4-6 weeks.
- Periodically rotate the bars to ensure even drying and curing.
- After curing, your handmade grass soap is ready to use. To keep it in great shape, follow these tips:
- Store the soap in a cool, dry place, away from direct sunlight and humidity.
- Wrap the bars individually or place them in airtight containers to prevent moisture loss.
- Avoid stacking the bars, as this can cause the soap to deform or stick together.
- Label each bar with the date of production to ensure rotation and use within the optimal timeframe.
By curing and storing your homemade soap right, it will stay great for months. This lets you enjoy your hard work every time you use it.
Troubleshooting Common Issues
Making homemade natural soap is rewarding but comes with challenges. As you start making soap, be ready for problems and know how to fix them. We'll cover common issues and offer solutions to help you succeed.
Overheating During Saponification
One big problem in soap making is the batter getting too hot. This can cause color changes, faster trace, and soap that hardens too quickly. To avoid this, watch your temperatures closely. Try using the cold process method for lower temperatures.
Zesty Lather and Drying Effects
If your homemade soap has a zesty, drying lather, it might be due to an oil imbalance. Adjust the oil and butter mix to get a creamier lather. Adding shea butter or glycerin can also help moisturize your skin.
Sticky or Soft Soap
Sticky or soft natural soap is a common issue. It usually comes from not curing the soap enough or using the wrong lye ratio. Make sure to follow the saponification process well and cure your soap for the right amount of time. If it still doesn't work, try changing your recipe to make the soap harder.
Discoloration and Scent Fading
Seeing your soap discolor or its scent fade can be a letdown. To prevent this, keep your soap away from direct sunlight. Use high-quality, safe essential oils or fragrances for a lasting scent.
Knowing about these common problems and how to solve them can help you make great homemade soap. Your soap will look and smell wonderful, and it will be moisturizing for your skin.
Tips for Creating Artisanal Soap Variations
Making your own artisanal, organic, and handmade soap is very rewarding. You can make your soap stand out by trying new things. Here are some tips to help you create unique soap variations.
Color Enhancement Methods
Adding natural pigments can make your soap pop. Try using ingredients like:
- Activated charcoal for a sleek, sophisticated black
- Turmeric or paprika for warm, earthy tones
- Spirulina or chlorophyll for soothing, verdant greens
- Beet powder or carrot juice for rich, reddish-orange shades
- These natural colors not only look great but also add benefits to your soap.
Texture Variations
Try different methods to add interesting textures to your soap. You can:
- Add exfoliating ingredients like ground oats, cornmeal, or crushed herbs
- Swirl in layers of contrasting colors and patterns
- Embed dried flowers, herbs, or other natural inclusions
- Use soap molds with intricate designs for a unique imprint
These textures can make your soap look like a work of art.
Scent Combinations
You can mix essential oils to create unique scents for your soap. Try blending like:
- Lemongrass and patchouli for a fresh, earthy aroma
- Eucalyptus and rosemary for a rejuvenating, spa-like experience
- Lavender and cedarwood for a calming, woodsy fragrance
Make sure the scents work well together to enhance your soap's natural essence.
Conclusion
In this guide, we've covered how to make natural soap at home. You now know how to create your own unique soap. This includes understanding the saponification process and choosing the right grass.
Grass soap is not just for cleaning. It also nourishes and refreshes your skin. Adding coconut milk makes it even more moisturizing and soothing.
Keep trying new things with grass soap. Experiment with different grasses, colors, and scents. Making your own soap is fun and lets you share something special with others. Enjoy the process and the results of your homemade soap.
About the Creator
WHITE HADE
Hi I am a writer
Keep reading
More stories from WHITE HADE and writers in Education and other communities.
How to make a cold smoke box addon?
Are you into home smoking? Ready to explore cold smoking and elevate your cooking? This guide will show you how to make your own cold smoke box addon. Let’s learn to smoke meats, fish, and cheeses with perfection in your backyard.
By WHITE HADE about a year ago in Education
The Digital Nomad Blueprint
In a not-so-distant future, where technology thrived and the world became increasingly connected, many people chose to break free from traditional lifestyles. Among them was a young woman named Mia. Mia was a digital nomad, traveling the globe with her laptop, working remotely while exploring new cultures. Her heart was set on living life to the fullest, but she was also searching for something greater—a sense of purpose.
By Hamad Afridi 4 days ago in Education


Comments
There are no comments for this story
Be the first to respond and start the conversation.