
How To Fix A Cracked Laptop Screen Without Replacing It?
Discover DIY solutions to fix a cracked laptop screen without replacing it, including temporary fixes, external display options, and screen repair techniques to keep your device usable.


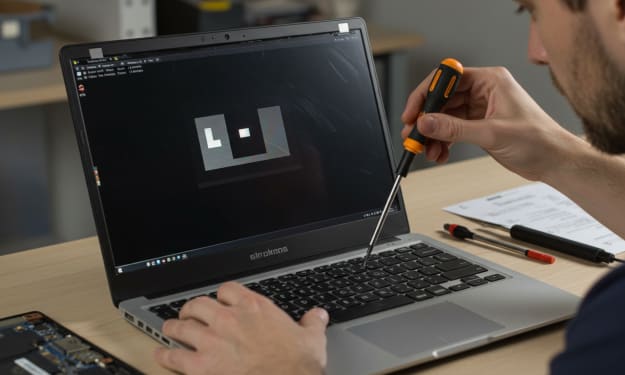
Among the most annoying problems to handle is a cracked laptop screen.
The best long-term solution is to replace the screen, but this may be costly and require specific technical expertise.
There are a few things you can do to try and get around the damage or make a broken laptop screen look less like it broke.
This extensive article will cover several alternatives to a complete replacement for repairing a broken laptop screen.
Identifying the Degree of a Cracked Screen
Laptop screens can crack to varying degrees:
Little surface fissures: Usually small, these have no effect on the screen’s performance. Perhaps they are only visible from certain angles.
Deeper cracks might affect touch sensitivity, screen functionality, or even produce dead pixels.
Shattered Screens: Replacement would be required if the screen is completely destroyed; these methods might not work in such situation.
Before making any repairs, determine how much damage there is and whether it is safe to proceed without replacement.
Important Safety Information
When a screen cracks, safety must come first:
Avoid Sharp Edges: Fingers can be severed by glass edges on cracked displays. Put on safety gloves if necessary.
Avoid Doing More Damage Bending or stressing the screen could exacerbate the crack.
Make sure you have backed up important data before attempting any repairs in case the screen becomes unusable.
How to Fix a Broken Laptop Screen Short of Purchasing a New One?
Crystal Clear Screen
Before repairing the screen, dust and debris should be cleared away:
Offline the laptop: Unplug and turn off every power source for the laptop.
Working with a Microfiber Cloth: Wipe the screen lightly with a microfiber cloth to prevent more damage.
Extra: Smudges and grime can be removed with a screen cleaner designed for laptops.
Put on a Screen Protector
Screen protector application can help to stabilise a tiny crack and prevent further damage:
Make Your Choice of Premium Screen Protector Look for a screen cover made and model uniquely for your laptop.
See also the Installation Guide: To avoid air bubbles and ensure a good adhesion, gently apply the screen protector.
Assure an Easy Application: Squeegee or plastic card air bubbles get out of the application.
Stabilize the crack with clear tape.
Use clear tape to stabilise and prevent a crack from getting worse:
Select Premium Clear Tape: Use transparent packing tape or other strong-adhering transparent tape.
Segment the Tape: Cut just enough tape to cover the crack without going too far onto the screen that’s still there.
Stick on the Tape At first: Just smooth the tape over the crack to avoid air bubbles.
Finished Overhang: If necessary, cut overhanging tape with a utility knife or scissors.
Modify Screen Settings to Make Less Visible
Should the crack cause visual distortions, you can adjust screen settings to lessen its effect:
Edit Screen Brightness: Choose a brightness level that makes the crack less noticeable.
Changing the color of the desktop wallpaper will help to hide the fracture.
Move Icons and Widgets: If the crack affects certain areas of the screen, move desktop icons and widgets to other areas of the screen to maintain functionality intact.
If the crack severely limits vision or functionality, you can use an external display to get around it:
Make an HDMI, VGA, or DisplayPort connection from your laptop to an external monitor.
Enter the display settings to duplicate or extend the screen onto the external monitor.
For Critical Work, Use an External Monitor: Should the laptop screen break, finish important work on the external monitor.
Incorporate a Screen Repair Kit
Small cracks can be helped to stabilise and become less obvious with a screen repair kit:
Choosing a screen repair kit Look for computer or other electronic equipment kits.
Note the Directions: Usually requiring an adhesive or resin to fill in the crack, use the repair kit as directed.
Please Give the Cure Some Time.
Keep to the recommended curing time to ensure the repair kit sets correctly.
Verify for Any More Damage
Following these fixes, look for any signs of additional damage on the laptop screen:
Check for Spread of the Crack: If it keeps getting larger, you may want to consider replacing the screen.
Monitor for Display Issues: Should the screen start to show dead pixels or other display problems, replacement could be necessary.
Check Laptop Operation: Test the touchpad, keyboard and other inputs to make sure the crack isn’t interfering with any laptop functionality.
Conclusion
Restoring a laptop screen without replacing it calls for creativity and prudence.
By following the instructions in this page, you can stabilise the fracture, reduce its visibility, and continue using your laptop.
If the crack gets worse or the screen becomes unusable, it is still crucial to consider professional repair or replacement.
Never jeopardize safety, and seek professional assistance if you are unsure about any step to avoid further damage to your laptop.
About the Creator
Laptopflora
Welcome to Laptopflora, where laptops meet expertise and your tech decisions are made easier. Our journey began with a single mission: to create a trusted platform that provides clear, actionable, and insightful information about laptop.
Keep reading
More stories from Laptopflora and writers in Education and other communities.
Graduated… But Still Broke. Why
Graduation day feels like victory. The hall is full. Names are called one by one. Parents sit proudly in the audience, holding their phones high to record the moment. Friends clap loudly. Teachers smile with approval. For years, this was the goal. Study hard. Get good grades. Earn the degree. And when that certificate finally rests in your hands, it feels like a passport to success. But sometimes, the applause is louder than the opportunity that follows.
By Shahid Zaman2 days ago in Education
The Dark Side of AI: What Could Artificial Intelligence Become in 100 Years?
But while AI promises innovation and efficiency, an important question remains: What could AI become 100 years from now?Looking ahead to the next century, the darker possibilities of artificial intelligence deserve serious attention.
By Spondan Chowdhury3 days ago in Education


Comments
There are no comments for this story
Be the first to respond and start the conversation.