
How To Connect Airpods To Laptop?
Find out how to connect your AirPods to a laptop using Bluetooth. Follow our quick and easy steps for seamless pairing on Windows or Mac.


Popular wireless earphones from Apple, the AirPods are renowned for being easy to use and convenient with other Apple devices. They can be connected to, nevertheless, a laptop running Windows, macOS, or another operating system.
Connecting AirPods to a laptop allows you to have wire-free, excellent audio for music, movies, and virtual meetings. This thorough guide will walk you through every step of connecting AirPods to a laptop, along with some useful troubleshooting tips for a perfect setup.
Why Wirelessly Connect an AirPods Device to a Laptop?
AirPods linked to a laptop offer a number of benefits:
Convenience of wireless listening: Increase your mobility by listening to music without hooks.
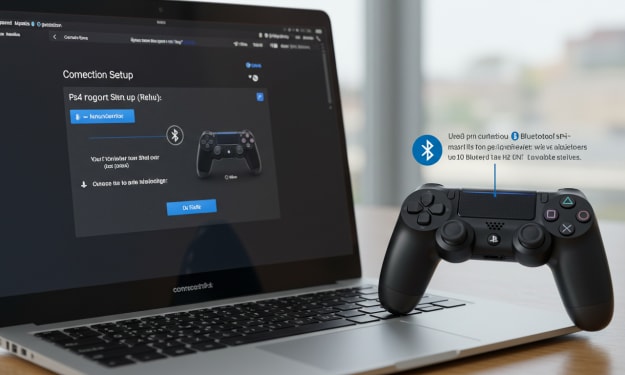
AirPods work with laptops and other Bluetooth-enabled devices.
Mic built right in: Utilizing AirPods, record sounds or have virtual meetings.
AirPods are lightweight and comfortable to wear.
Needed Resources and Equipment
Before connecting your laptop to the AirPods, make sure you have:
AirPods or AirPods Pro are the wireless earphones that plug into your laptop.
A Bluetooth-enabled laptop Check that your laptop has Bluetooth turned on.
Pairing and charging of AirPods are done with this case.
Maybe required to update drivers is internet access.
Technical Instructions Use These Simple Steps to Connect AirPods to a Laptop
Though straightforward, the process for connecting AirPods to a laptop differs somewhat according to the operating system. Computers running Windows and macOS will be covered in this session.
Linking AirPods to a Windows laptop
Proceed as follows to connect AirPods to a Windows laptop:
To begin, turn on the Bluetooth on your laptop.
Check that the Bluetooth on your Windows laptop is turned on.
Call up the Settings menu: For the Settings menu, hit "Windows + I".
See "Devices": Choose "Devices" to get to the Bluetooth and extra device settings.
Turn on Bluetooth. Assure that the Bluetooth toggle is set to "On".
Confirm pairing of the AirPods.
Start the pairing mode on your AirPods before connecting them to the laptop:
Lift the cover of the charging case after closing it and leaving the AirPods inside.
Press and hold the setup button on the charging case's rear. Hold it till the LED light on the AirPods starts to flash white and they go into pairing mode.
Tether the AirPods to your Windows PC.
When in pairing mode, connect the AirPods to your laptop:
Find things with Bluetooth enabled: Tap "Add Bluetooth or other device" from the "Devices" menu.
Select "Bluetooth" : Choose Bluetooth to start device discovery.
To select your AirPods: Click to pair your AirPods after finding them in the device list.
Check the connection. The LED light on the charging case should turn solid after a successful pairing.
Take a Test Drive with Your AirPods
Verify the AirPods' functionality by testing them after pairing:
Display audio Check if sound is coming via the AirPods by opening a music or video file.
Check the microphone. For a test of the microphone, try joining an online meeting or utilizing a voice recording software.
Pairing AirPods with a MacBook or macOS laptop
With a few small exceptions, the process of connecting AirPods to a MacBook or macOS laptop is same to that of Windows.
Launch the Bluetooth on your MacBook
Assure that Bluetooth is turned on for your MacBook:
Launch "System Settings" to see: Choose "System Settings" (also called "System Preferences") after clicking the Apple icon in the upper-left corner.
Head to "Bluetooth": To be sure Bluetooth is enabled, open the settings.
Get the AirPods ready for pairing
As with the Windows setup, turn on AirPods pairing mode:
Opening the charging case, slide: Once the AirPods are inside, close the case and raise the cover.
Press and hold the setup button: Hold the button on the back of the case down when pairing mode is shown by a white LED light blinking.
Link your MacBook to the AirPods
Pair the AirPods with your MacBook:
Locate gadgets with Bluetooth capability. Your AirPods should be listed as a device when you access the Bluetooth settings.
Select AirPods. To start pairing your AirPods, press and hold.
Check the continuity: When the AirPods are properly plugged in, the LED light on the charging case should turn solid.
Review Your AirPod Fit
Check that everything is working as it should by testing your AirPods after pairing:
Sound playback Open a movie or music file to hear how the AirPods sound.
Check the microphone. Test the microphone with voice recording software or by joining a virtual meeting.
Troubleshooting Guidelines
If your AirPods won't connect to a laptop, try these troubleshooting steps:
Give your laptop a restart Restarts can resolve a number of connectivity issues.
Reset your AirPods: Press and hold the setup button until the AirPods cease to pair if the LED light on them flashes amber and then white.
Check the Bluetooth driver version. Verify if your laptop has the most recent Bluetooth drivers.
Should the issue persist, remove ("forget") your AirPods from the list of Bluetooth devices and try to fix them again.
Check the Bluetooth compatibility: Check to be sure your laptop has Bluetooth installed and is working as it should.
Condensed
When you link AirPods to a computer, you can use wireless audio and other functions without having to deal with wires.
Whether you're using a Windows laptop or a MacBook, the process is straightforward and just a few steps long. Follow this comprehensive tutorial to ensure a successful connection and enjoy a faultless audio experience.
Regarding using AirPods with a laptop, please feel free to share any further tips or observations in the space provided for comments below. Savor the sound!
About the Creator
Laptopflora
Welcome to Laptopflora, where laptops meet expertise and your tech decisions are made easier. Our journey began with a single mission: to create a trusted platform that provides clear, actionable, and insightful information about laptop.
Keep reading
More stories from Laptopflora and writers in Education and other communities.
Why the Sun’s Surface Boils: Understanding Solar Granulation and Turbulent Energy
The Structure of the Sun To understand why the Sun’s surface appears to boil, it is important to first understand the structure of the Sun. The Sun is composed of several layers, each with different physical processes.
By shahkar jalal7 days ago in Education
Bomb Scare
It was 2027, and the world never thought it would happen. A missle hit the United States, but it wasn't where they had anticipated. A little town in the northeast was hit by a missile strike, they didn't know why, and they didn't know exactly where it hit, but they did know it was a coastal community, somewhere between Maine and Delaware.
By Gregory Payton6 days ago in Fiction


Comments
There are no comments for this story
Be the first to respond and start the conversation.